17
En
With u (Remote Interactive), you can use the following
special functions:
■ System On/Auto Power On
When you start playback on a component connected via
u while the AV receiver is on Standby, the AV
receiver will automatically turn on and select that com-
ponent as the input source.
■ Direct Change
When playback is started on a component connected via
u, the AV receiver automatically selects that compo-
nent as the input source.
■ Remote Control
You can use the AV receiver’s remote controller to con-
trol your other u-capable Onkyo components, point-
ing the remote controller at the AV receiver’s remote
control sensor instead of the component. You must enter
the appropriate remote control code first (➔ 61).
Note
•Use only u cables for u connections. u cables are supplied
with Onkyo players (DVD, CD, etc.).
• Some components have two u jacks. You can connect either
one to the AV receiver. The other jack is for connecting addi-
tional u-capable components.
• Connect only Onkyo components to u jacks. Connecting other
manufacturer’s components may cause a malfunction.
• Some components may not support all u functions. Refer to
the manuals supplied with your other Onkyo components.
• While Zone 2 is on, the System On/Auto Power On and Direct
Change u functions do not work.
• Do not use u connections if you use HDMI Control (RIHD)
(➔ 49).
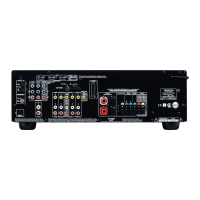
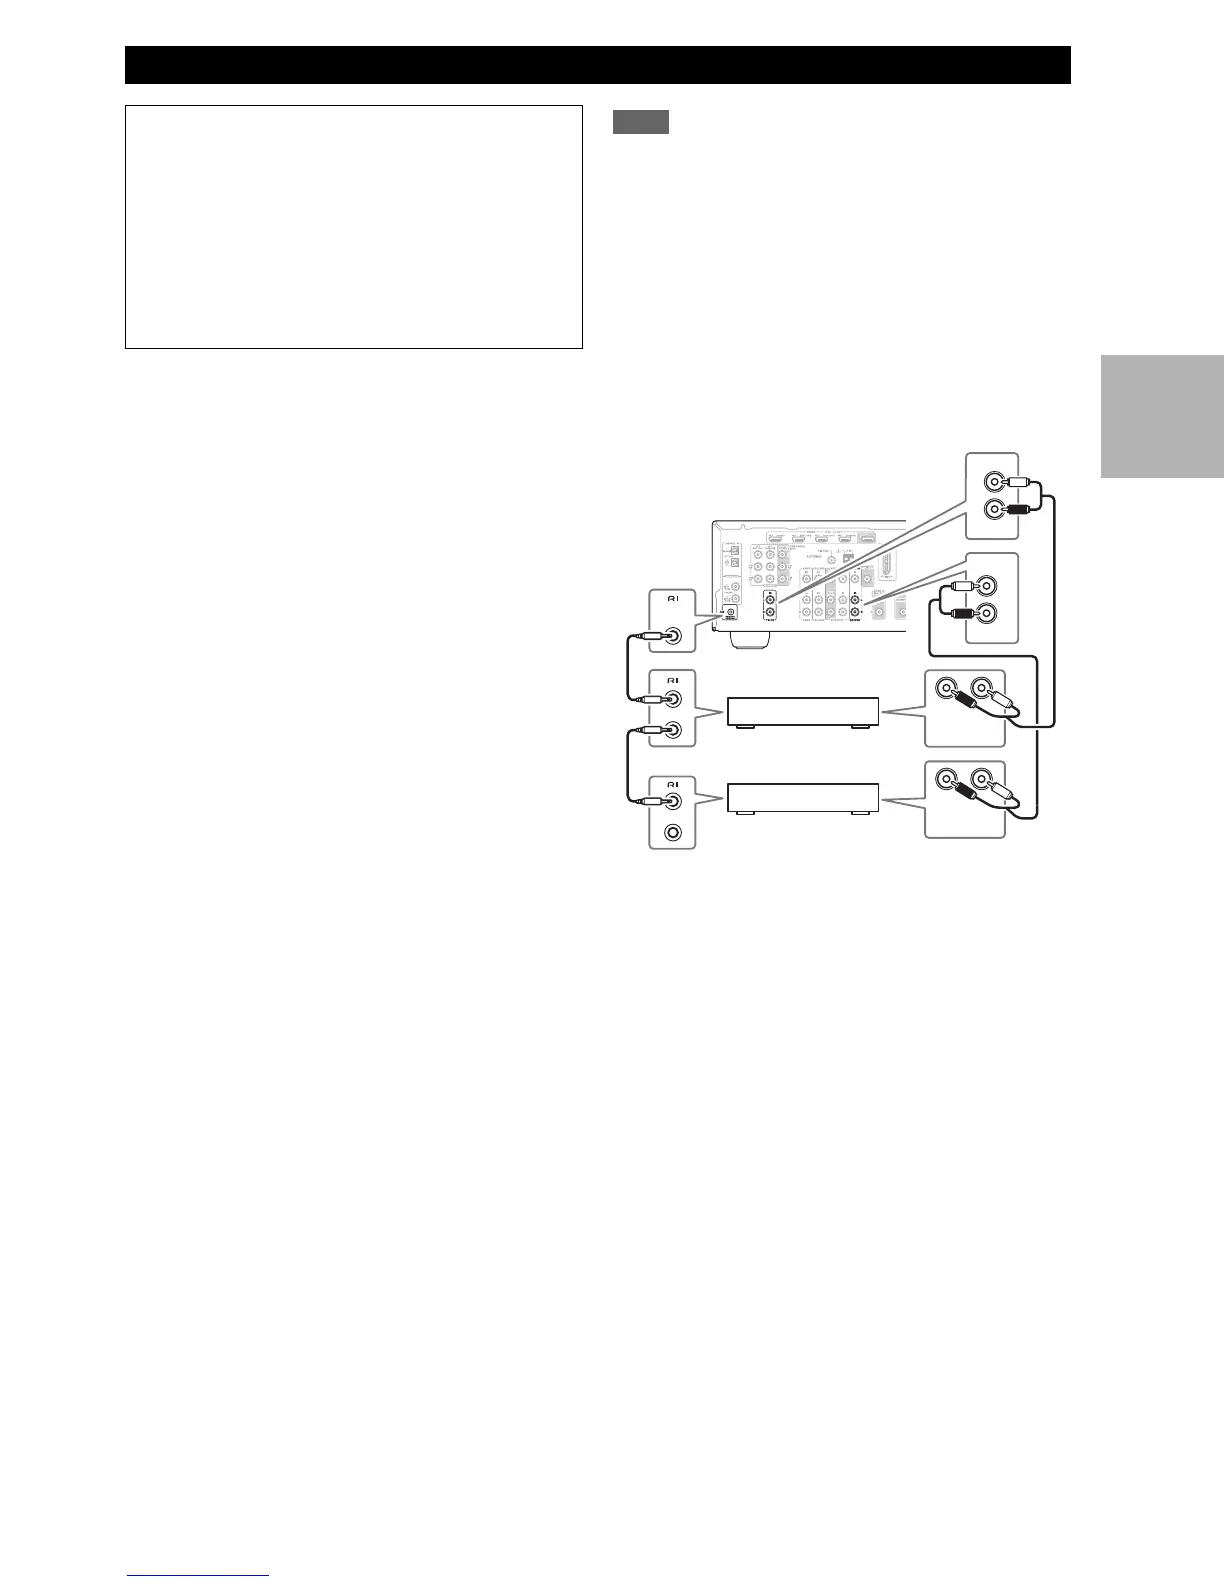
Connecting Onkyo u Components
Step 1:
Make sure that each Onkyo component is connected
with an analog audio cable (connection D in the hookup
examples) (➔ 16).
Step 2:
Make the u connection (see illustration below).
Step 3:
If you’re using an RI Dock, or cassette tape deck,
change the Input Display (➔ 23).
LR
IN
BD/DVD
L
R
IN
TV/CD
L
R
REMOTE
CONTROL
ANALOG
AUDIO OUT
LR
ANALOG
AUDIO OUT
e.g., CD player
e.g., DVD player
 Loading...