6
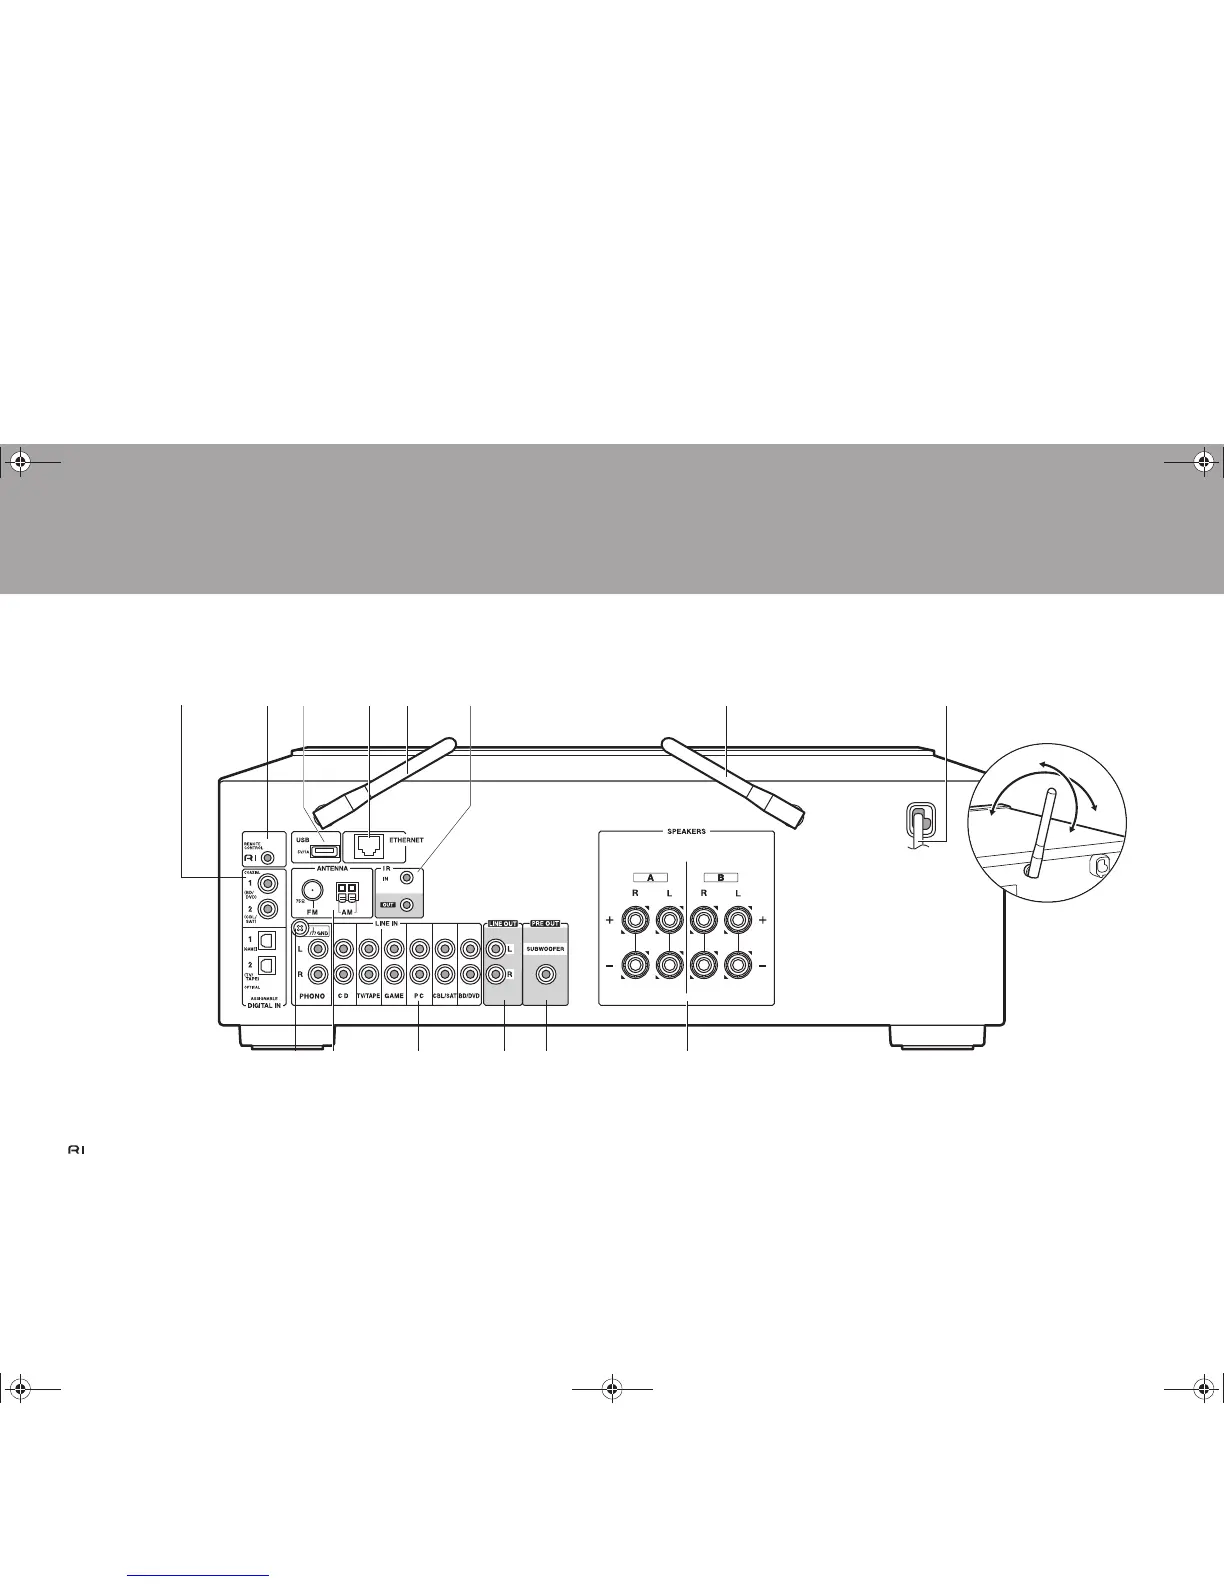
Rear Panel
1. DIGITAL IN OPTICAL/COAXIAL jacks: Input digital audio signals from an external device
with a digital optical cable or digital coaxial cable.
2. REMOTE CONTROL jack: An Onkyo product with RI jack can be connected and
synchronized with this unit (P10).
3. USB jack: A USB storage device is connected so that music files stored in it can be
played. You can also supply power (maximum 5 V/1 A) to USB devices with a USB cable.
To receive DAB radio, connect to a USB cable that has been connected to a USB DAB
adapter.
4. ETHERNET jack: Connect to the network with an Ethernet cable.
5. Wireless antenna: Raise for Wi-Fi connection or when using a BLUETOOTH wireless
technology enabled device. Adjust their angles according to the connection status.
6. IR IN/OUT terminals: Connected to the multi-room remote control kit. Special devices or
cables are necessary. For more information about preparation, contact the specialized
stores.
7. Power cord
8. GND jack: The ground wire of the turntable is connected.
9. FM 75Ω/AM ANTENNA jacks: Connect the supplied FM indoor antenna and AM indoor
antenna.
10.
LINE IN jacks: Input audio signals from an external device with an analog audio cable.
11.
LINE OUT jacks: Connect a recording device, such as a cassette tape deck. Connect to
the LINE IN jacks on the recording device using analog audio cable.
12.
SUBWOOFER PRE OUT jack: Connect a powered subwoofer with a subwoofer cable.
13.
SPEAKERS jacks: Connect speakers with speaker cables. You can connect a set of left
and right speakers to each of the A/B terminals.
 Loading...