68
Enjoying Movies and Music in the Remote Zone (Zone 2/3)
—Continued
Operating with the Remote Controller
When operating with the remote controller, how to
operate depends on the location of Zone 2 or Zone 3, or
the distance from the TX-NR1000/TX-NR5000E.
• Point the remote controller at the infrared receiver on
the TX-NR1000/TX-NR5000E, and then operate the
controller.
• Install a remote controller sensor in Zone 2 or Zone 3
through an IR connection (See page 45).
• Switch the Transmission Signal Format to RF (Radio
Frequency) (depending on the destination) (See page
141).
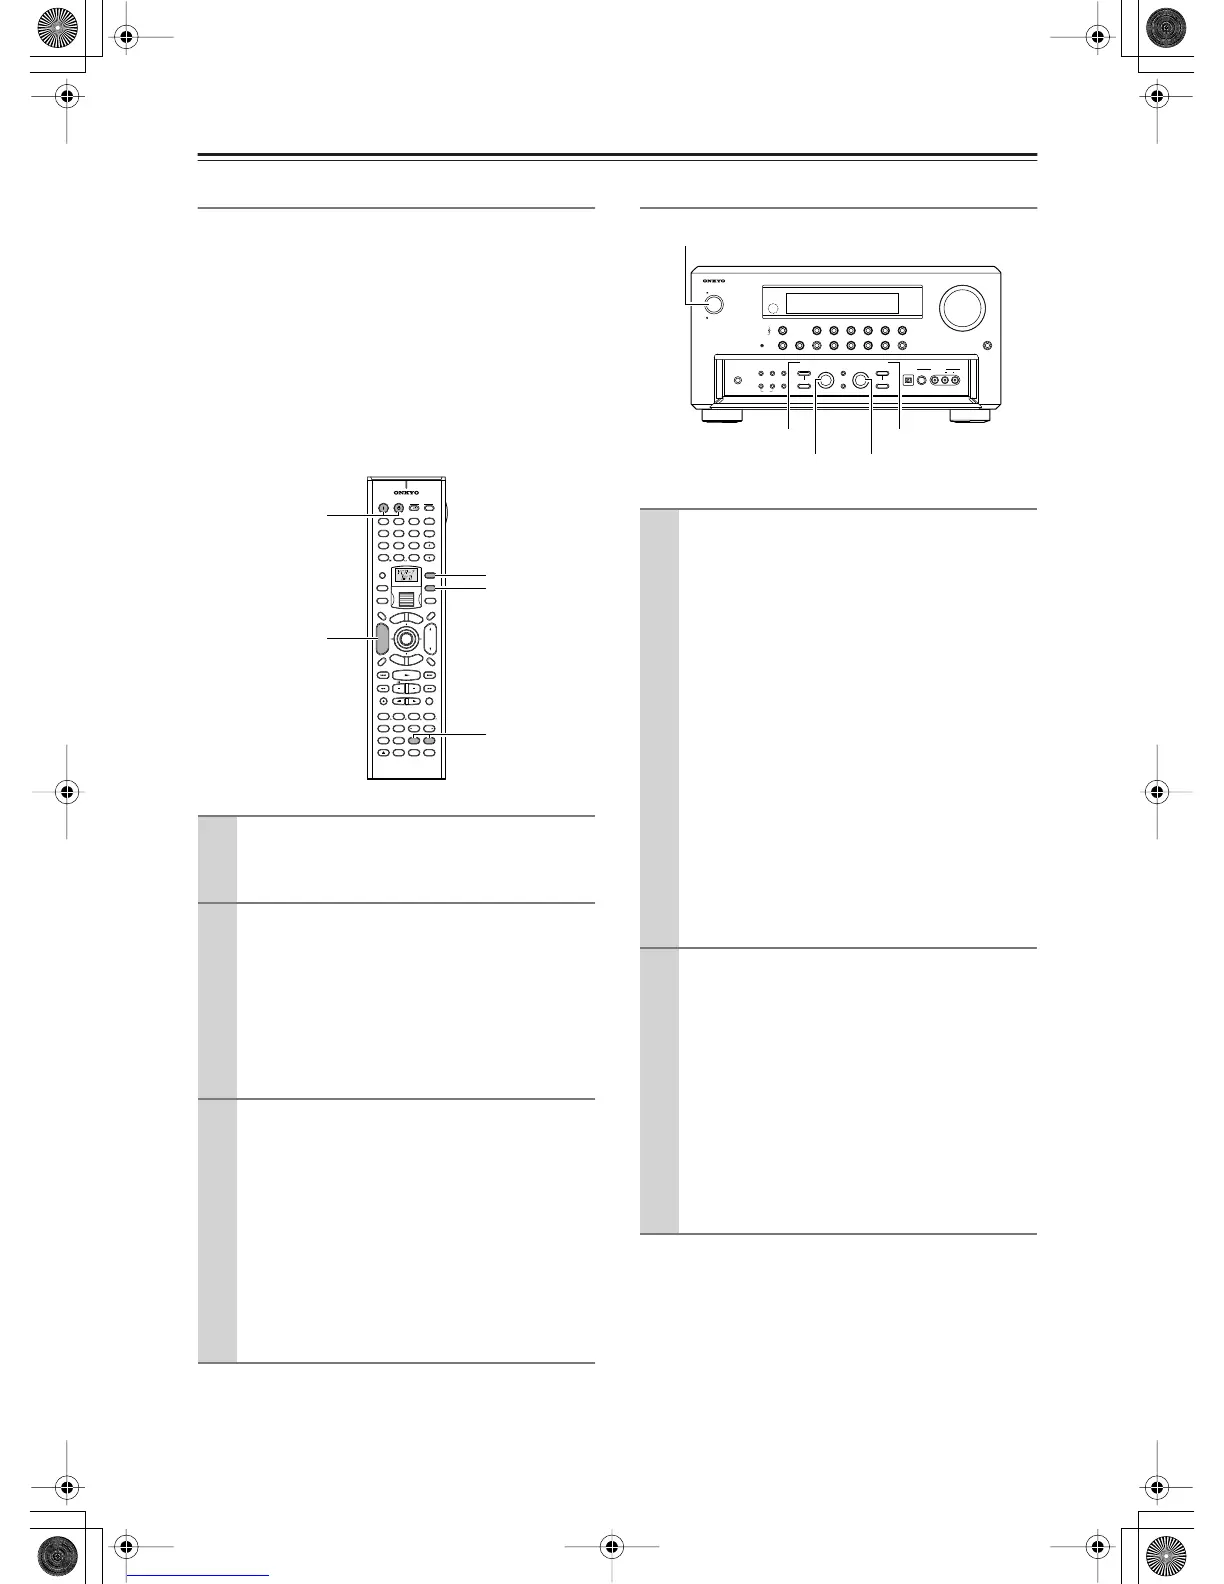
Operating on the TX-NR1000/TX-NR5000E
1
Power on the devices in Zone 2 or Zone 3.
Press the [ZONE 2] or [ZONE 3] button, and
then the [ON] button.
2
Select a source.
Rotate the scroll wheel to select a source while
the [ZONE 2] or [ZONE 3] button is lighted (if
the button is not lighted, press the [ZONE2] or
[ZONE 3] button to light it).
• When you have selected the tuner, you can
choose a preset channel with the [CH DISC
+/–] button.
3
Adjust the volume level.
Press the [ZONE 2] (or [ZONE 3]) button, and
within 5 seconds, press the [LEVEL –/+] button
to adjust the volume level.
Notes:
• When the pre-main amplifier or receiver is
connected, the volume level should be adjusted
at the connected component side.
• When not using Zone 2 or Zone 3, press the
[ZONE 2] (or [ZONE 3]) button, and then
press the [STANDBY] button.
--
/
---
@.
-
'
/ ABC DEF
PQRS TUV WXYZ
DIRECT TUNING
GHI JKL MNO
CAPS DELETE
LANGUAGE LOCATION
ALBUM AR
TIST GENRE
PLAYLIST
REPEAT VIDEO MUSIC PHOTO
CUSTOM
DISPLAY
DIMMER
T
V
INPUT
SLEEP
RANDOMREC
MAIN A MAIN B
MUTING
ENTER
LAST MANGLE
SUBTITLE
AUDIO
MEMORY
SEARCHA
-
BREPEAT
ON STANDBY
TV
TV CH
TV VOL
RC
-
558M
S
E
R
V
E
R
A
U
D
I
O
A
D
J
E
X
I
T
G
U
I
D
E
PREV
CH
+
10 0
CLEAR
123
456
789
INPUT
T
O
P
M
E
N
U
M
E
N
U
S
E
T
U
P
R
E
T
U
R
N
ZONE
2
INPUTMODE
MACRO
VOL
CH
DISC
TEST T
O
NE
CH SEL
PURE A
SURR
DIRECT
STEREO
Re
-
EQ
THX
A
LL
ST
LEVEL
+
LEVEL
-
L NIGHT
AUDIO
SEL
DSP DSP
+
-
+
-
I
ZONE
3
#
CH DISC +/–
ON, STANDBY
LEVEL –/+
ZONE 2
ZONE 3
1
Turn on the power supply to the
TX-NR1000/TX-NR5000E, and then select
a source for Zone 2 or Zone 3.
For Zone 2, press the [ZONE 2] button, and then
select the source with the [SELECT/PRESET] dial.
For Zone 3, press the [REC/ZONE 3] button, and
then, select the source with the [CONTROL/
TUNING] dial.
When you press the [ZONE 2] or [REC/ZONE 3]
button, the [STANDBY] indicator on the
TX-NR1000/TX-NR5000E blinks for five sec-
onds, so perform operations while it is blinking.
The source button for Zone 2 lights in green and
the source buttton for Zone 3 lights in red.
To switch the source for Zone 2 (or Zone 3) and
the main room simultaneously:
Repeatedly press the [ZONE 2] (or [REC/ZONE
3]) button to display “Z2Sel:SOURCE,” and then
select the source.
2
Adjust the volume level.
For Zone 2, press the [LEVEL] button under the
[ZONE 2] button, and then adjust with the
[SELECT/PRESET] dial.
For Zone 3, press the [LEVEL] button under the
[REC/ZONE 3] button, and then adjust with the
[CONTROL/TUNING] dial.
Notes:
• When a pre-main amplifier or receiver is
connected to the TX-NR1000/TX-NR5000E,
the volume level should be adjusted at the
connected component side.
STANDBY/ON
STANDBY
PURE AUDIO
MASTER VOLUME
OPEN
ZONE 2
()
GREEN
MAIN
()
BLUE
REC
/
ZONE 3
(
)
RED
DISPLAY
DVD
VIDEO
3
VIDEO 4 VIDEO 5 VIDEO 6 VIDEO 7VIDEO 2VIDEO 1
MEMORY
SETUP
EXIT
PHONES
VIDEO 7 INPUT
S VIDEO
DIGITAL
AUDIO
VIDEO L R
LISTENING
MODE
AUDIO
SELECTOR
TONE
CLEAR
DIMMER
ZONE
2 REC/
ZONE 3
LEVEL LEVEL
SELECT/
PRESET
CONTROL
/
TUNING
PUSH TO ENTERPUSH TO ENTER
C
D NET AUDIOPHONOTUNERTAPE 1 TAPE 2
TUNING
MODE
STANDBY/ON
REC/ZONE3ZONE2
CONTROL / TUNINGSELECT/PRESET

 Loading...