15
Charging Battery Types & Approximate Charge Times
The OPTIMA
®
D200+ is designed specifically for 12 Volt batteries.
Please use the table below to understand your battery type before making a quick
set “battery type charging profile” selection.
Please use the table below to understand charging and maintaining your battery.
Note: OPTIMA
®
D200+ is designed to charge small batteries like the OPTIMA
®
LiFePO4 battery.
OPTIMA
®
D200+ is designed to maintain auto/truck batteries for short and long term storage. However,
OPTIMA
®
D200+ is not designed to charge or maintain large batteries like 4D or 8D batteries.
CAUTION - IMPORTANT NOTICE: Don’t know your battery type? Look online or call your
local dealer with your battery manufacturer’s name and part number to identify your battery
type before charging. Do not charge or maintain 4D, 8D or other high capacity 6, 8 or 12 Volt
batteries typically seen in golf carts as they are typically wired for 24 Volt, 36 Volt or 48 Volt
configurations and have a dedicated / specific charger to be used.
Read all important safety and cautionary markings on your battery by the
manufacturer and in this manual before using your OPTIMA
®
D200+.
16
Description of Battery Type
OPTIMA
®
ORANGETOP 12 Volt LiFePO4
(lithium iron phosphate) batteries
Approximate
Amp Hour Rating
3-15 Ah
Battery Type
OPTIMA
®
HYPERCORE
LITHIUM
™
batteries
Approximate
Charge Times
Less than 1 hour at
20 to 40% discharge
1 or 2 hours at 50%
or greater discharge
Quick Set Icon
Profile 2
AGM
Profile 1
OPTIMA
®
Li
Profile 3
Flooded
Standard 12 Volt Flooded lead acid
and standard AGM batteries
- Flooded motorcycle, tractor, power
sport batteries with and without caps
- AGM motorcycle, tractor, power sport
batteries
Standard Flooded
and AGM (Absorbed
Glass Mat) batteries
up to 40 Ah 3 to 9 hours at
20 to 40% discharge
15 to 30 hours at 50%
or greater discharge
OPTIMA
®
12 Volt AGM batteries
- OPTIMA
®
REDTOP and BLUETOP batteries
with a dark gray body
- OPTIMA
®
YELLOWTOP and BLUETOP
batteries with a light gray body
- Other high performance AGM
starting batteries
High Performance
AGM (Absorbed
Glass Mat)
batteries
35-100 Ah 9 to 15 hours at
20 to 40% discharge
18 to 30 hours at 50%
or greater discharge
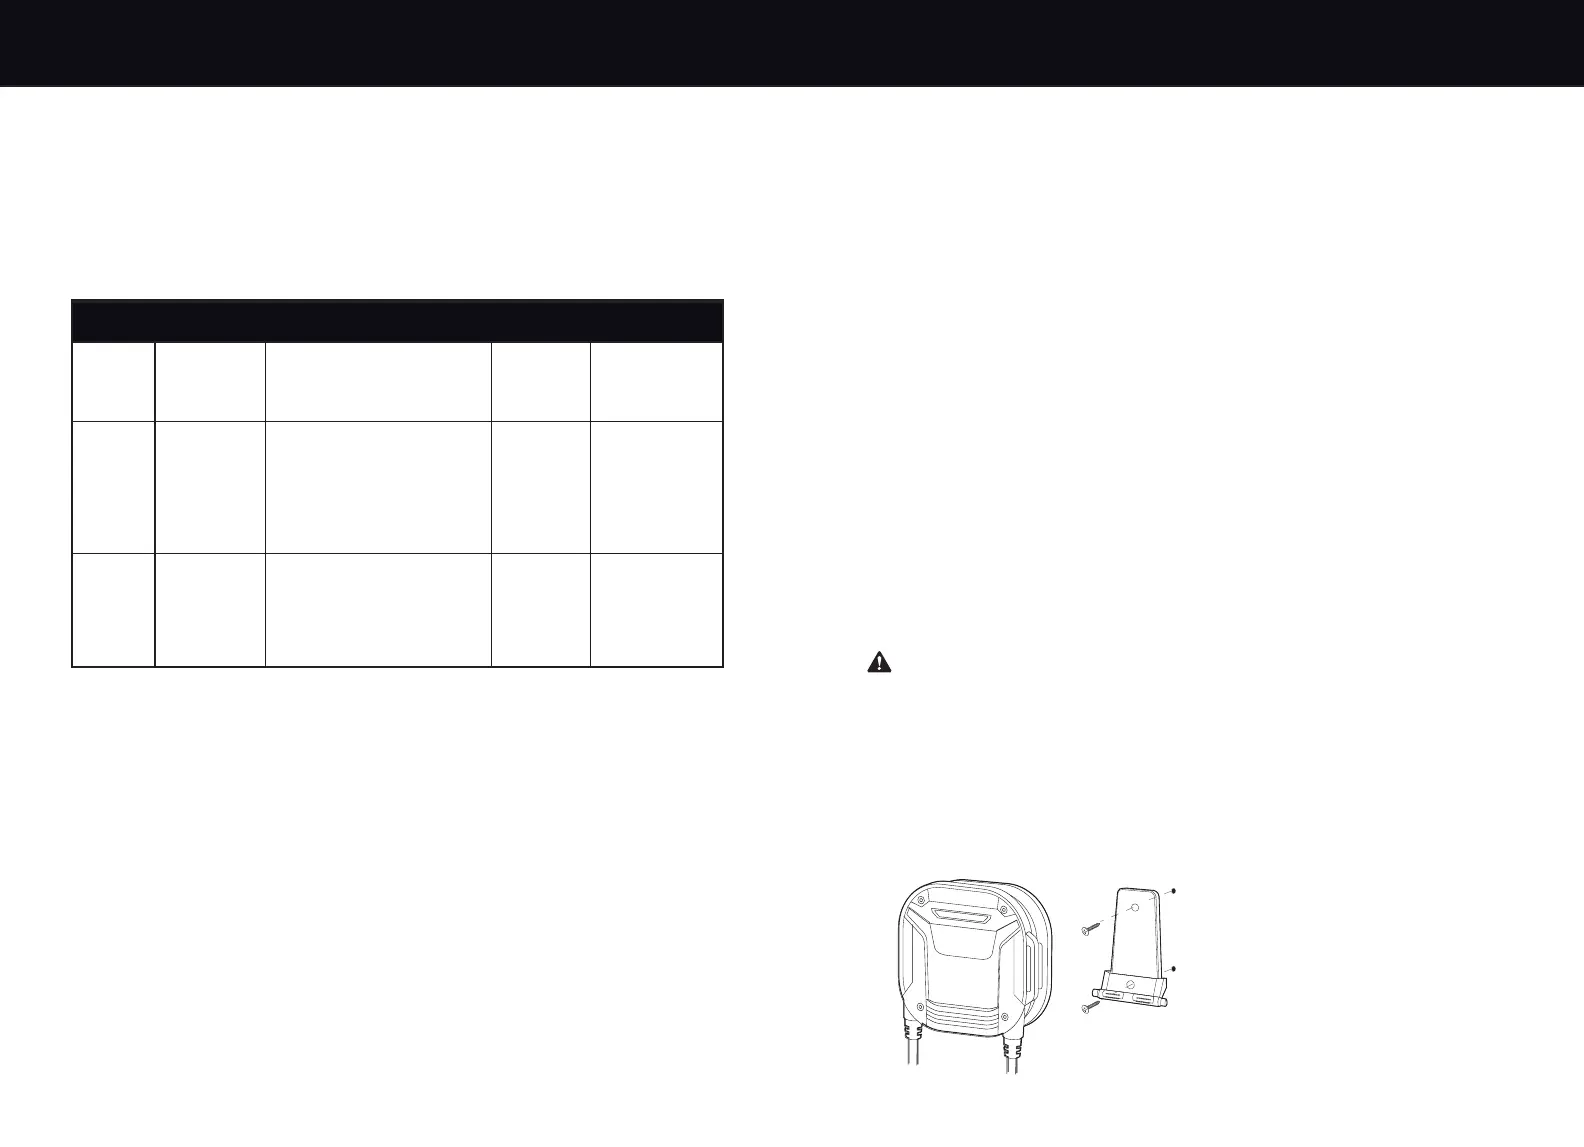
Installation
OPTIMA
®
D200+ is designed to be permanently mounted on-board vertically with the wall organizer bracket.
Always mount your OPTIMA
®
D200+ in a compartment or area that can be properly ventilated during use.
Do NOT make any electrical connections to the OPTIMA
®
D200+ or batteries until the following
steps are completed:
10 Easy to follow installation steps:
1. Select a mounting location that allows for free air ventilation with a minimum of 6 inches of
clear unobstructed space around and in front of the charger. Open all battery and engine
compartments and ventilate for at least 15 minutes before starting the installation. Confirm
all battery cables can reach the battery.
2. Do not install charger on carpeted, upholstered, vinyl, or varnished areas. Be sure to place
the charger in an accessible area where all indicators are viewable. Install this unit on a
hard surface.
3. Using the wall organizer bracket, mark the position of each mounting hole. Ensure the mounting
screws will not puncture or protrude into a live well, a fuel or oil tank or the bottom of the vehicle.
4. Using a 1/8" or 7/64" drill bit, drill pilot holes in the (2) marked locations as described in step 3.
Insert the drywall anchors if needed. (Drywall anchors included)
5. Position the wall organizer bracket over the mounting holes and secure with a power screwdriver
by installing 2 stainless steel #8 screws. (Mounting screws included)
6. Install the charger onto the wall organizer bracket.
7. Connect the DC output cables as illustrated on pages 17-20. Make sure the black wires are
connected as illustrated to the negative side of the battery and the red wires are connected
to the positive side of the battery.
CAUTION: Connect the charger to the battery before applying AC Power.
8. Make sure all DC connections are correct, tight, and free from corrosion.
9. Locate the AC power cord in an open-air area of your vehicle at least 21 inches from the
charger, batteries, and fuel fill lines.
10. Connect a heavy duty UL approved extension cord to the D200+ first. After connecting the
extension cord to the charger, proceed to plug the extension cord to a nearby GFCI protected
(Ground Fault Circuit Interrupt) outlet. Always remove the extension cord from the outlet first
when charging is completed, followed by unplugging the charger. You are now connected and
charging your batteries, and can view the LED indicators.
IMPORTANT NOTICE
- Maintain an obstruction-free area of 6 inches
around the product.
- Prior to mounting, confirm mounting surface
has adequate strength and thickness
- Check for electrical or fuel lines on or
behind surface.
1/8” or 7/64” pilot hole with silicon sealer
 Loading...