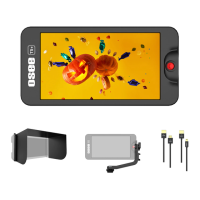
Unpack and Installation
9
Retain these packing materials for future use.
2. Connect required cables for signal input and output.
3. Connect the 5~17VDC power source through DC IN Type-C
interface or powered by battery.
4. As a final step, turn on the device by toggling the power
switch located on the rear of the unit.
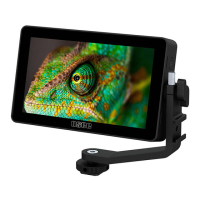
Install Battery:
Only support SONY NP-F series and Canon LP-E6 battery currently. The
battery slot is bidirectional, and please take note of the battery installation
direction according to the “NP-F” or “LP-E” icon near the slot when
mounting the battery. The icons are as shown in the following illustration,
slide the battery down into the slot until heard a click.
Figure 3-2 Battery Installation
Install Sunhood:
In case of diffusion light and direct illumination, we can use sunhood for
the monitor when supervising images.
First, spread the sunhood along the fold lines, then pull the rubber belts
into the depressed slots at both sides of the rear panel of the monitor,
adapting to the monitor tightly as below: