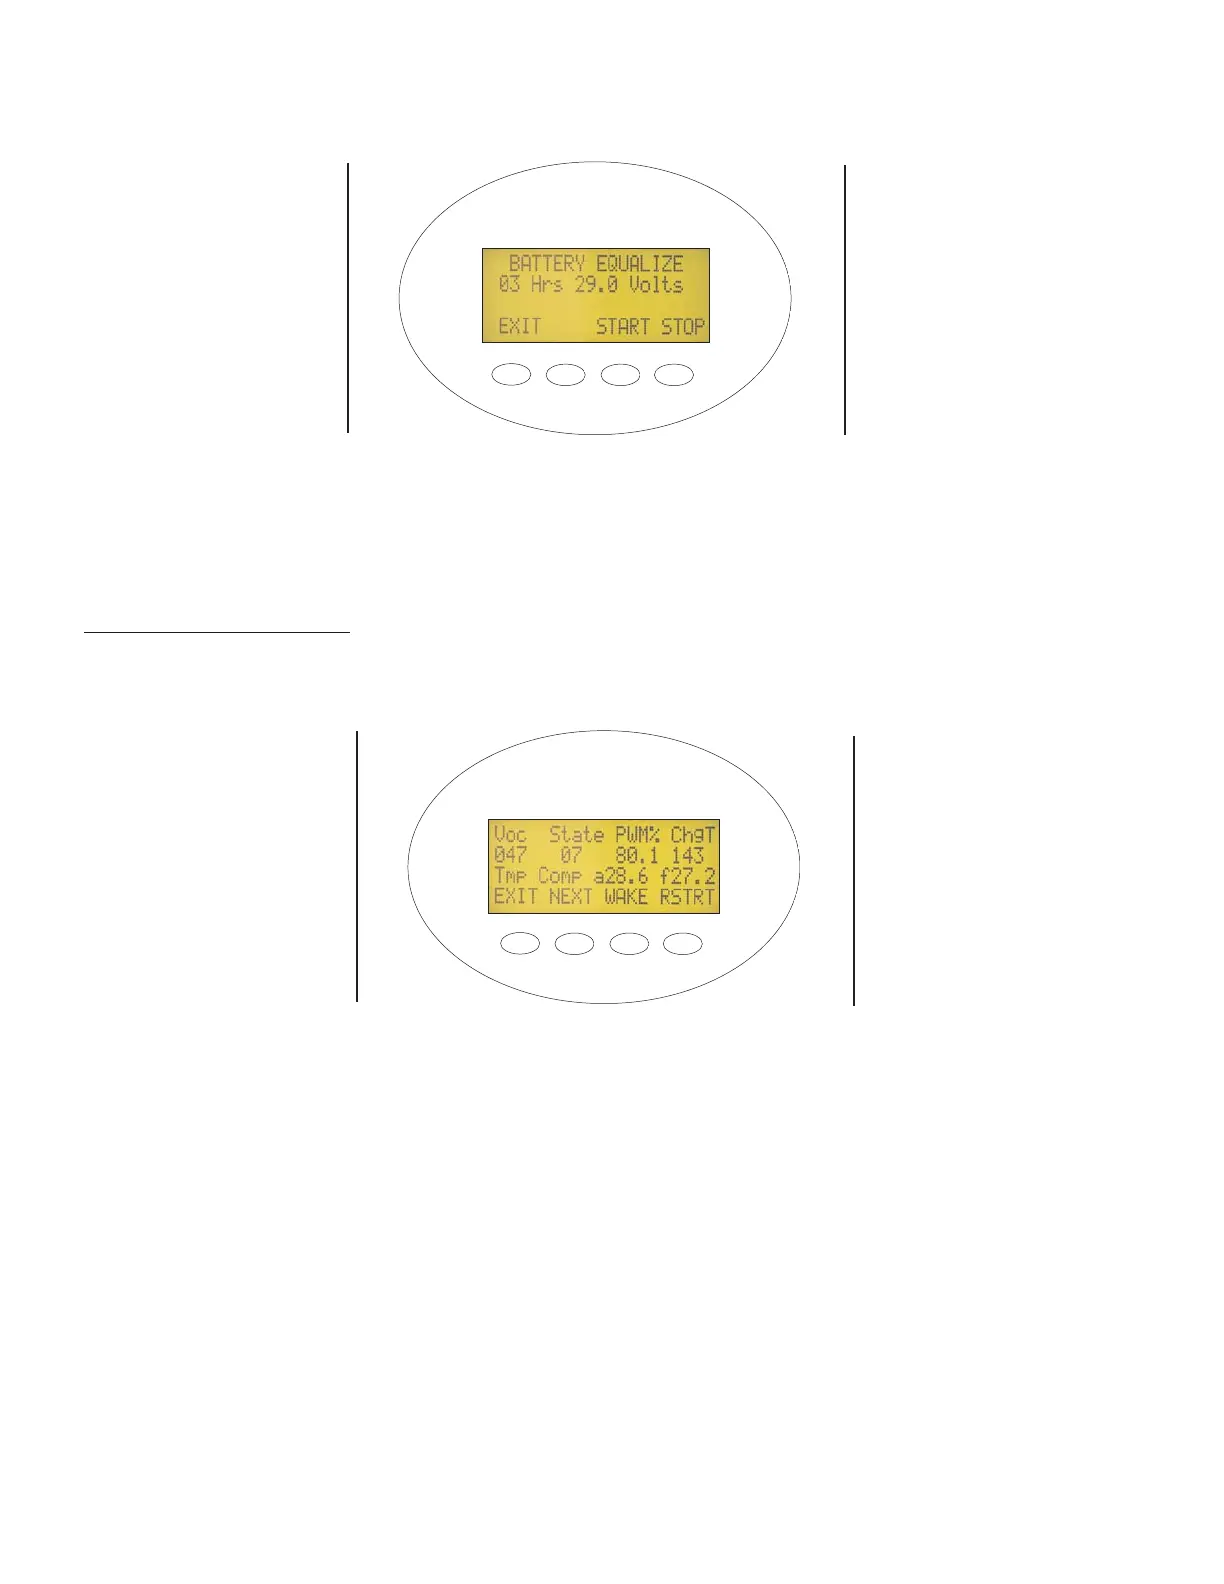
The Battery equalization process must be started manually. The screen shown in Figure 13 is used to start the
equalization process. The EQ process is automatically terminated once the EQ time period has occurred. Pressing
“Stop” will over-ride the timed EQ charge and return the controller to normal operation.
Miscellaneous Screens:
The screens shown in Figures 14, 15 and 16 are primarily for engineers, technicians, and
customer service personnel who need to access technical information. Phone calls to OutBack may require reporting
some of these values for troubleshooting purposes. The following is a brief description of the contents of these screens:
Voc This is the open circuit voltage of the PV panels measured at the last wakeup cycle.
State The MX60 has thousands of lines of code. Each operation is called a State. This number is useful for
troubleshooting .
PWM% This is the duty cycle of the buck converter. At 50%, the PV terminals would be twice battery voltage.
ChgT This is the minute counter for the Absorption and EQ cycle. It counts up from zero (000) while in the
Bulk cycle and then counts down (in minutes) from a maximum adjustable time in the Absorption cycle.
This allows the MX60 to enter the Float stage sooner when the controller starts the charging process
with a full battery. It can also be used to see how many minutes have accumulated during the equaliza-
tion process.
TmpComp Battery temperature compensated absorb and float setpoints. The setpoints will rise when the battery is
cold and will be lowered when the battery is hot.
Wake Allows manual wakeup when the MX60 has started the 5 minute snoozing period due to low PV output.
Rstrt Forces the MX60 to restart from sleep mode .
Figure 13 - Battery Equalization Start Screen
Figure 14 - Miscellaneous Screen 1
USER CONFIGURATION
COMPLETE
PRESS “STOP” OR
“START” TO RETURN TO
THE
STATUS SCREEN
AND INITIATE EQUAL-
IZATION
PRESS “NEXT” TO
CONTINUE TO THE
FORCE BULK/FLOAT
SCREEN
12