8
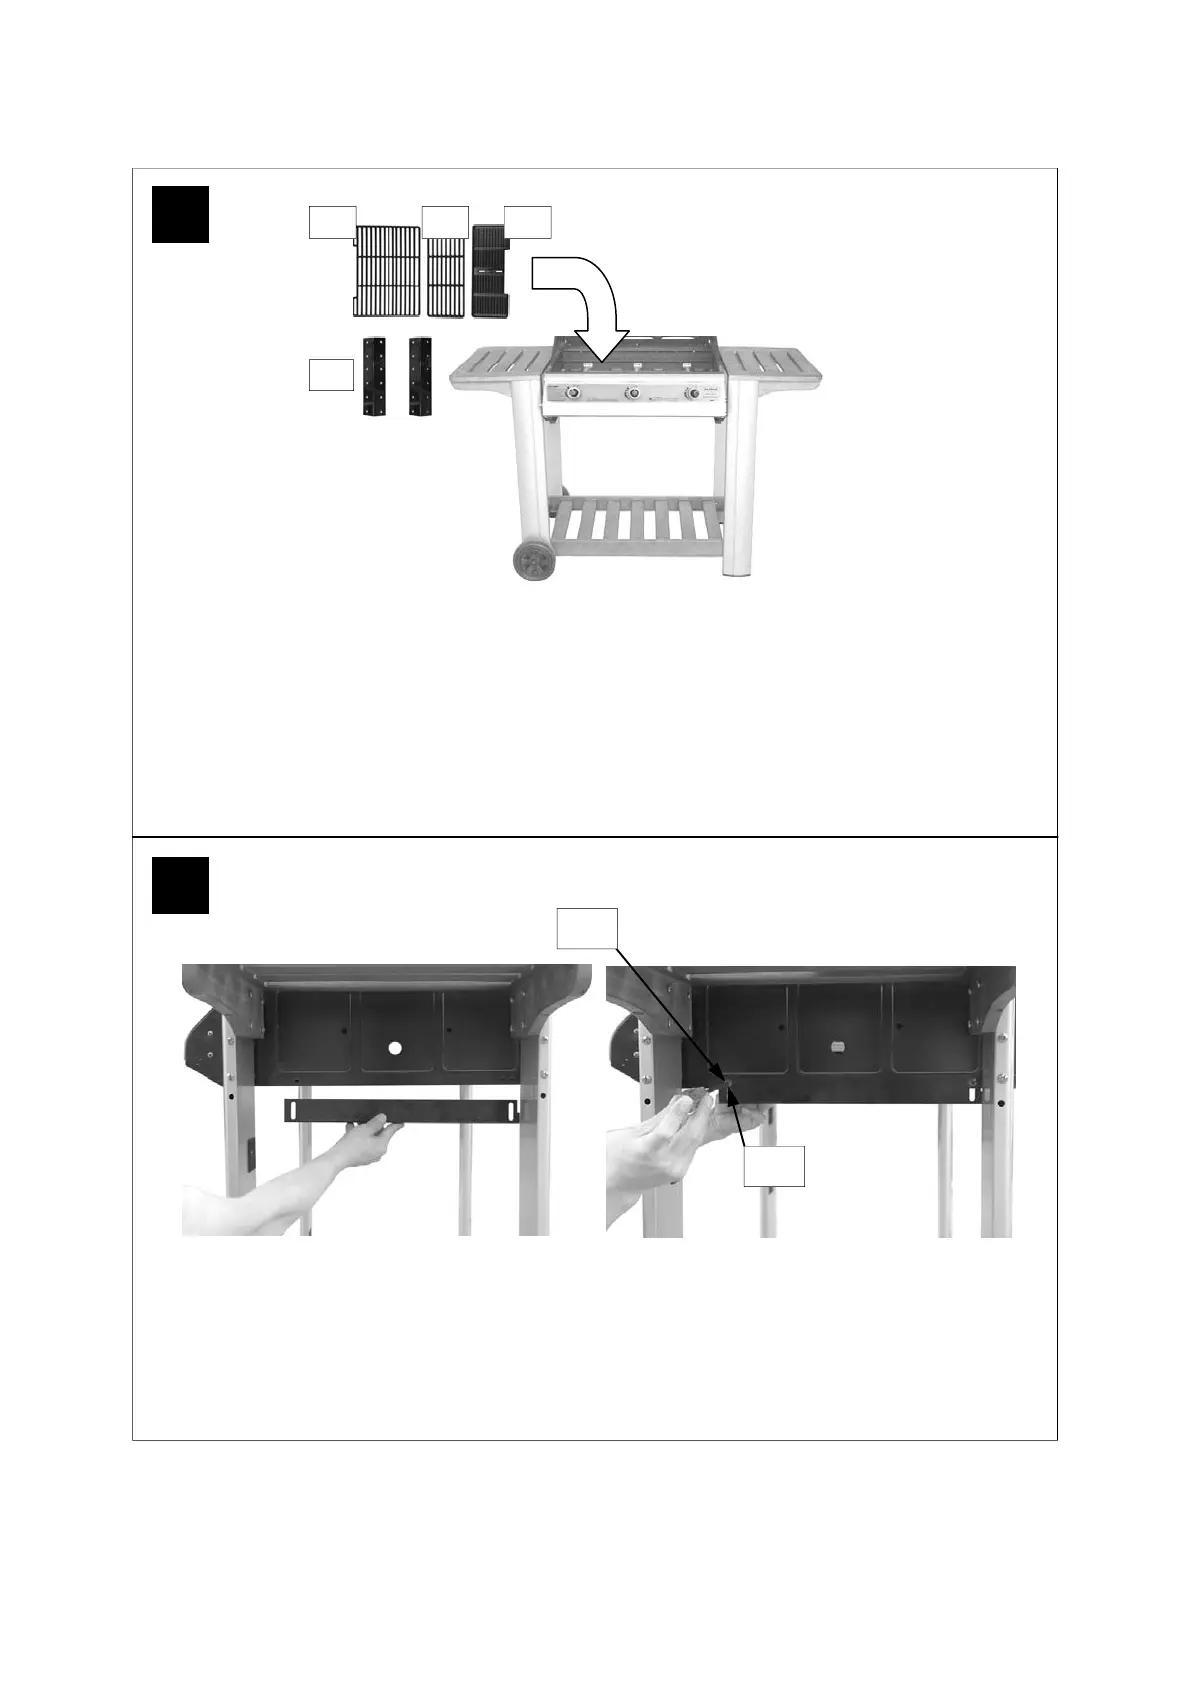
Remove the plastic wrap from the flame tamer (B12) and lay them carefully into the body ensuring
they lie level within the body. Lay the cooking grill(s) (B9, B10)and griddle (B11) into place.
2 burner model configuration: Left — Large Cooking Grill, flame tamer, Right — Small Cooking
Grill, flame tamer;
3 burner model configuration: Left — Large Cooking Grill, flame tamer, Middle — Small Cooking
Grill, flame tamer, Right — Small Griddle Plate.
NOTE: The flame tamers must be laid over the burners.
8
7
B9 B11 B10
B12
Attach drip tray right bracket (B8) to barbecue body using M5x15 bolts (D2), washers (D3) and
M5 nuts (D4) as shown. Repeat above process for drip tray left bracket (B7).
NOTE: Ensure that the tabs of the brakets which stop the drip tray are located at the
back of the barbecue.
D2
D3