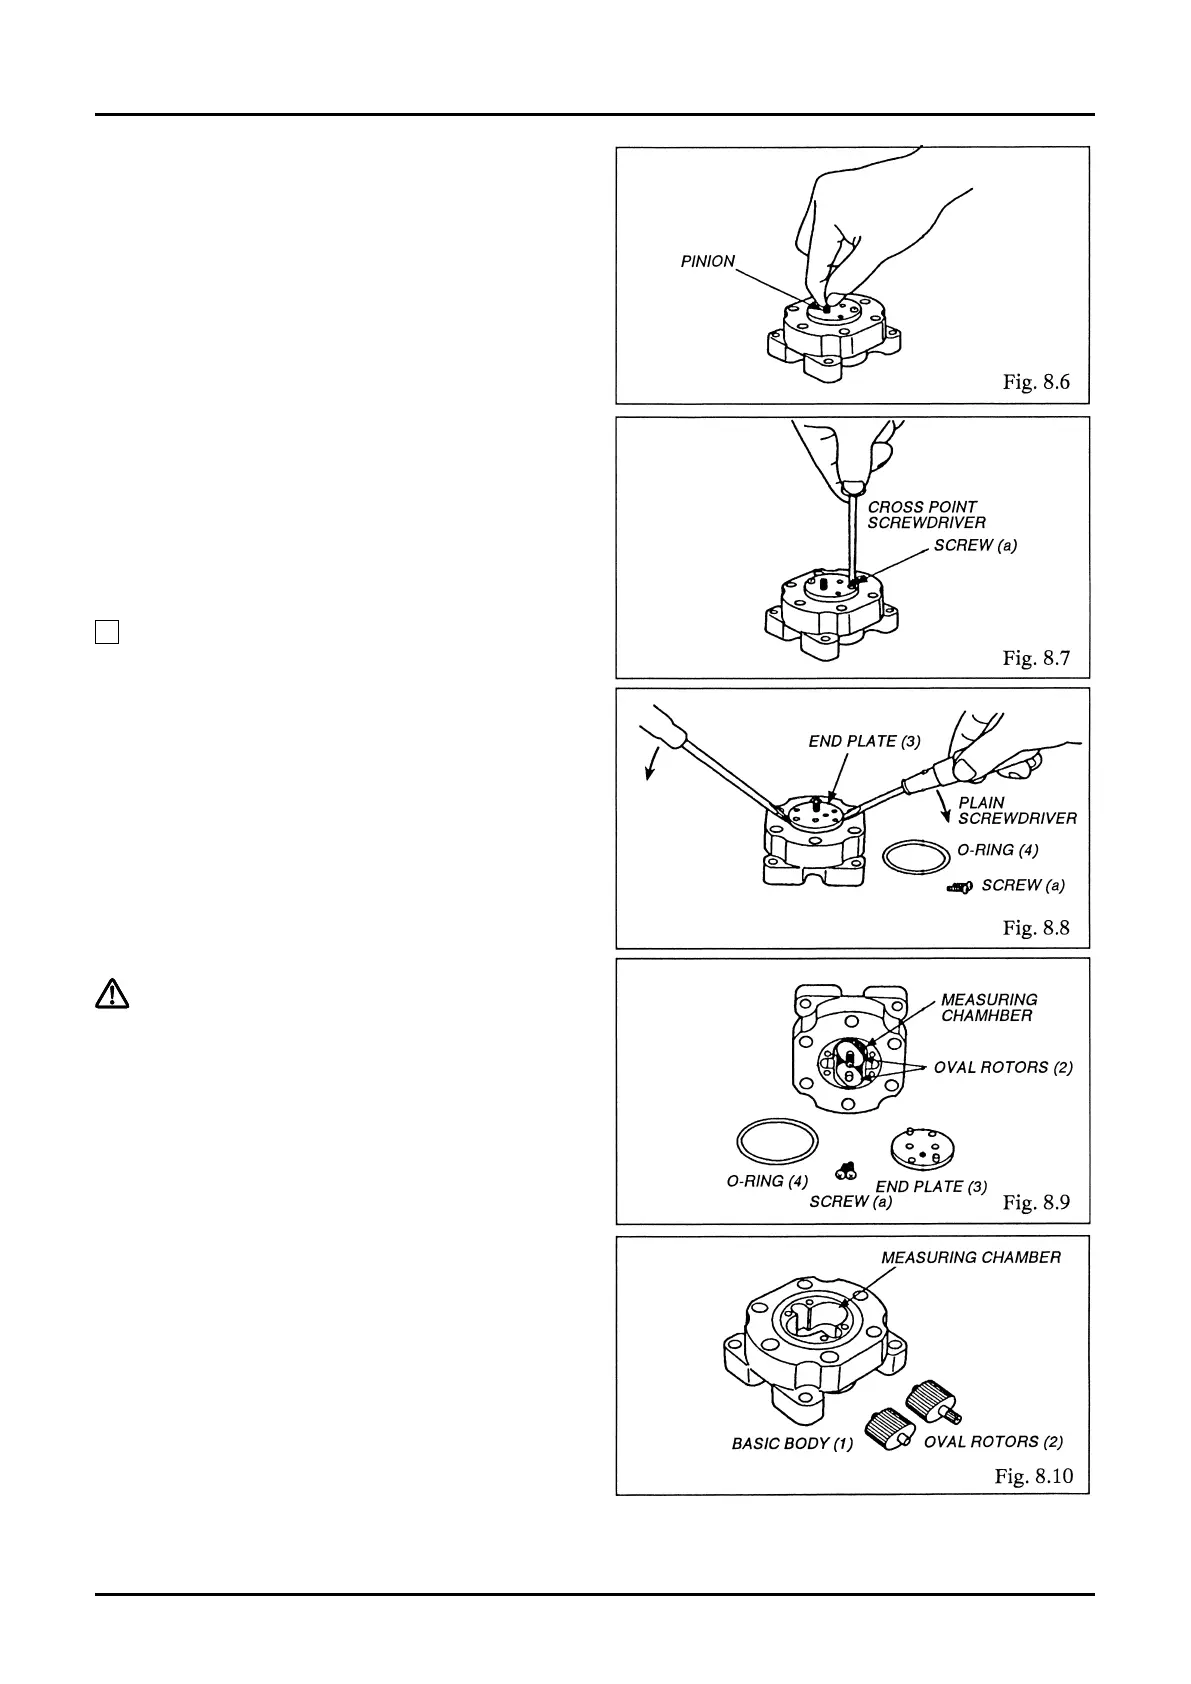
⑦ Inspect the pinion and associated components
for wear (Fig. 8.6).
⑧ Take o two screws (a), using plain screwdriver
(Fig. 8.7).
⑨ By inserting screwdriver blades into the
clearance as shown in Fig. 8.8, pry out the end
plate (3) uniformly.
⑩ Removing the end plate provides access to the
measuring chamber, Oval rotors (2) and other
components (Fig. 8.9).
⑪ Examine the Oval rotors and measuring
chamber for condition (Fig. 8.10).
NOTE: Each Oval rotor should be extracted in a
straight line.
(A) Aren’t Oval rotors jammed with foreign
matter?
(B) Aren’t rotors, rotor shafts and other
components worn?
(C) Aren’t the measuring chamber and end
plate inner wall damaged?
Following inspection of these components,
thoroughly wash clean the Oval rotors, rotor shafts,
measuring chamber, and end plate with clean water
or cleaning oil.
➡➡