OWC Data Doubler Installation
23
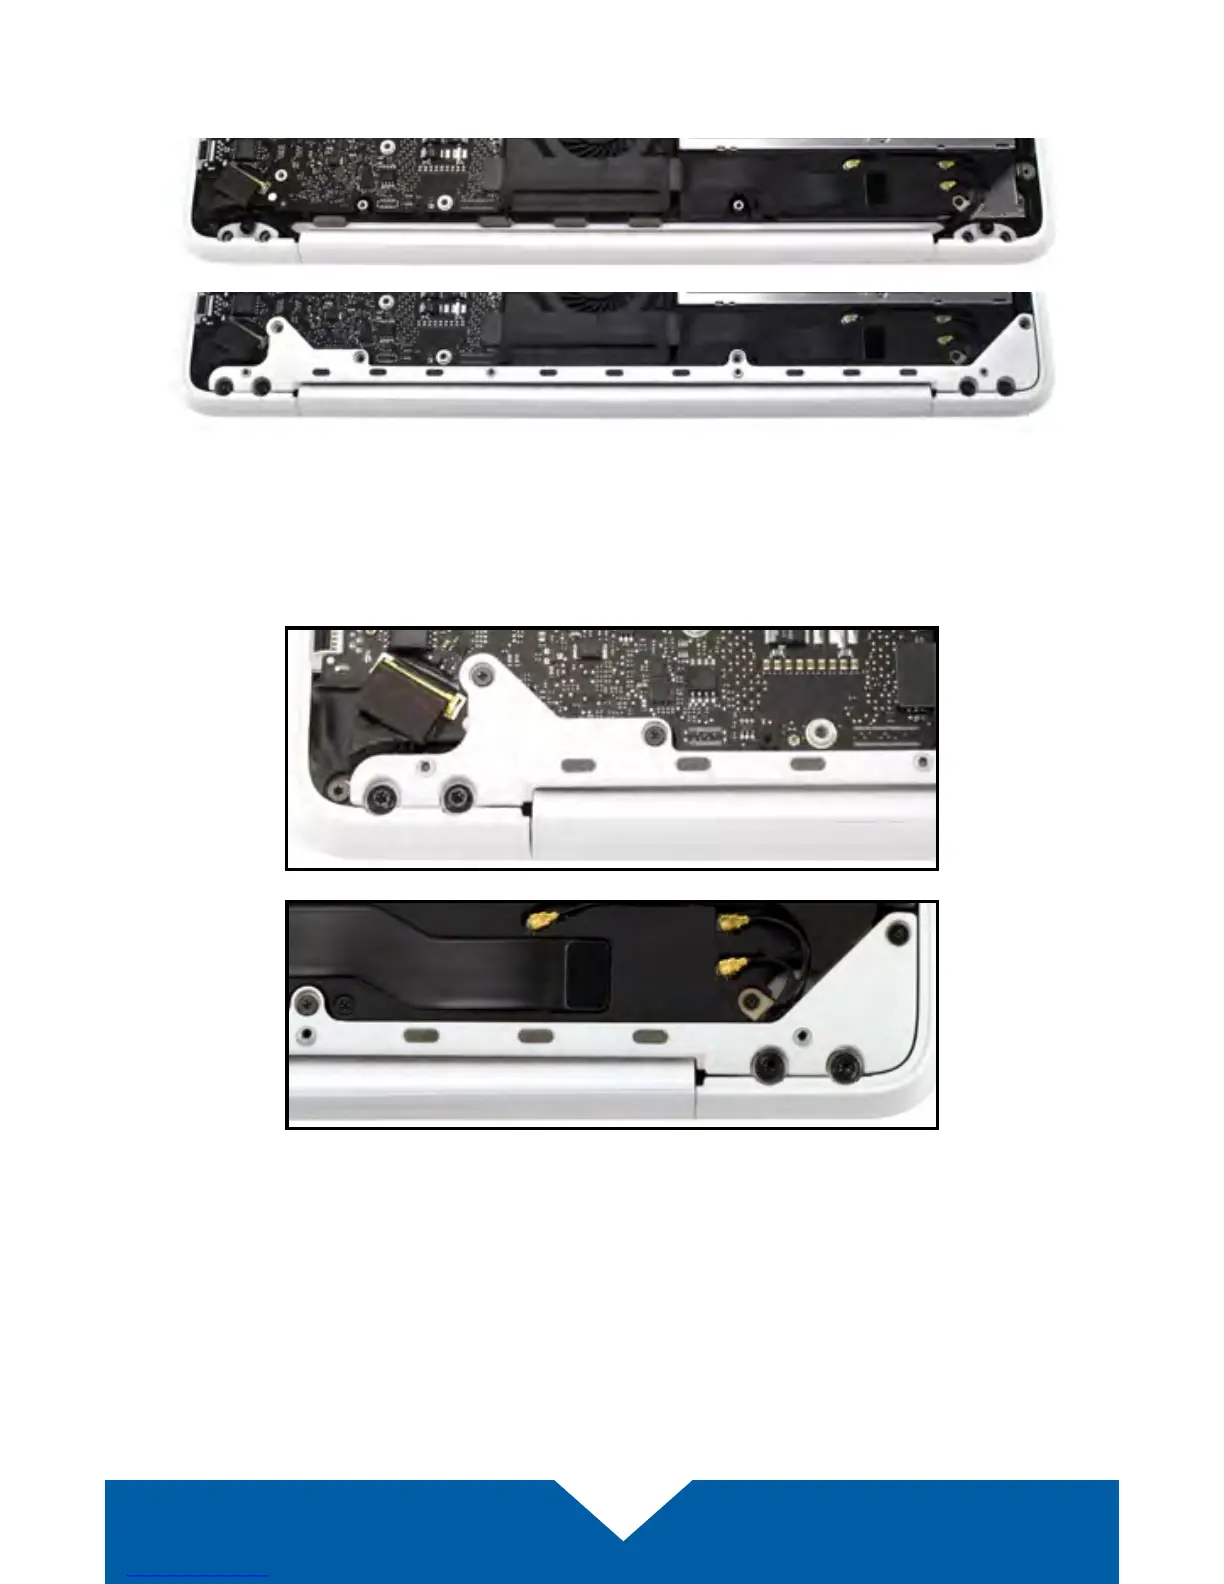
21. Reattach the rear vent to the laptop. Make sure the venter is ush with the
chassis, as shown below (lower image).
22. Reinsert the four Phillips screws that were removed from the rear vent in
the order shown below (1-4). Initially, tighten them just enough to get the
screws threaded. Then, tighten all four rmly.
23. Reinsert the four Torx T8 screws into the rear vent and as in the previous
step, tighten them just enough to get them threaded (5-8). Then tighten all
four rmly. If you disconnected your battery in Step 2, disconnect it now.
24. Reattach the bottom cover to the chassis and ax the eight Phillips
screws that were removed in Step 1. The installation process is complete.
Proceed to Section 3.1 for additional support information.
➀
➁
➂
➃
➄
➅
➆
➇