OWC Data Doubler Installation
31
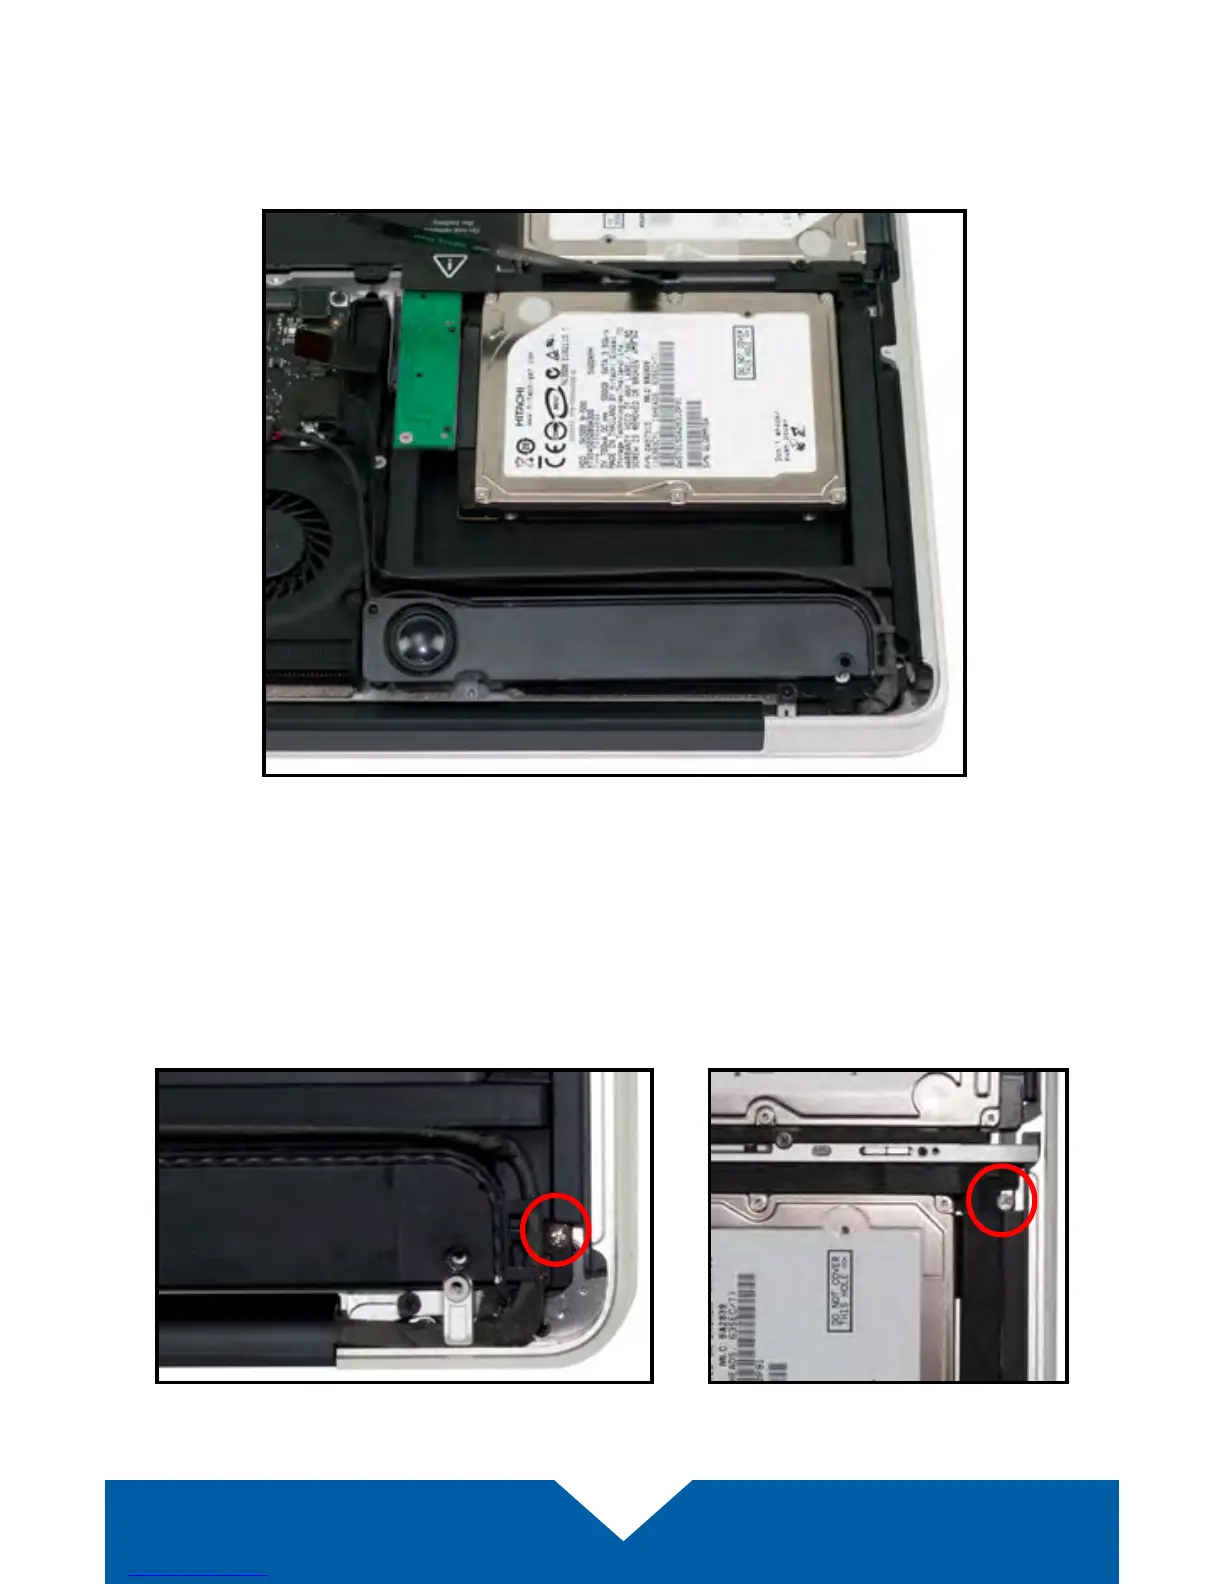
16. Carefully place the assembled Data Doubler bracket into the optical bay,
being careful not to damage any cables or connectors. Make sure the
battery tab is resting atop the seated bracket. Note: this photo shows an
earlier Data Doubler model with black aluminum.
17. Reseat the speaker housing and cable from Step 10 then ax the screws
in their original locations. Next Ax the screw you removed in Step 8.
18. Take two longer Phillips screws from the Data Doubler Kit and ax them
in the locations shown below (the original screws were removed in Step 5).