OWC Data Doubler Installation
38
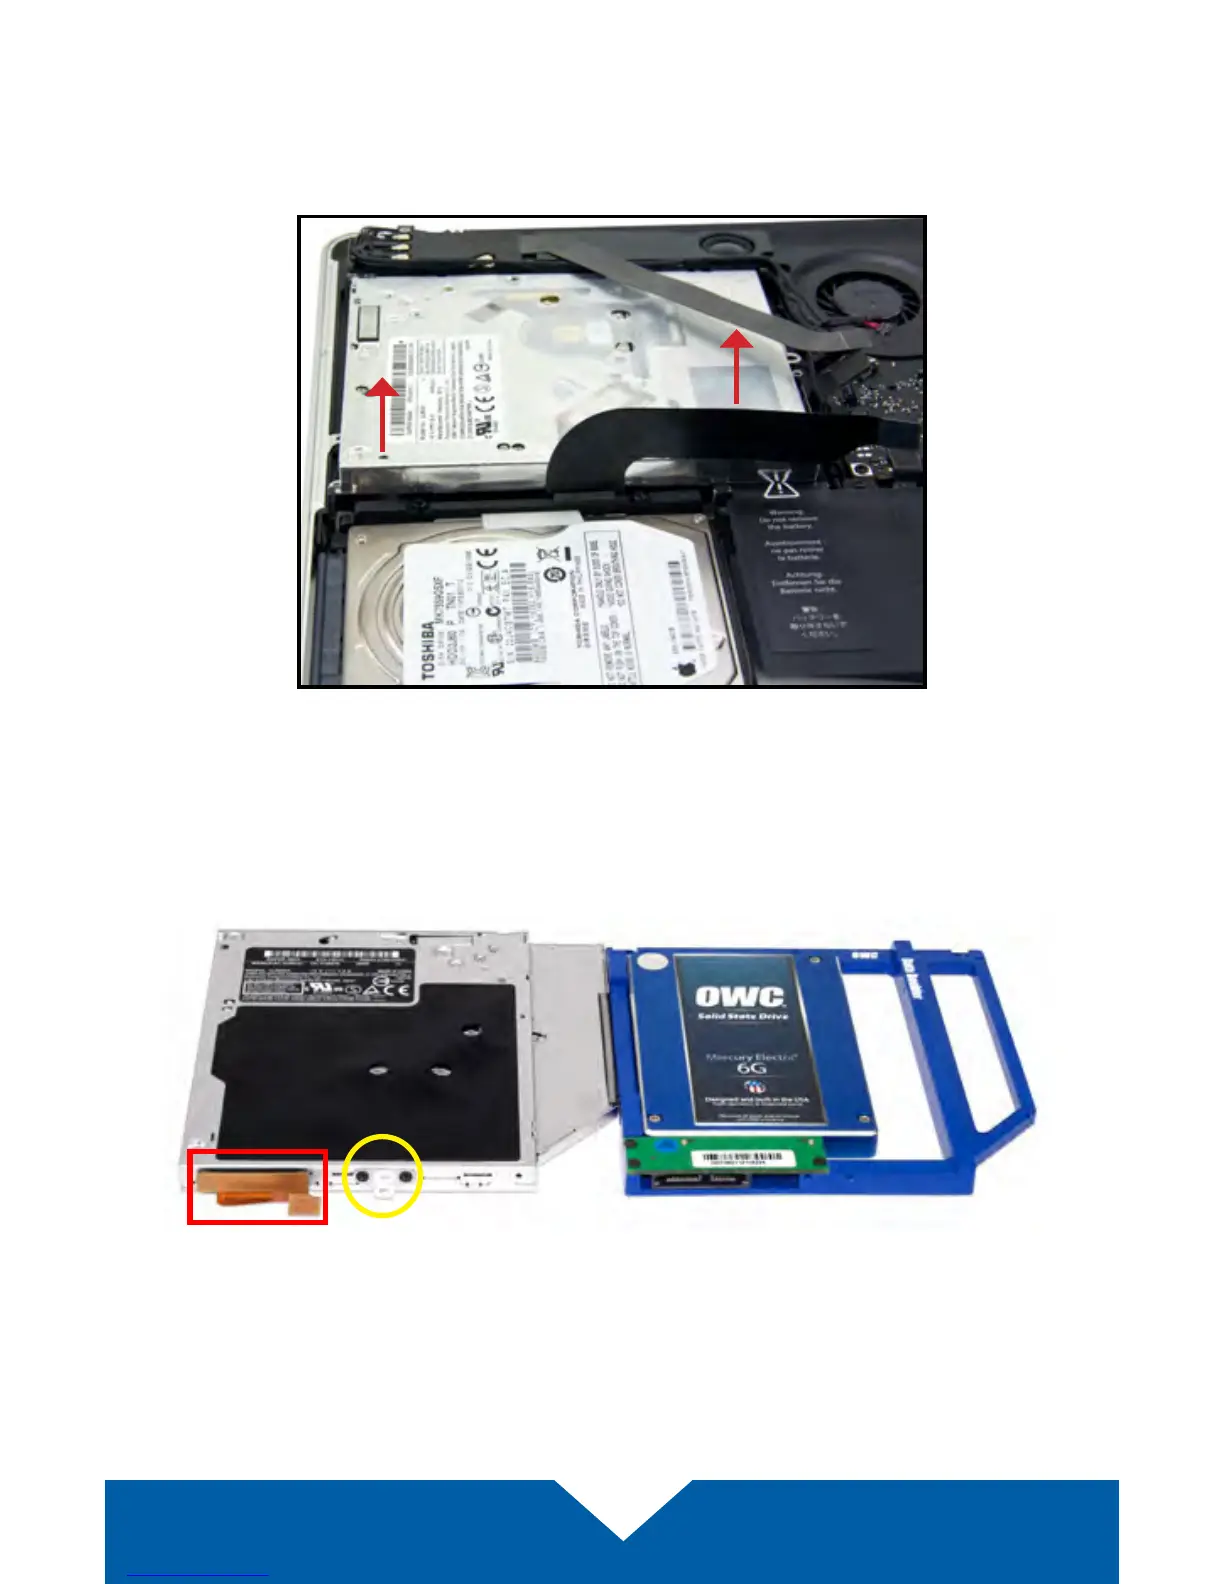
11. Gently lift the optical drive out of the drive bay, being careful to not damage
any cables in the process. Note: the orientation of this photo shows the
corner of the chassis nearest the optical drive at the top of the photo,
rather than the bottom as in previous and upcoming shots.
12. Place the optical drive and the assembled Data Doubler bracket in front of
you, as shown below. Note: the cable and optical drive bracket from your
laptop may look slightly dierent.