OWC Data Doubler Installation
45
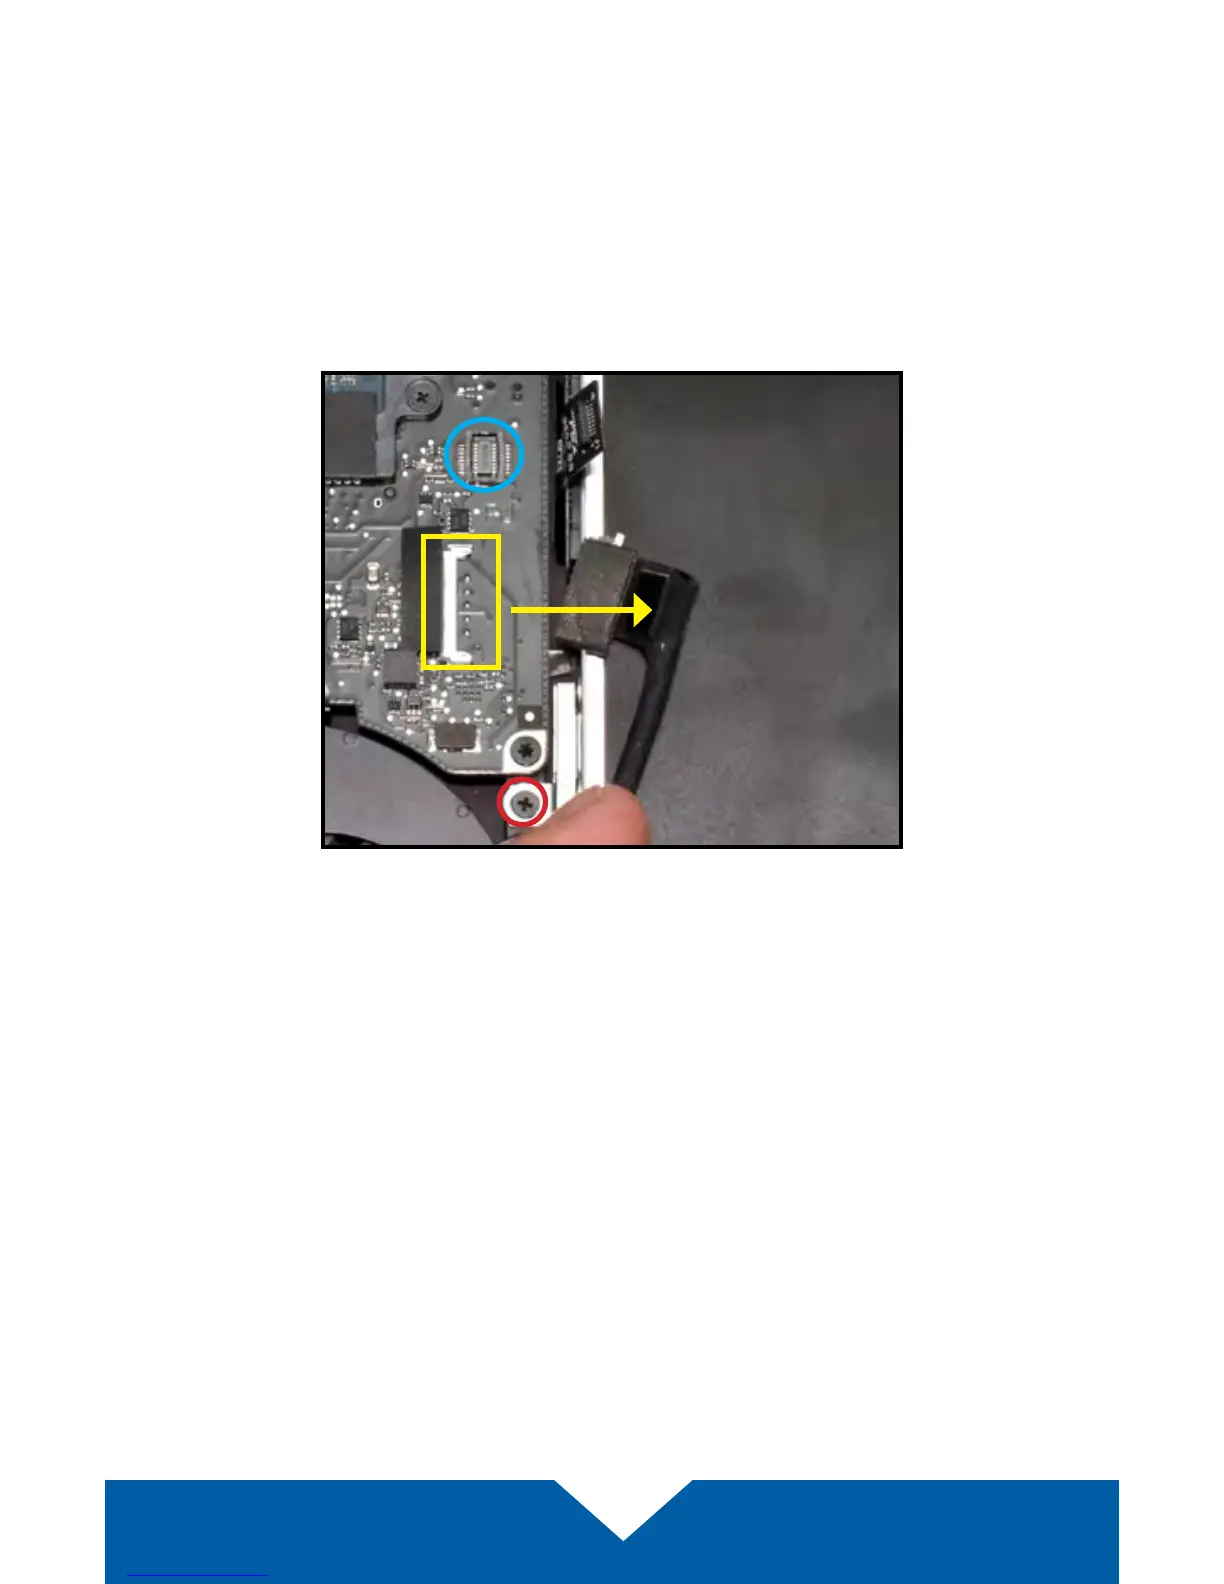
8. Near the left edge of the optical drive, there is a black cable attached to
the logic board (connection point highlighted below in yellow). You need to
disconnect this cable to expose a screw below it. To disconnect it, slide it
directly towards the optical drive. Caution: this cable is easily damaged.
9. Once you have the cable out of the way, you should see a black Phillips
screw inserted through a silver bracket (highlighted below in red) that is
attached to the back of the optical drive. Remove the screw and set it
aside. This screw will be used during the reassembly process.
10. There is a ribbon cable that connects the optical drive to the logic board
(connection point shown in blue above). This cable will be either orange or
black. Use the nylon pry tool to gently disconnect the cable's connector
from the logic board. Caution: this cable is easily damaged.