OWC Data Doubler Installation
46
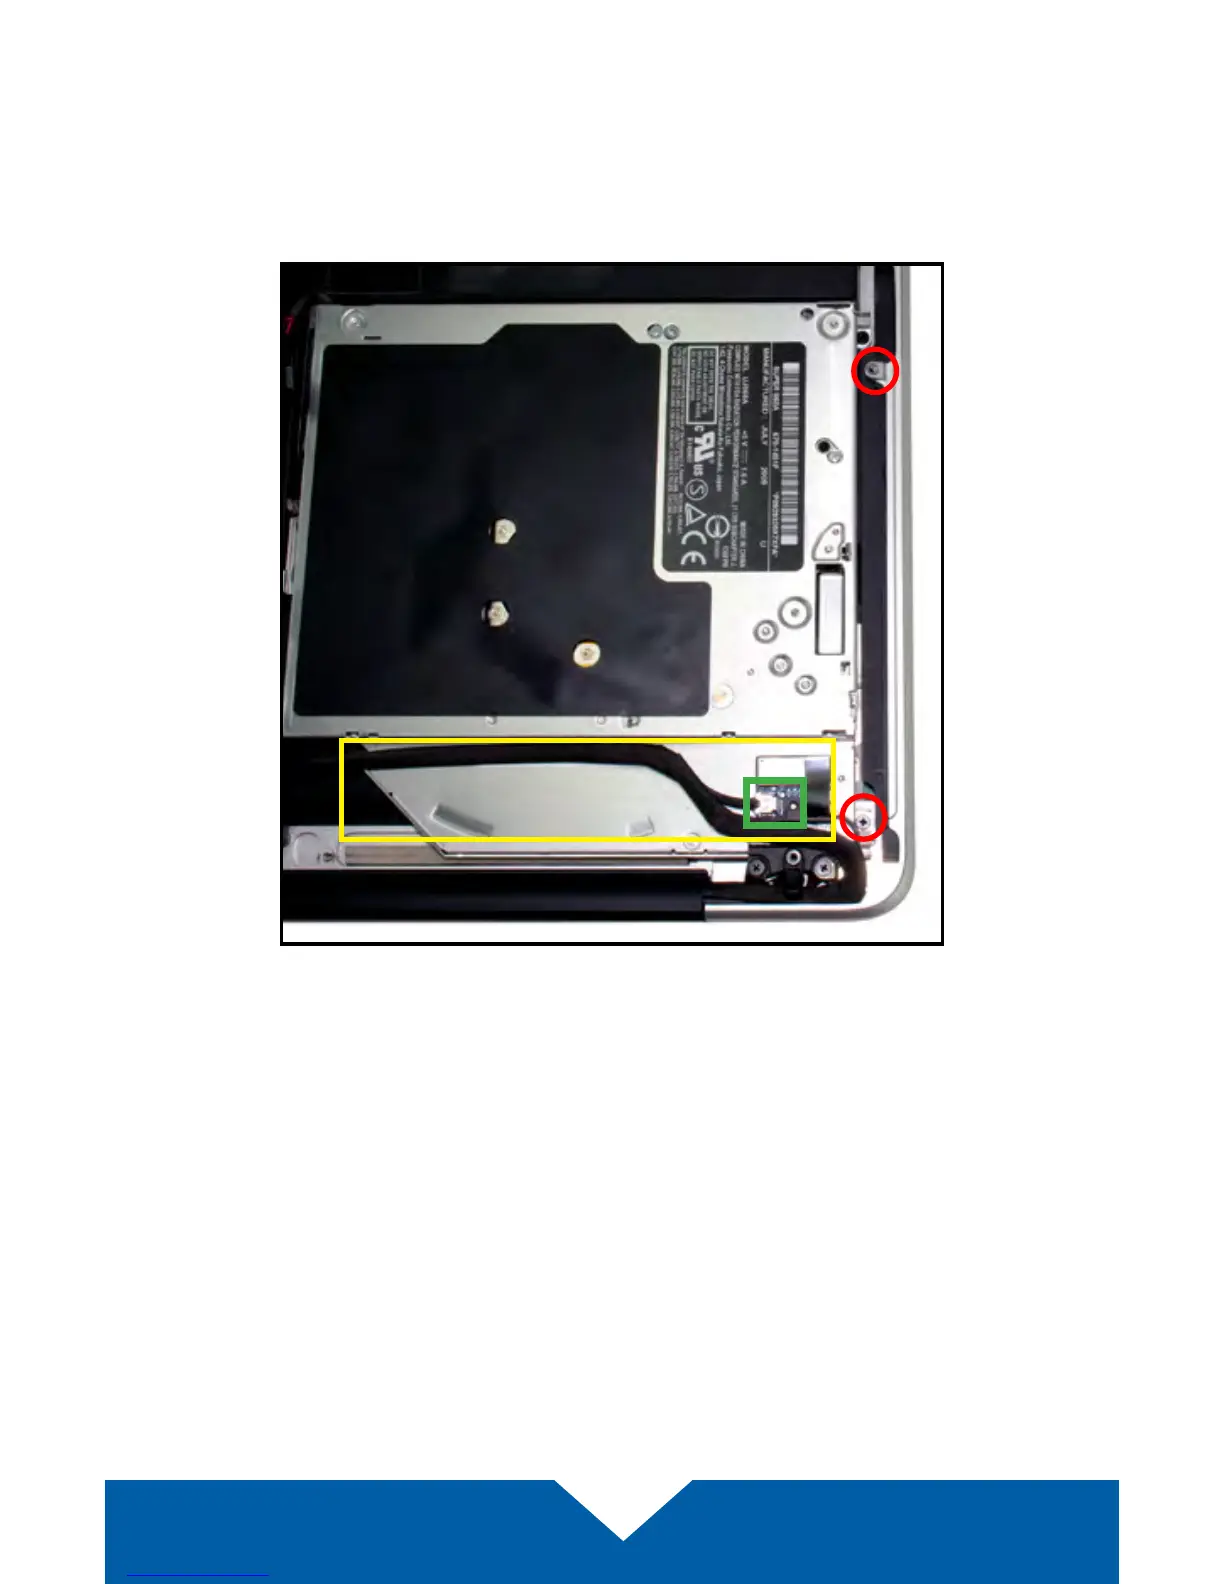
11. There are two small Phillips screws located along the right edge of the
optical drive (highlighted in red below) that are used to secure the drive to
the chassis. Remove these screws. Note: These screws will not be used
when reassembling the laptop; store them in a safe place in case you
need them later.
12. There is a black cable (highlighted above in yellow) that is attached to
the optical drive via a glue strip. Gently detach the wire bundle from the
optical drive before you can continue. Work from left to the right to avoid
disconnecting the wire from a connector (highlighted in green). If you do
disconnect the wire, you can reconnect it during the reassembly process.