OWC Data Doubler Installation
54
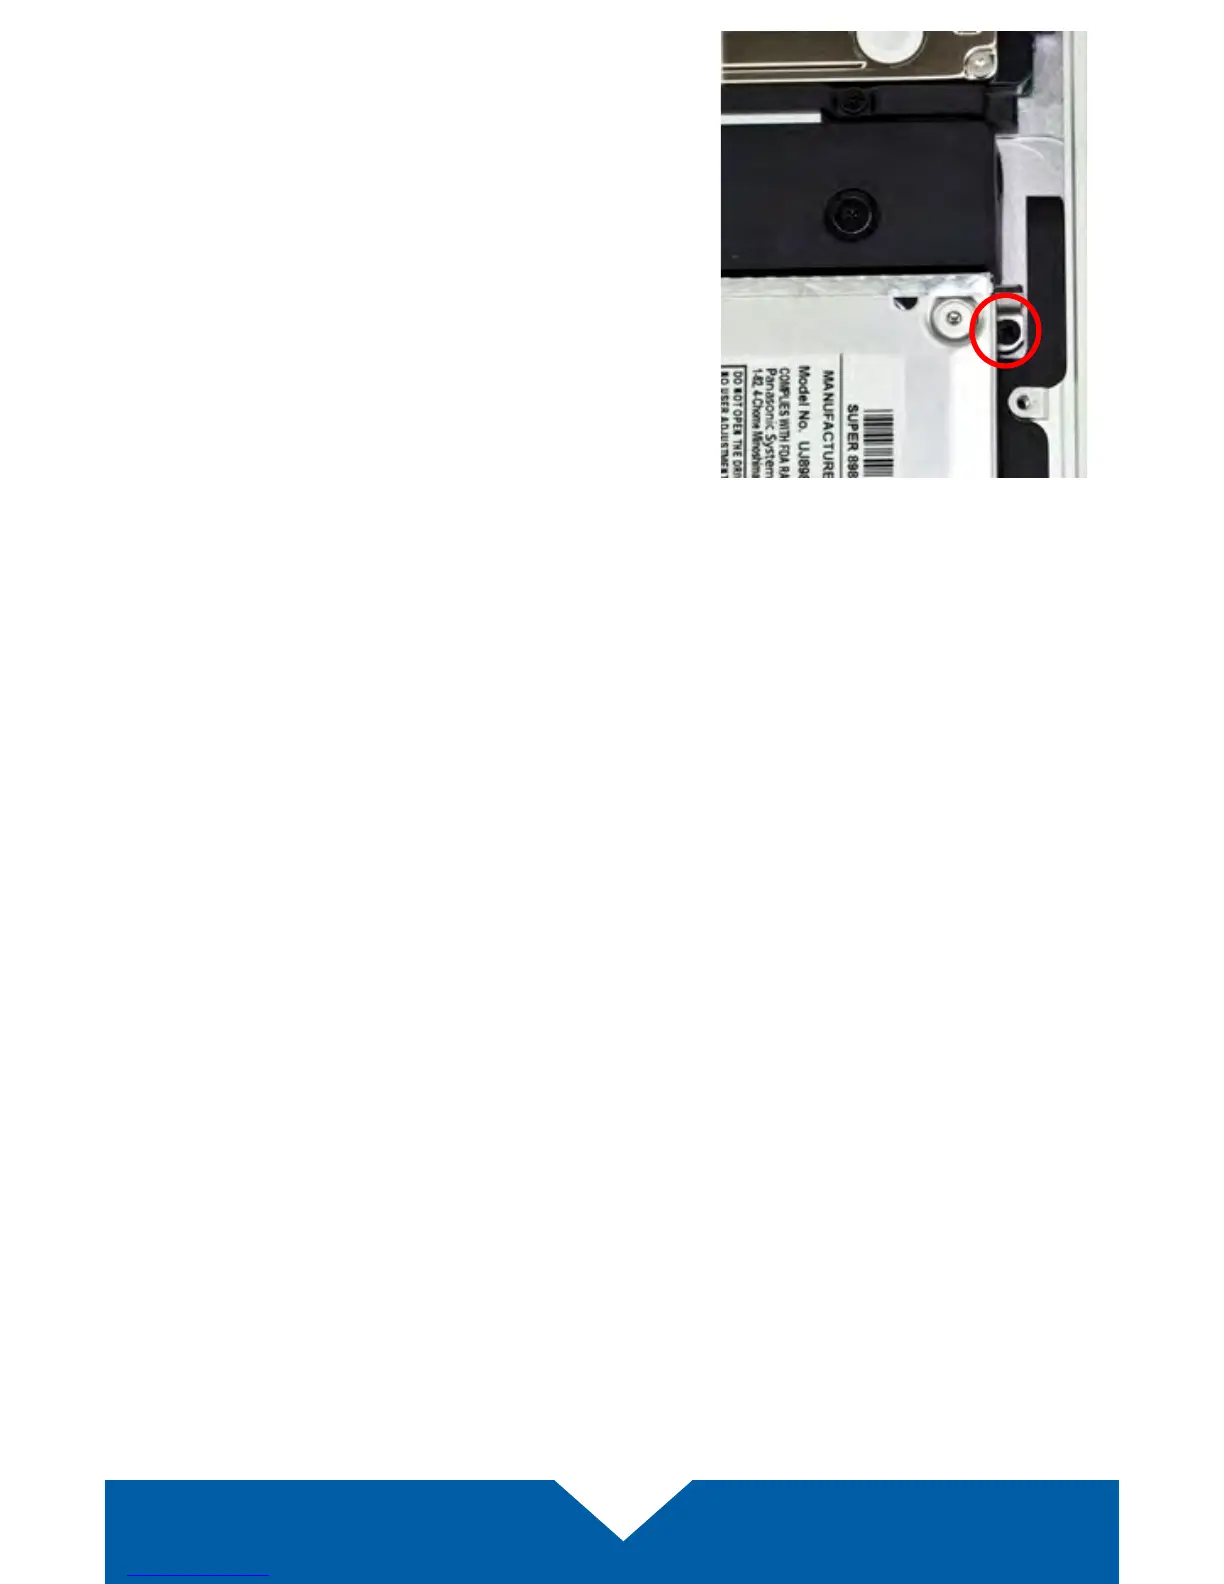
10. There is another small Phillips screw
near the top of the optical drive (shown
at right) that needs to be removed.
Note: this screw will not be used during
reassembly; store it in a safe place in
case you need it later.
11. Lift the optical drive along the edge nearest the ribbon cables, then
carefully remove it from the optical bay.
Caution: avoid snagging or pulling the cables that were disconnected in
earlier steps. They can tear easily if they catch on the corners of the drive,
as you lift it out of the chassis.