OWC Data Doubler Installation
53
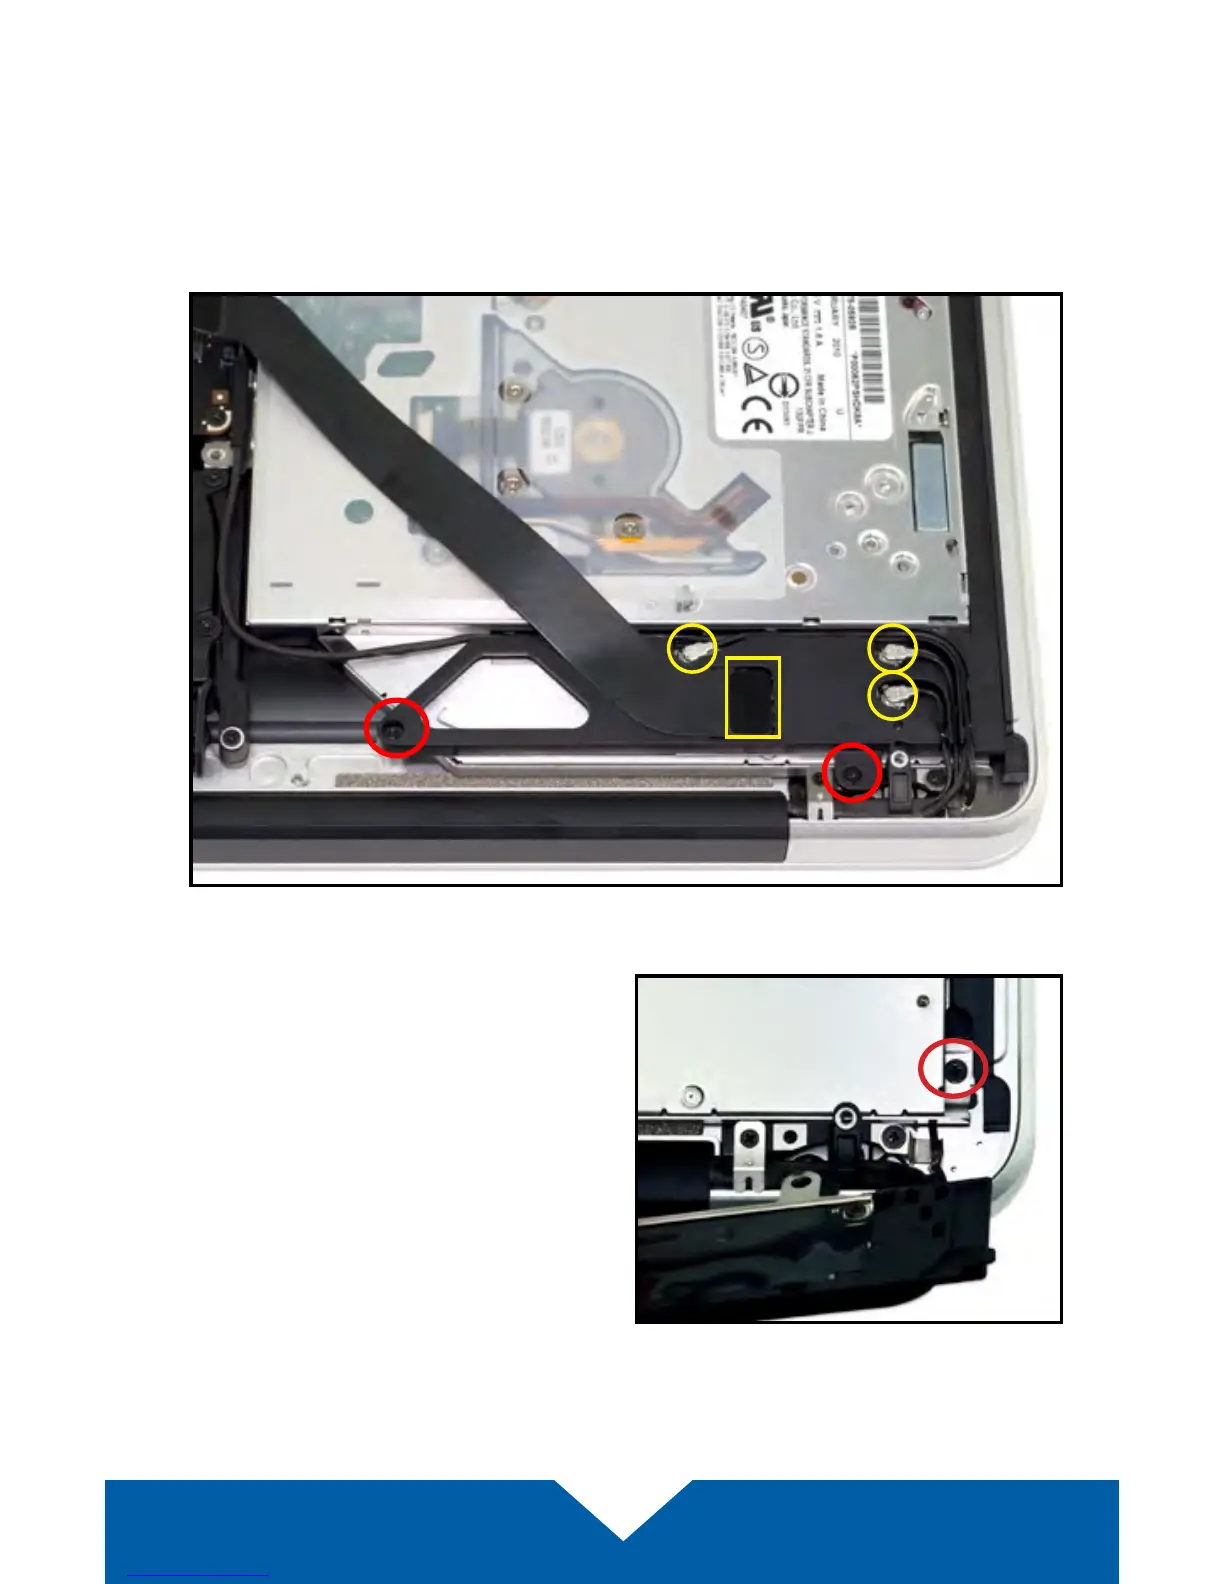
8. There is an Airport / Bluetooth bracket located below the optical drive. The
bracket is connected to a black ribbon cable as well as three antennae
(highlighted in yellow). Remove the two Phillips screws highlighted below
in red in order to detach the bracket, then carefully set it aside. You do not
need to disconnect the cables. Note: the screw near the corner is longer
than its counterpart; it needs to be axed in the same location during
reassembly.
9. Remove the Phillips screw near
the lower right corner of the optical
drive. Note: You will not reuse this
screw during reassembly; store it
in a safe place in case you need it
later.