OWC Data Doubler Installation
62
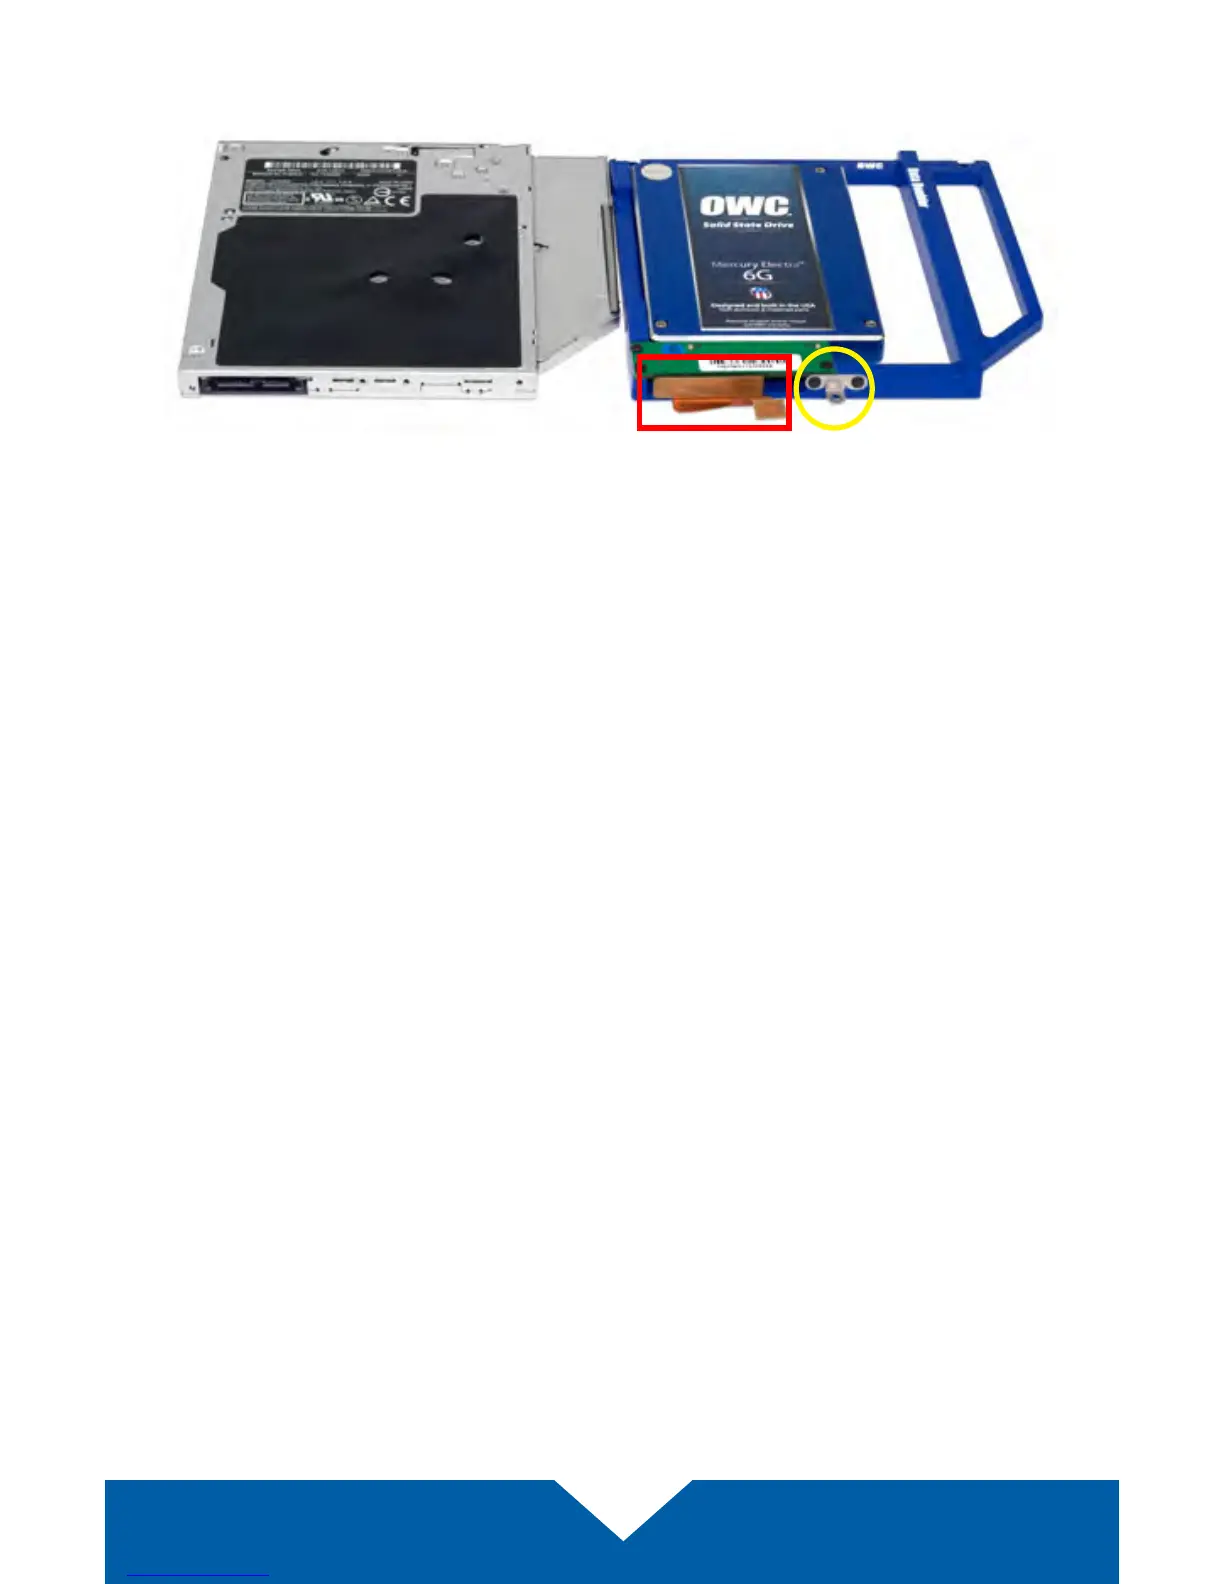
14. Plug the cable into the Data Doubler’s green circuit board. The location of
the installed cable is highlighted in red below.
15. Remove the silver bracket that is attached to the back of the optical drive
(highlighted in yellow in Step 12) by removing the two Phillips screws.
Using the same two screws, ax the silver bracket to the OWC Data
Doubler as shown in the photo from Step 14 (highlighted in yellow).
16. Carefully reseat the assembled Data Doubler into the optical bay, being
careful not to damage any cables or connectors.
Continue to the next page.