OWC Data Doubler Installation
61
10. Near the top-right corner of the optical
drive, there is another small Phillips
screw that needs to be removed. Note:
This screw will not be used during
reassembly; store it in a safe place in
case you need it later.
11. Gently lift the optical drive out of the optical bay, making sure not to
damage any of the disconnected cables.
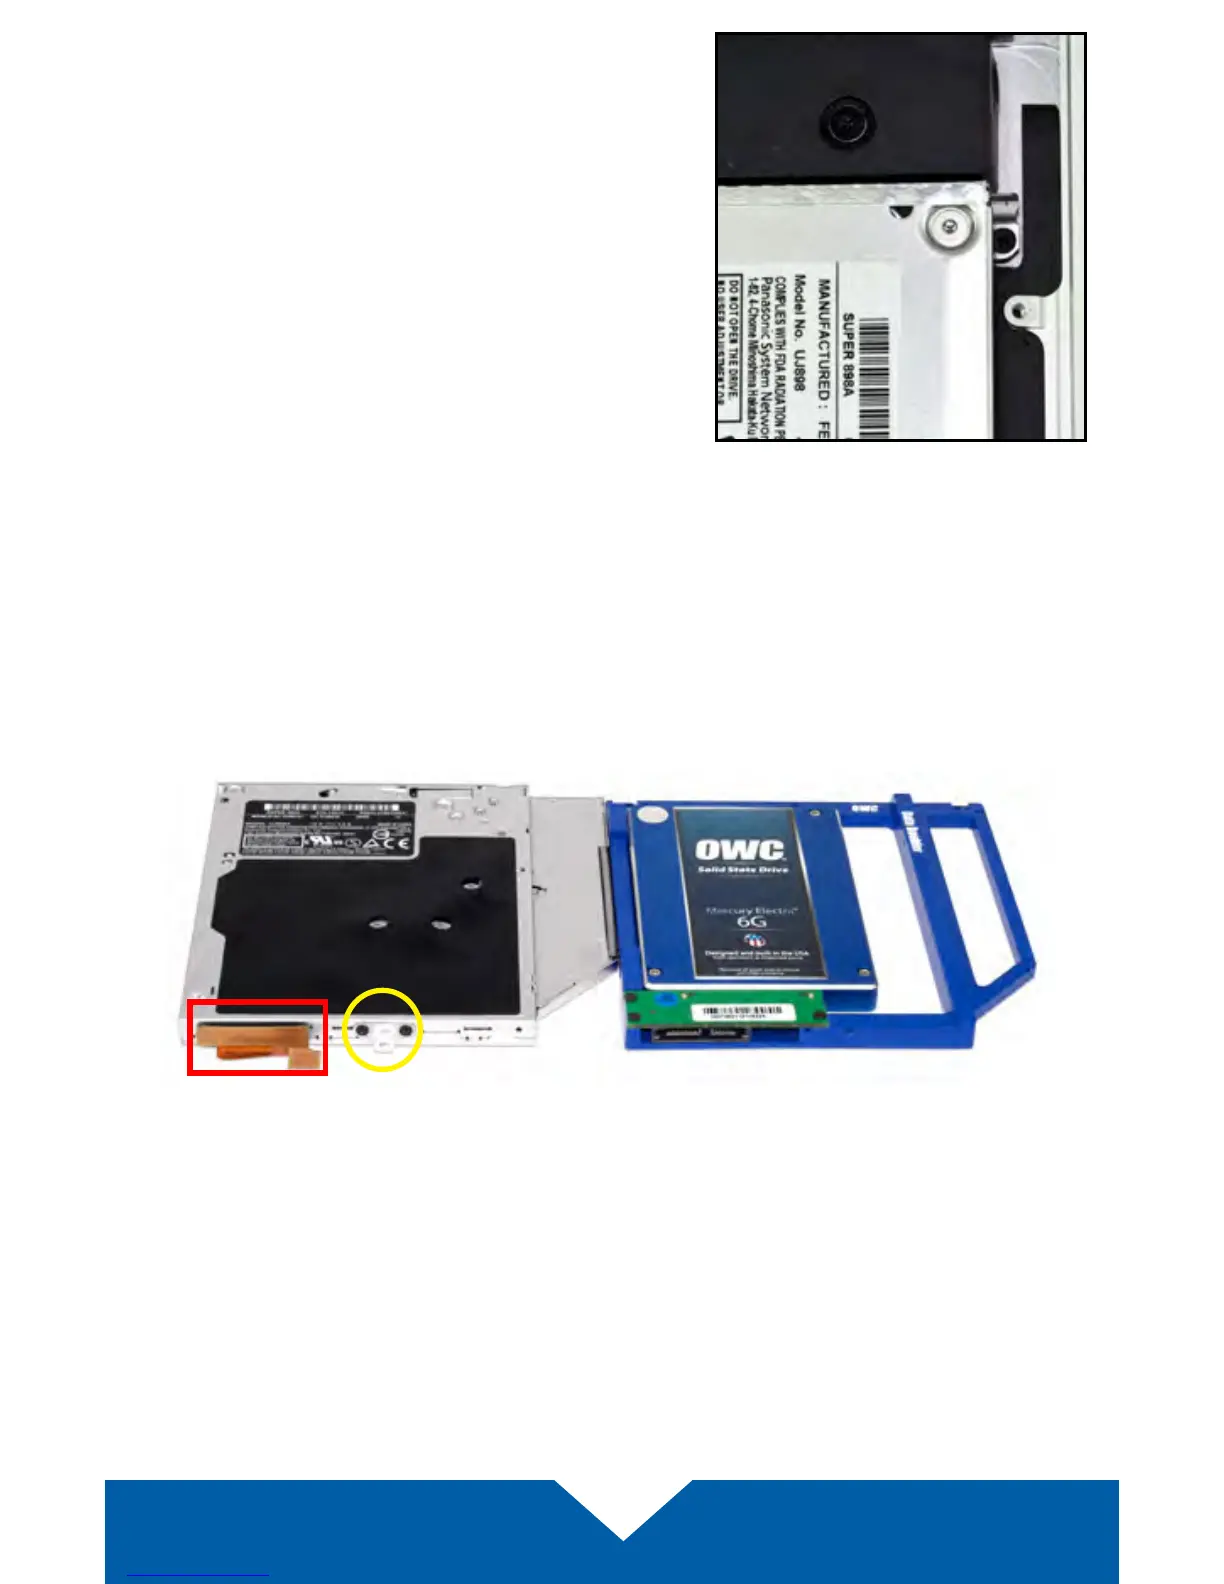
12. Place the optical drive you removed from your laptop and the hard drive
that you already installed into the OWC Data Doubler bracket on the table
in front of you, as shown below.
13. To transfer the optical drive cable (highlighted above in red) to the Data
Doubler, rst detach it from the drive by gently prying it loose with your
ngernail or the nylon pry tool. Then gently pull the cable out of the SATA
port. Caution: this cable is easily damaged.