OWC Data Doubler Installation
65
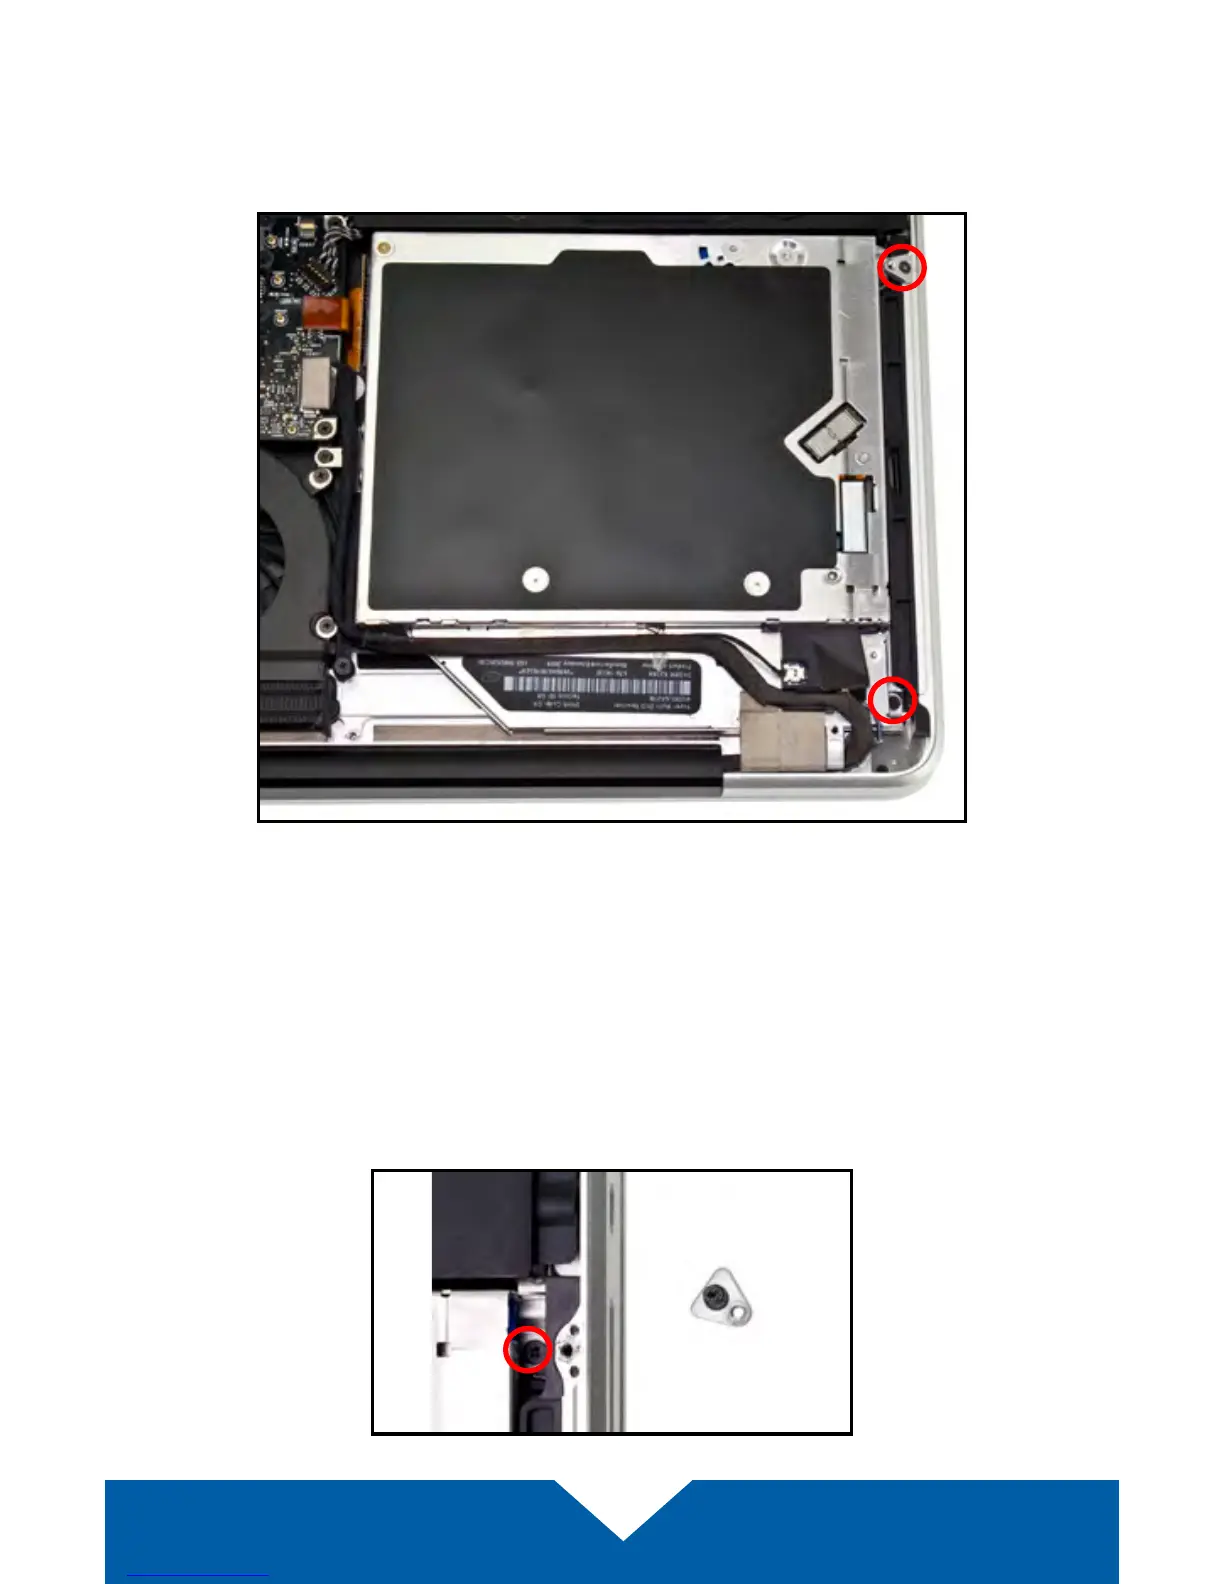
3. Turn the laptop so that the optical drive is oriented as shown below.
This matches the orientation used in later steps. There are two screws
highlighted below in red; remove the lower screw. Note: This screw will not
be used during reassembly; store it in a safe place in case you need it later.
4. The second screw highlighted above (top-right corner) is covering another
screw that also needs to be removed. Use a Torx T8 driver to remove the
top screw and the small bracket it holds in place. These screws will be
used during the reassembly process.
5. Next, remove the screw that was hidden under the bracket (shown below
in red). Note: This screw will not be used during reassembly; store it in a
safe place in case you need it later.