OWC Data Doubler Installation
66
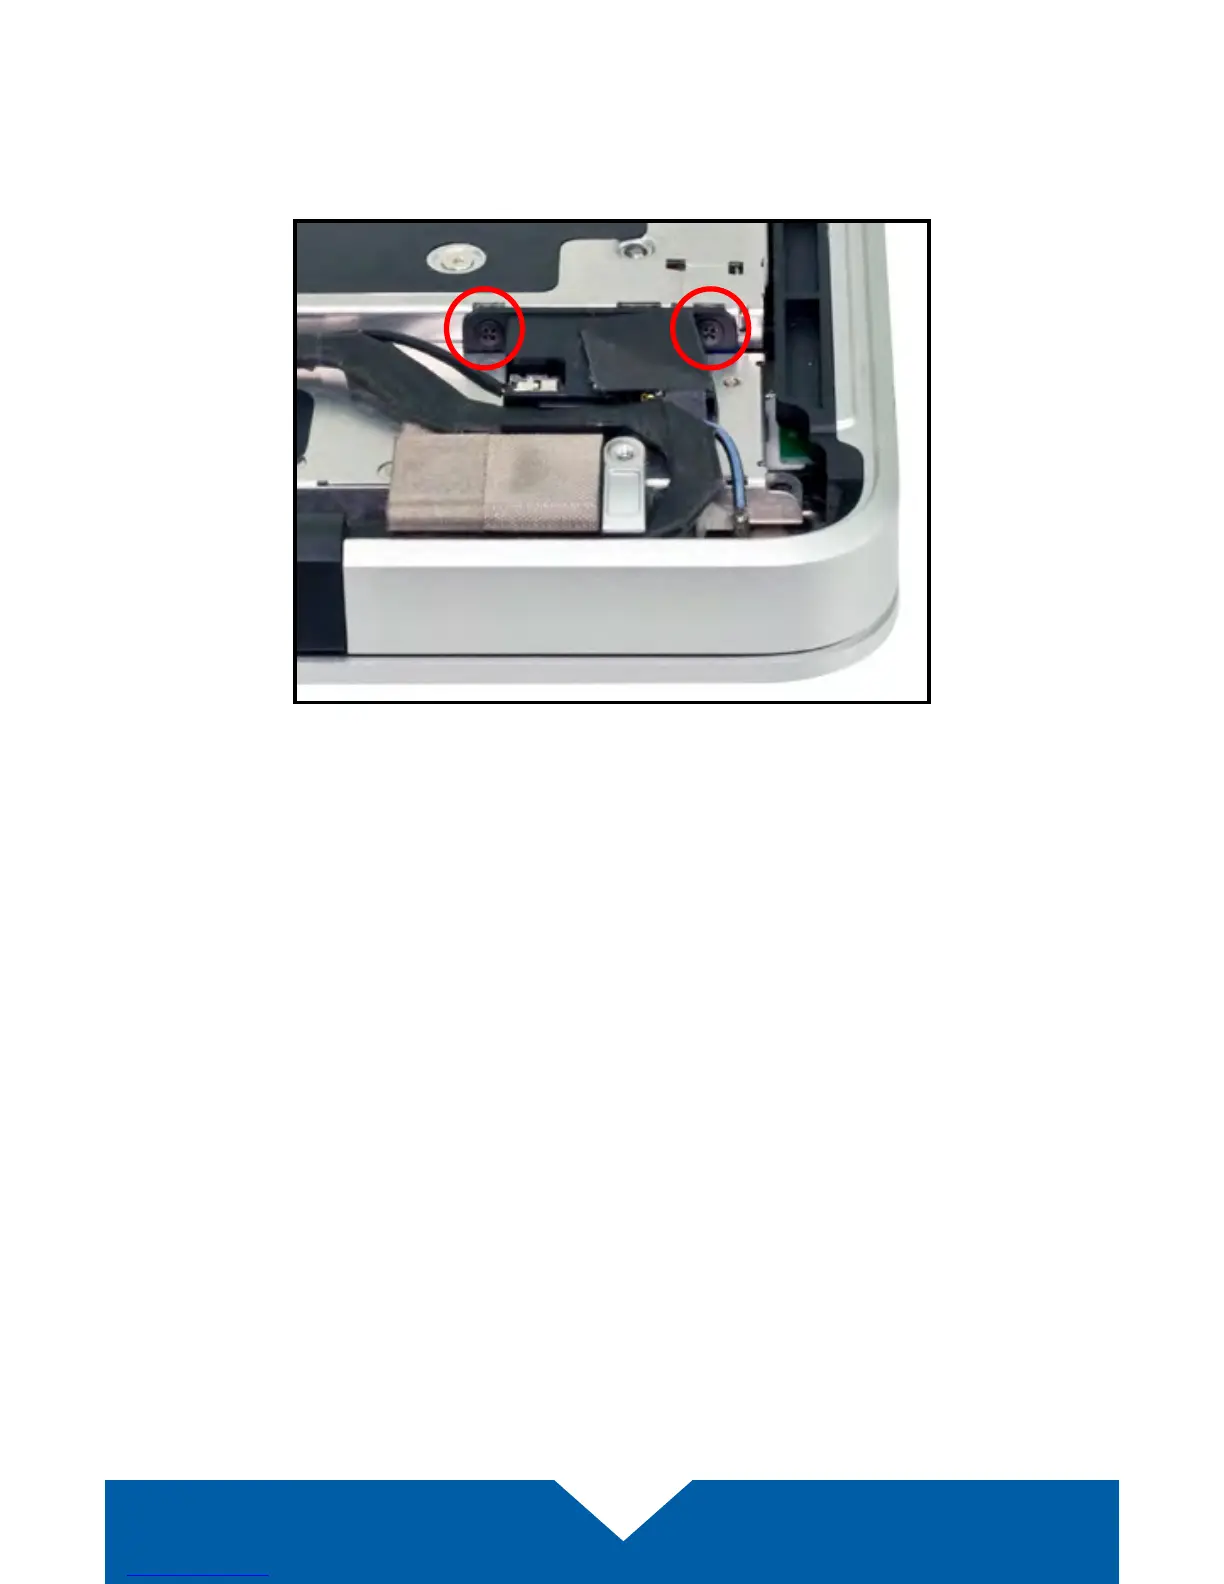
6. Near the corner of the optical drive, there is a black plastic bracket that
screws into the side of the drive. You need to remove two Phillips screws
that hold this bracket in place (shown below in red) and set them aside.
They will be used later in the reassembly process.
7. Once the bracket is disconnected, notice that the black cable bundle that
runs along the body of the optical drive — it is attached via an adhesive.
Gently lift and remove this cable bundle from the body of the optical drive.
Continue to the next page.