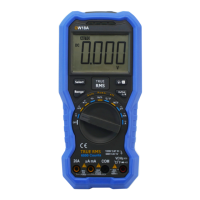
3.Making Measurements
Measuring Transistor — Only for specific models
(1) Rotate the rotary switch to .
(2) Verify the type of the transistor is NPN or PNP, and locate the Emitter, Base and
Collector leads. Insert leads of the transistor into the corresponding test holes on the
panel.
(3) Read the hFE value.
Measuring DC or AC Current
Warning: Never attempt an in-circuit current measurement where the open-circuit
potential to earth is greater than 250
V. Doing so will cause damage to
the multimeter and possible electric shock or personal injury.
Caution: To avoid possible damage to the multimeter or to the equipment under
test, check the multimeter’s fuse before measuring current. Use the
proper terminals, function, and range for your measurement. Never place
the test leads in parallel with any circuit or component when the leads are
plugged into the current terminals.
(1) Turn off the power of the measured circuit. Discharge all high- voltage capacitors.
(2) For OW18A/OW18B,connect the black test lead to the terminal. For currents
below 600 mA, connect the red test lead to the terminal; for currents
within 600 mA – 10 A, connect the red test lead to the terminal.
For OW18D/OW18E,connect the black test lead to the terminal. For currents
below 200 mA, connect the red test lead to the terminal; for currents
within 200 mA – 10 A, connect the red test lead to the terminal.
(3) Rotate the rotary switch to the appropriate position according to the measurement
range, , , or .
(4) Disconnect the circuit path to be tested. Connect the black test lead to one side of
the circuit (with a lower voltage); connect the red test lead to the other side (with a
higher voltage). Reversing the leads will produce a negative reading, but will not
damage the multimeter.
(5) Select DC or AC measurement mode. Default is DC measurement mode, will be
displayed. Press to switch into AC measurement mode, will be displayed.
(6) Turn on the power of the measured circuit, and read the display. Press to
enable and cycle through the manual ranges. If "OL" is displayed, it indicates the
input exceeds the selected range and the rotary switch should be set to the position
with higher range.
(7) Turn off the power of the measured circuit and discharge all high-voltage capacitors.
Remove the test leads and restore the circuit to the original condition.
Note: When measuring AC current, press to cycle through frequency measuring,
duty cycle measuring, and original measuring.
15
 Loading...