R6000S Operation Manual: Rev. G
PAC L.P., All Rights Reserved, 2015 Page 45 of 92
3.2.2 Set Span
1. Leave sample/calibrate switch in the calibrate position and set zero/span switch to span position.
NOTE: The sample flow meter and backpressure regulator should be at the same setting that was used
on the zero gas.
2. After the detector output has stabilized for five minutes, adjust the span dial to obtain the appropriate
setting that corresponds to the concentration of the span gas.
3. Allow the span gas to flow through for two minutes to ensure the level display is stable and close to
the concentration of the span gas.
4. Set Sample/Cabinet Switch to SAMPLE.
5. Set Zero/Span Switch to ZERO.
6. Resume normal operation.
NOTE: Repeat the Zero and Span steps once again to ensure the level display returns to the appropriate
settings.
3.2.3 Normal Operation
1. Return sample/calibrate switch to sample for normal operation.
2. Return zero/span switch back to zero to de-energize the solenoid valve when not in use.
NOTE: The sample flow meter and backpressure regulator should be at the same setting that was used
to calibrate the analyzer.
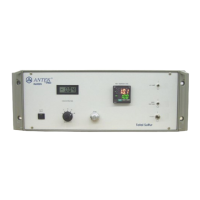
3.2.4 Temperature Controller Settings
NOTE: The temperature controller parameters were set prior to shipment. Normally it is not necessary to
reset any parameters, but if it becomes necessary use the following procedure. Complete details about
any of these settings may be found in the temperature controller operating manual provided with the
instrument.
1. Press and hold SEL button for 2 seconds. Display will read NAnU on the Furnace temperature
controller or P on the Detector thermoelectric cooler temperature controller. This is the 1st Block
Parameter. If the display reads P on either controller, the 2nd Block Parameter has been selected.
Press and hold the SEL button for 2 seconds until the display reads P-n1 for 3rd Block Parameters.
2. Press the down arrow (\/) to toggle through the Menu. At a given parameter, press the SEL button.
The value for each parameter can be changed by pressing the up arrow (Λ) or the down arrow (\/).
3. After the parameter has been changed, press the SEL button to store the value. If the SEL button is
not pressed, the value will not be changed.
4. Temperature Controller Autotuning:
a. Enter the 1st Block Menu and select the parameter AΓ.
b. Press the SEL button. The value should read zero (000) and the last zero will begin flashing.
c. Use the up arrow () and change the number from zero to one (1). The display will now read one
(1) and the one (1) will be flashing.
d. Press the SEL button. Press the down arrow (\/) to advance to the next parameter. The decimal
point after the SV will begin flashing. The AUTOTUNE sequence has now been initiated.