User’s Manual
26
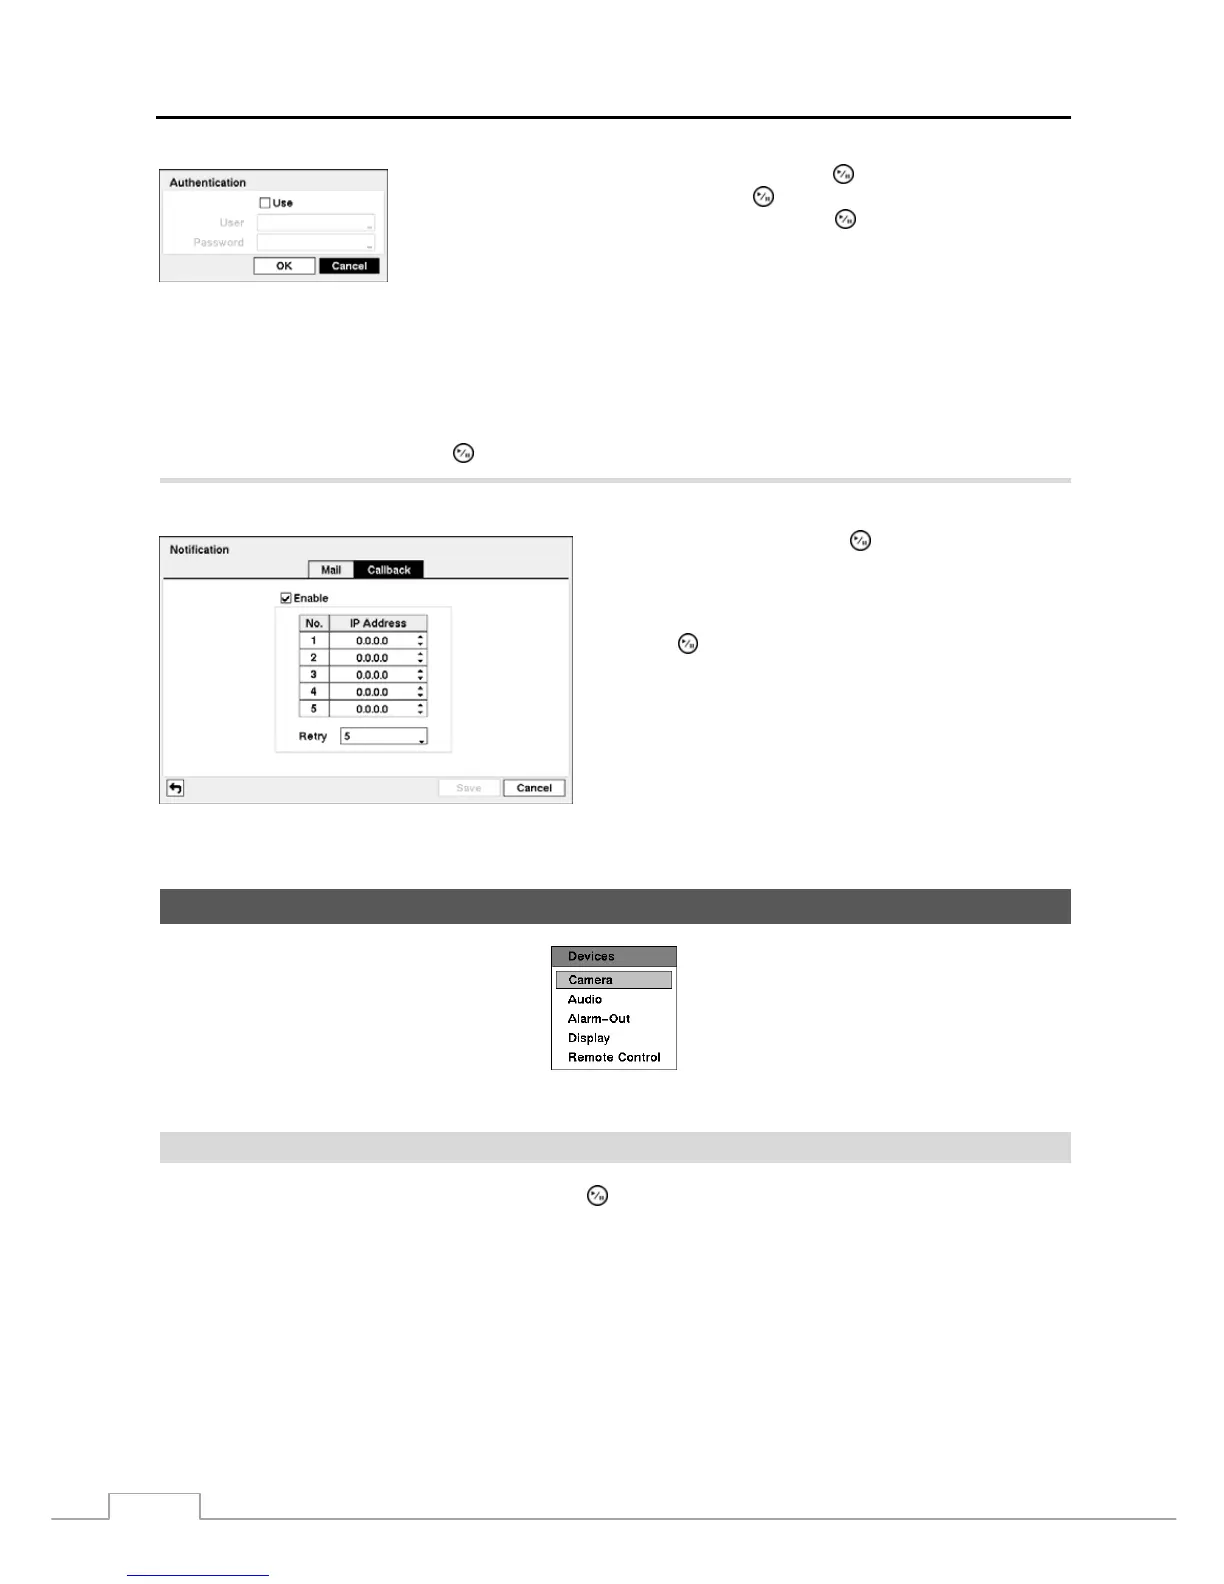
Highlight the box beside Authentication and press the button. An Authentication
screen appears. Highlight Use and press the
button to toggle between On and Off.
Highlight the box beside User/Password and press the
button. A virtual keyboard
appears allowing you to enter the user ID and password.
Highlight the box beside Sender and enter the sender’s e-mail address. Use the virtual keyboard to enter the e-mail
address.
NOTE: The e-mail address must include the “@” character to be a valid address.
Highlight the box beside Recipient and enter the recipient’s e-mail address. Use the virtual keyboard to enter the
e-mail address.
Highlight the Test box and press the button to test emailing with the current settings you made.
Highlight the Callback tab, and the Callback screen displays.
Highlight Enable and press the
button to toggle between
On and Off. You will only be able to change the IP addresses
if Callback is enabled.
Highlight the IP Address box that you want to change and
press the
button. Use the arrow buttons to enter the IP
address of the computer you want contacted during an event.
You can enter up to five IP addresses.
Highlight the box beside Retry and enter the number of times
you would like the DVR to try contacting the computer. You
can select from 1 to 10 retries.
Figure 27 — Notification Callback setup screen.
Devices Setup
Figure 28 — Devices menu.
Camera
Highlight Camera in the Devices menu and press the
button. The Camera setup screen appears.



 To Next Page