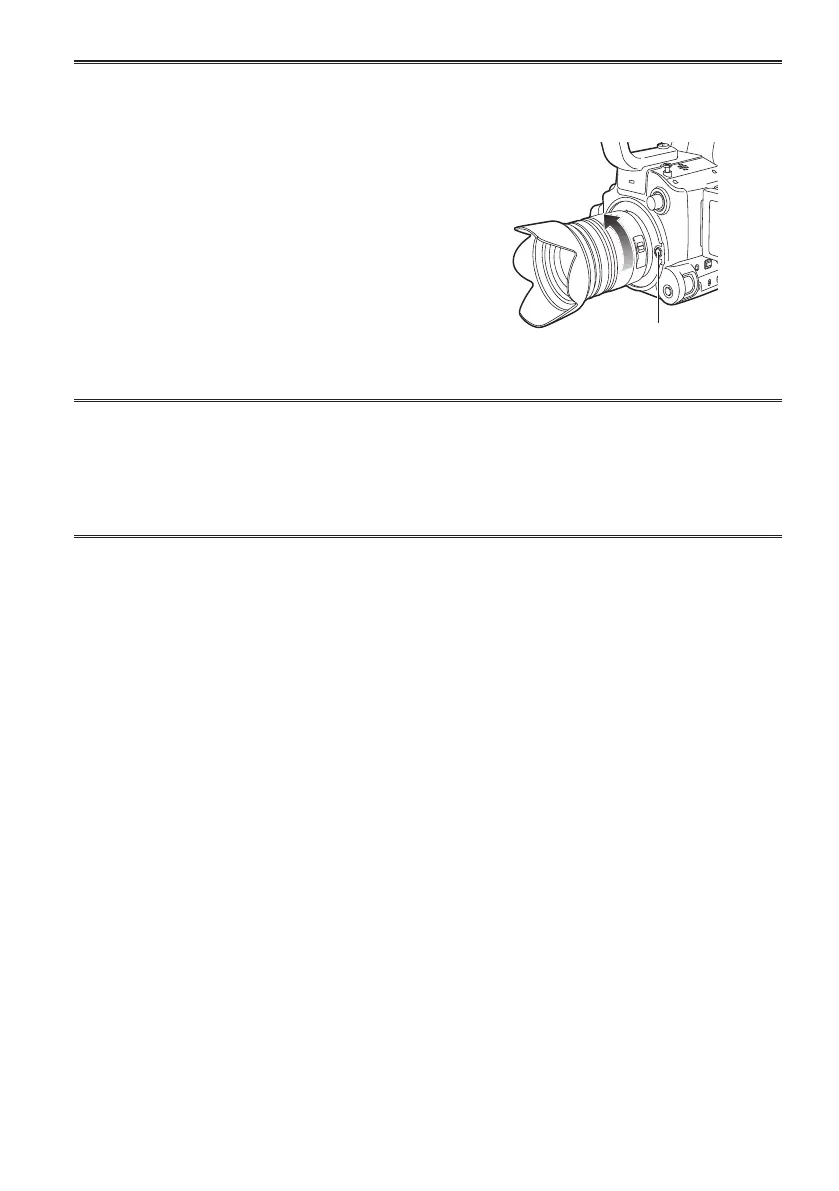
Detaching a lens from the camera ■
1
Attach the lens cap.
2
While pressing the lens detachment button, turn the
lens in the direction indicated by the arrows until it
stops, and detach.
3
Attach the body cap.
Lens detachment
button
Ensure that the body cap is attached to prevent dust or •
dirt from entering the camera.
To prevent damage to the lens connection, be sure to •
attach the lens rear cap.
When using lenses other than those conforming to the Micro Four Thirds and Four Thirds standard, •
see the LENS CHECK item in the OTHER FUNCTIONS screen of MENU settings.
Change lenses in a place that is relatively free of dust and dirt.•
When the power switch is [OFF] or when carrying the camera, attach the lens cap to prevent damage •
to the surface of the lens.
Be careful not to misplace the body cap, lens cap, or lens rear cap.•
Enabling Image Stabilization
■
Image Stabilization can be enabled with lenses equipped with OIS.
Set the OIS switch of the lens to [ON]
Setting the OIS switch to [OFF] is recommended when using a tripod.
Use the OIS switch on the camera if a lens has an Image Stabilization function but does not have an •
OIS switch. If the lens has an OIS switch, the OIS switch on the camera is disabled.