Piping and Drainage
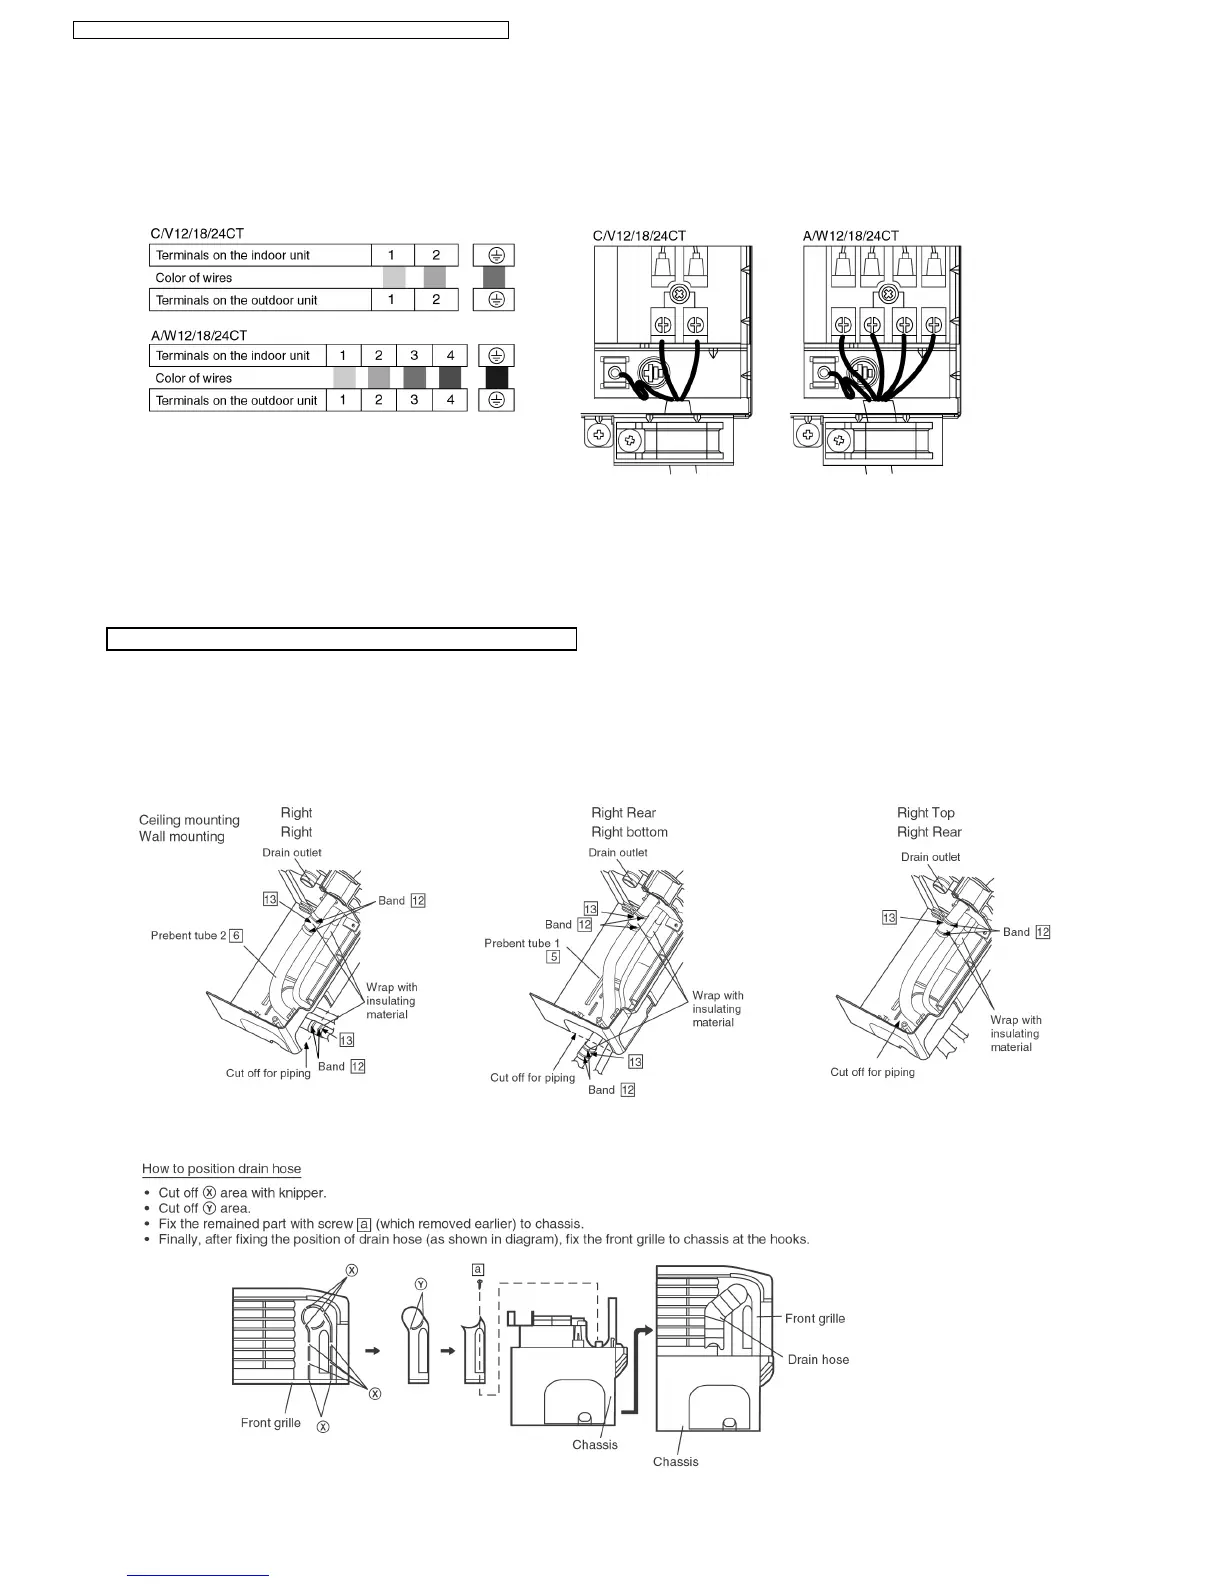
9.2.5. CONNECT THE CABLE TO THE INDOOR UNIT
1. Open the control box at the bottom end of the chassis and connect the cable through the hole.
•
Connect the wires to the terminals on the control board individually according to the outdoor unit connection.
•
Ensure the color of wires of outdoor unit and the terminal Nos are the same to the indoor’s respectively.
•
Secure the cable onto the control board with the holder (clamper).
•
Insert two tabs on the Side panel into two slots on the chassis, and secure it to the chassis with the screw.
9.2.6. PIPING AND DRAINAGE
•
Cut off the Chassis with a nipper according to the inner surface for the Pipings.
•
Align the center of the pipings and sufficiently tighten the flare nut with fingers.
•
Finally tighten the flare nut with torque wrench, ensure the direction for tightening follows the arrow on the wrench.
•
Wrap the tube joining areas with insulating material so that there are no gaps (if it overlaps, cut the excess material) refer
diagram in "Pipe formings, insulating and finishing".
•
Connect the drain hose (insulated) to the drain outlet.
44
CS-A12CTP CU-A12CTP5 / CS-A18CTP CU-A18CTP5 / CS-A24CTP CU-A24CTP5
 Loading...