47
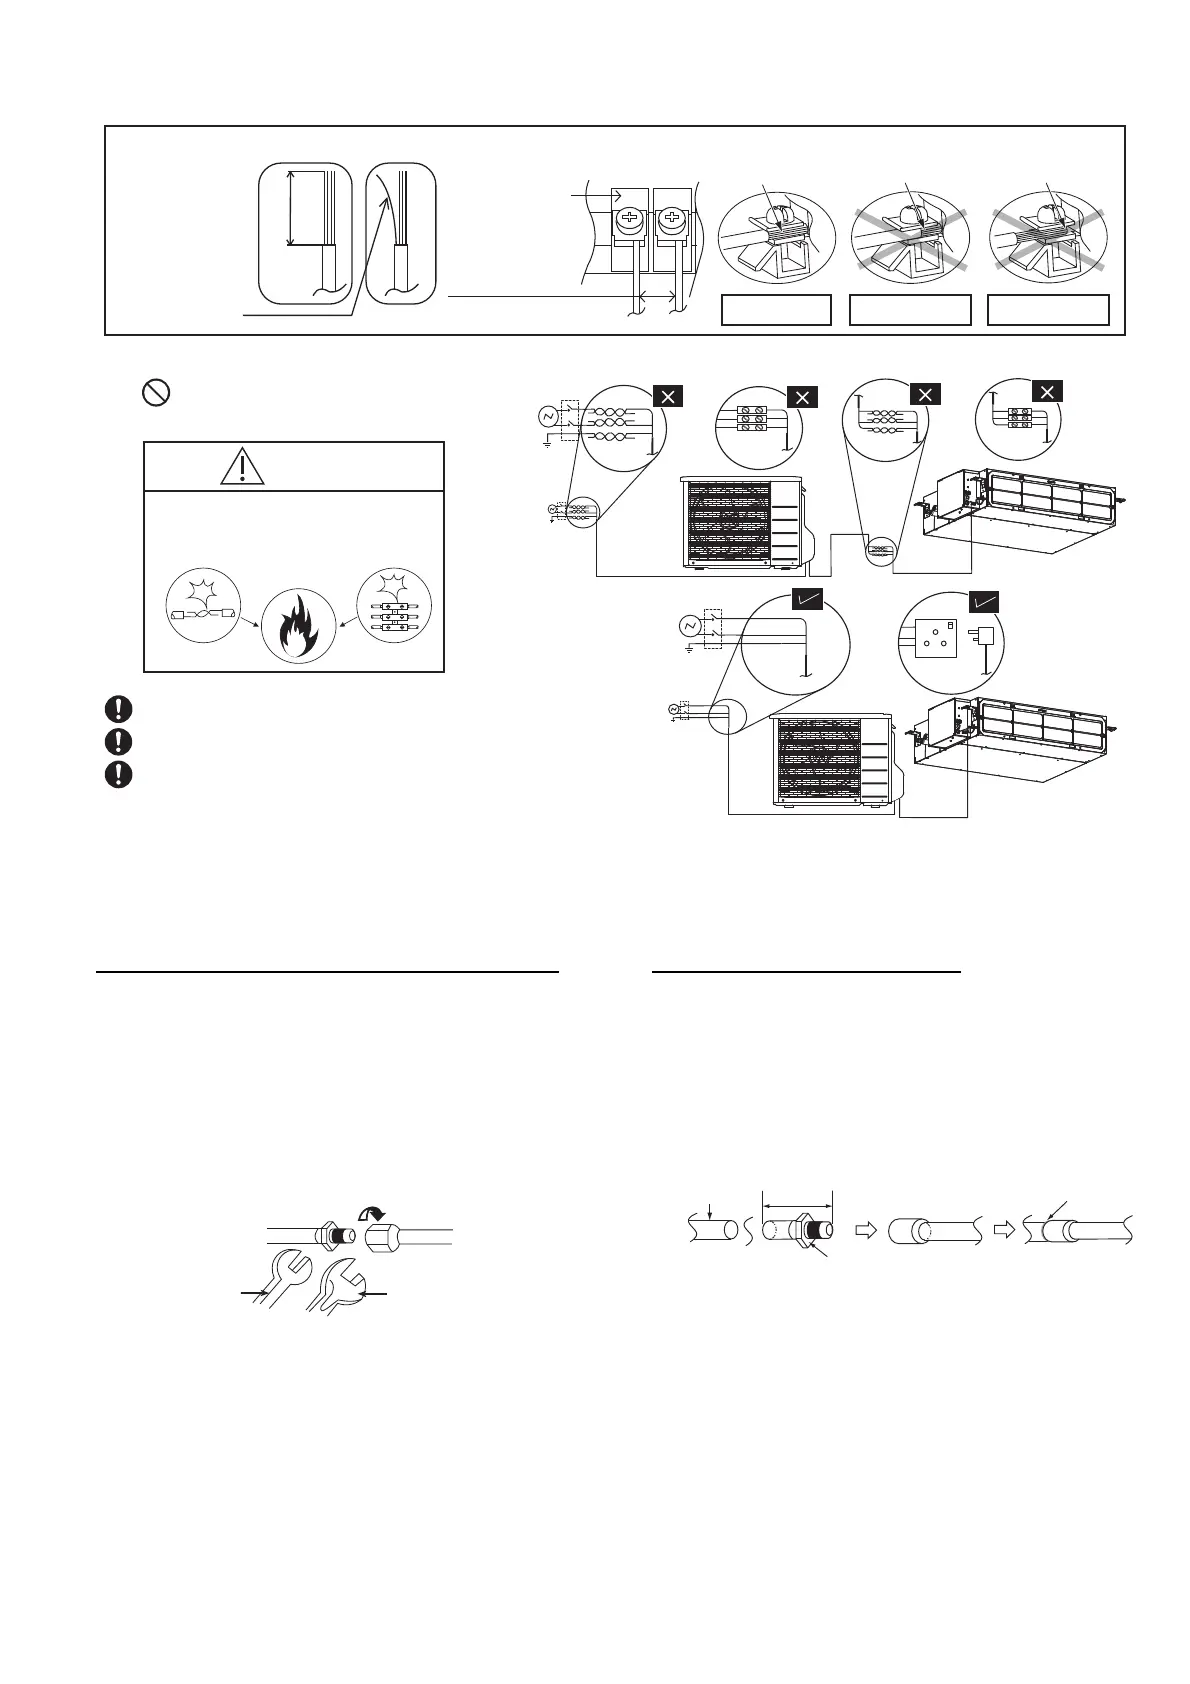
12.1.6.1 Wire Stripping and Connecting Requirement
WARNING
RISK OF FIRE
JOINING OF WIRES MAY CAUSE
OVERHEATING AND FIRE.
Do not joint wires
OR
OR
OR
Use complete wire without joining.
Use approved socket and plug with earth pin.
Wire connection in this area must follow to national
wiring rules.
Conductor
over inserted
Conductor
fully inserted
Conductor not
fully inserted
5 mm
or more
Indoor/outdoor
connection
terminal board
(gap between wires)
ACCEPT PROHIBITED PROHIBITED
Wire stripping
No loose strand
when inserted
10 ± 1 mm
12.1.7 Connect the Piping
12.1.7.1 Connecting the Piping to Indoor
For connection joint of all model (except R32 model)
Please make flare after inserting flare nut (locate at
joint portion of tube assembly) onto the copper pipe.
(In case of using long piping)
Connect the piping
Align the center of piping and sufficiently tighten
the flare nut with fingers.
Further tighten the flare nut with torque wrench in
specified torque as stated in the table.
Torque wrench
Spanner or
Wrench
For connection joint of R32 models
Decide the length.
Cut and remove the tube connectors at indoor
copper pipings (both gas and liquid piping) by
using pipe cutter. Remove burrs from cut edge.
Use pipe expander to expand the end of long
piping.
Align the center of piping and braze the piping
joints.
Indoor copper pipe
Tube connector
(40~50mm)
Brazing point
1. Cut and Remove 2. Expand long pipe 3. Braze both pipe
Braze the piping joints carefully so that the indoor
unit is not damaged by brazing flame.
If necessary, cover with wet clothes to prevent
parts unintentionally overburnt.

 Loading...