- 22 -
Press the Power Button on the Remote Control to select the Serviceman Adjustment .
For Adjustments:
CH
CH
PW
IMPORTANT NOTE:
Always Exit the Serviceman
Mode Following Adjustments.
CH
PW
CH
CH
CH
To S Items.
*NOTE
This registers are preset at the
factory, should not be changed.
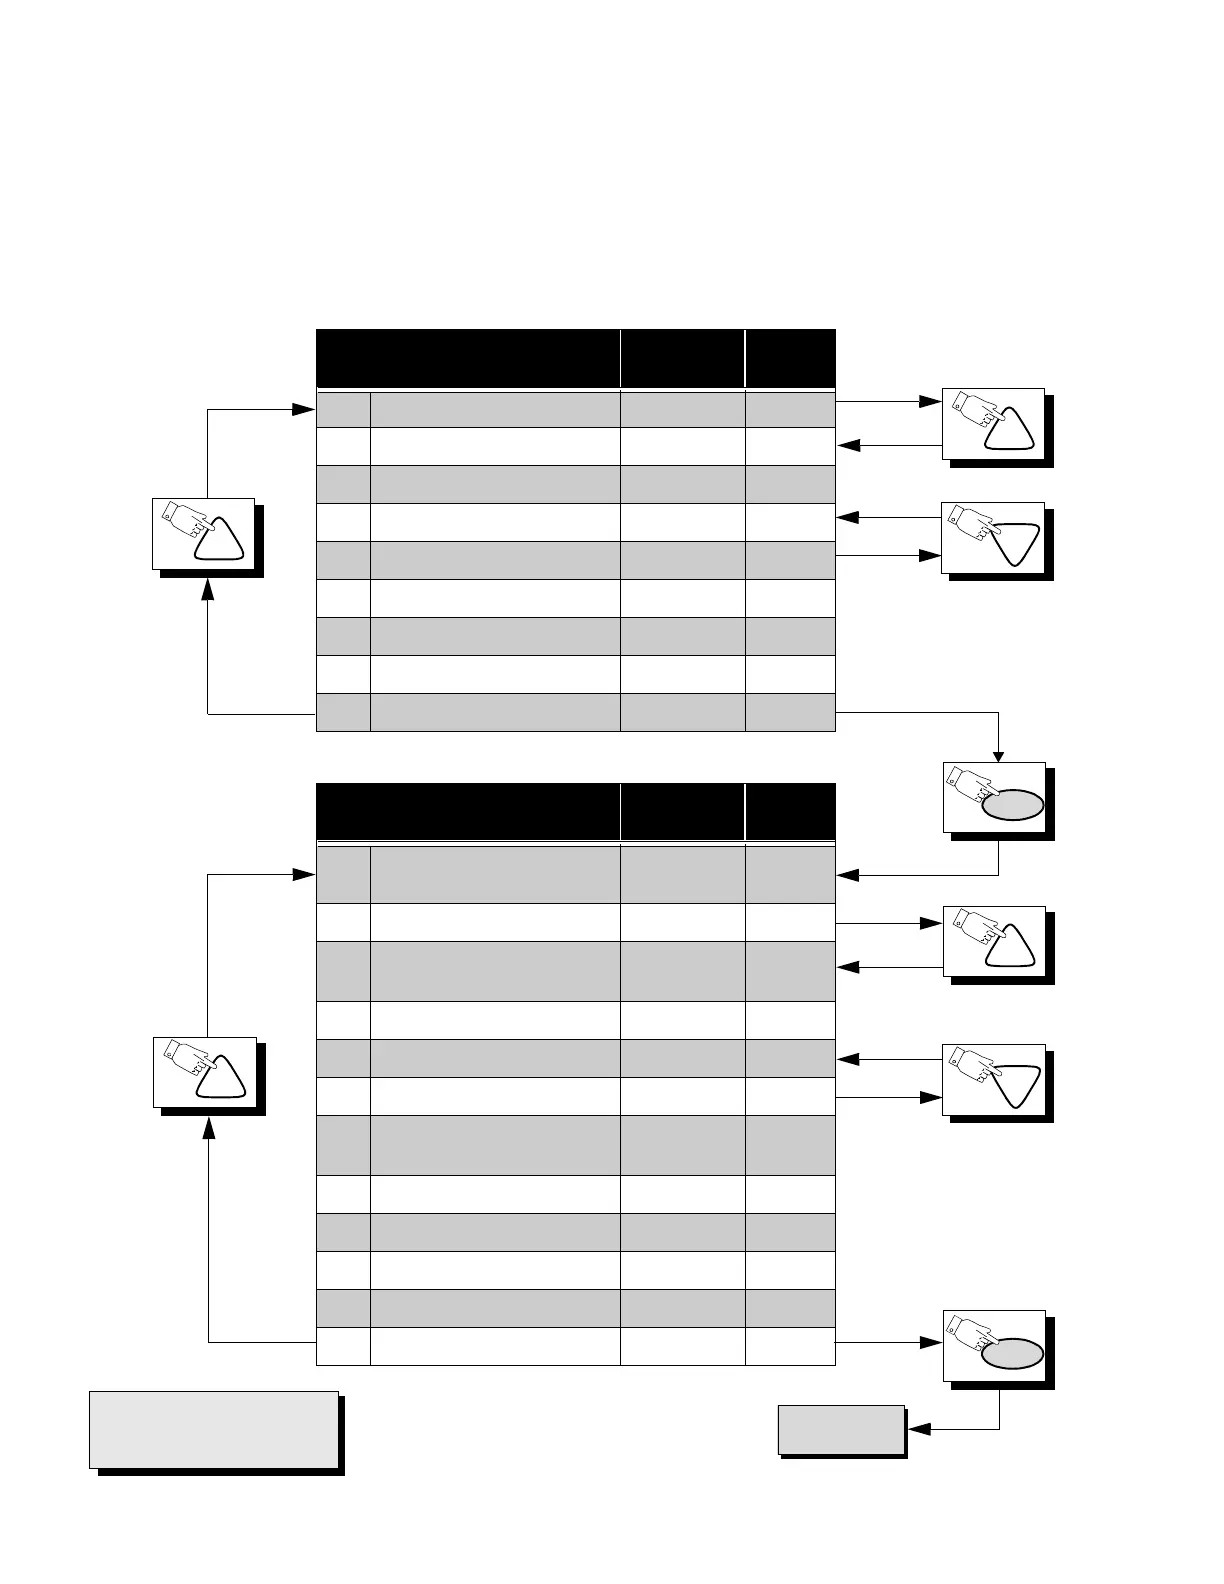
Sub-Data Adjustment Adj. Range
Default
Level
B0 SUB-COLOR 0 ~ 63 33
B1 SUB-TINT 0 ~ 63 33
B2 SUB-BRIGHTNESS 0 ~ 255 80
B3 SUB-PICTURE 0 ~ 63 34
B4* KILLER/ABL/GAMMA 0 ~ 7 5
B5 VIDEO ADJUSTMENT 0 ~ 15 8
B6 AUDIO ADJUSTMENT 0 ~ 31 16
B7 V-SIZE 0 ~ 63 29
B8 S V-SIZE 0 ~ 63 12
Cut-Off Adjustment Adj. Range
Default
Level
C0 CUT-OFF R
0 ~ 1
0 ~ 255
0
128
C1 CUT-OFF G 0 ~ 255 64
C2 CUT-OFF B
0 ~ 1
0 ~ 255
0
128
C3 DRIVE R 0 ~ 127 64
C4 DRIVE B 0 ~ 127 64
C5 YNR SWITCH 0 ~ 1 0
C6 AFT
0 ~ 1
0 ~ 255
1
120
C7 RF-AGC 0 ~ 127 64
C8 YNR VIDEO ADJUSTMENT 0 ~ 7 0
C9 HORIZONTAL CENTER 0 ~ 31 11
Ca BEAM LIMIT 0 ~ 7 4
Cb* VCJ TEST H 0 ~ 2 0
1.Press Channel Up/Down on the
Remote Control to select one of
the available Service Adjustments
(a in Fig. 27).
Note: Write Down the original
value set (b in
Fig. 27
) for
each address before
modifying anything. It is
easy to erroneously adjust
the wrong item.
2.Press Volume Up/Down on the
Remote Control to adjust the
level of the selected Service
Adjustment (b in Fig. 27).
 Loading...