VQT2J45
31
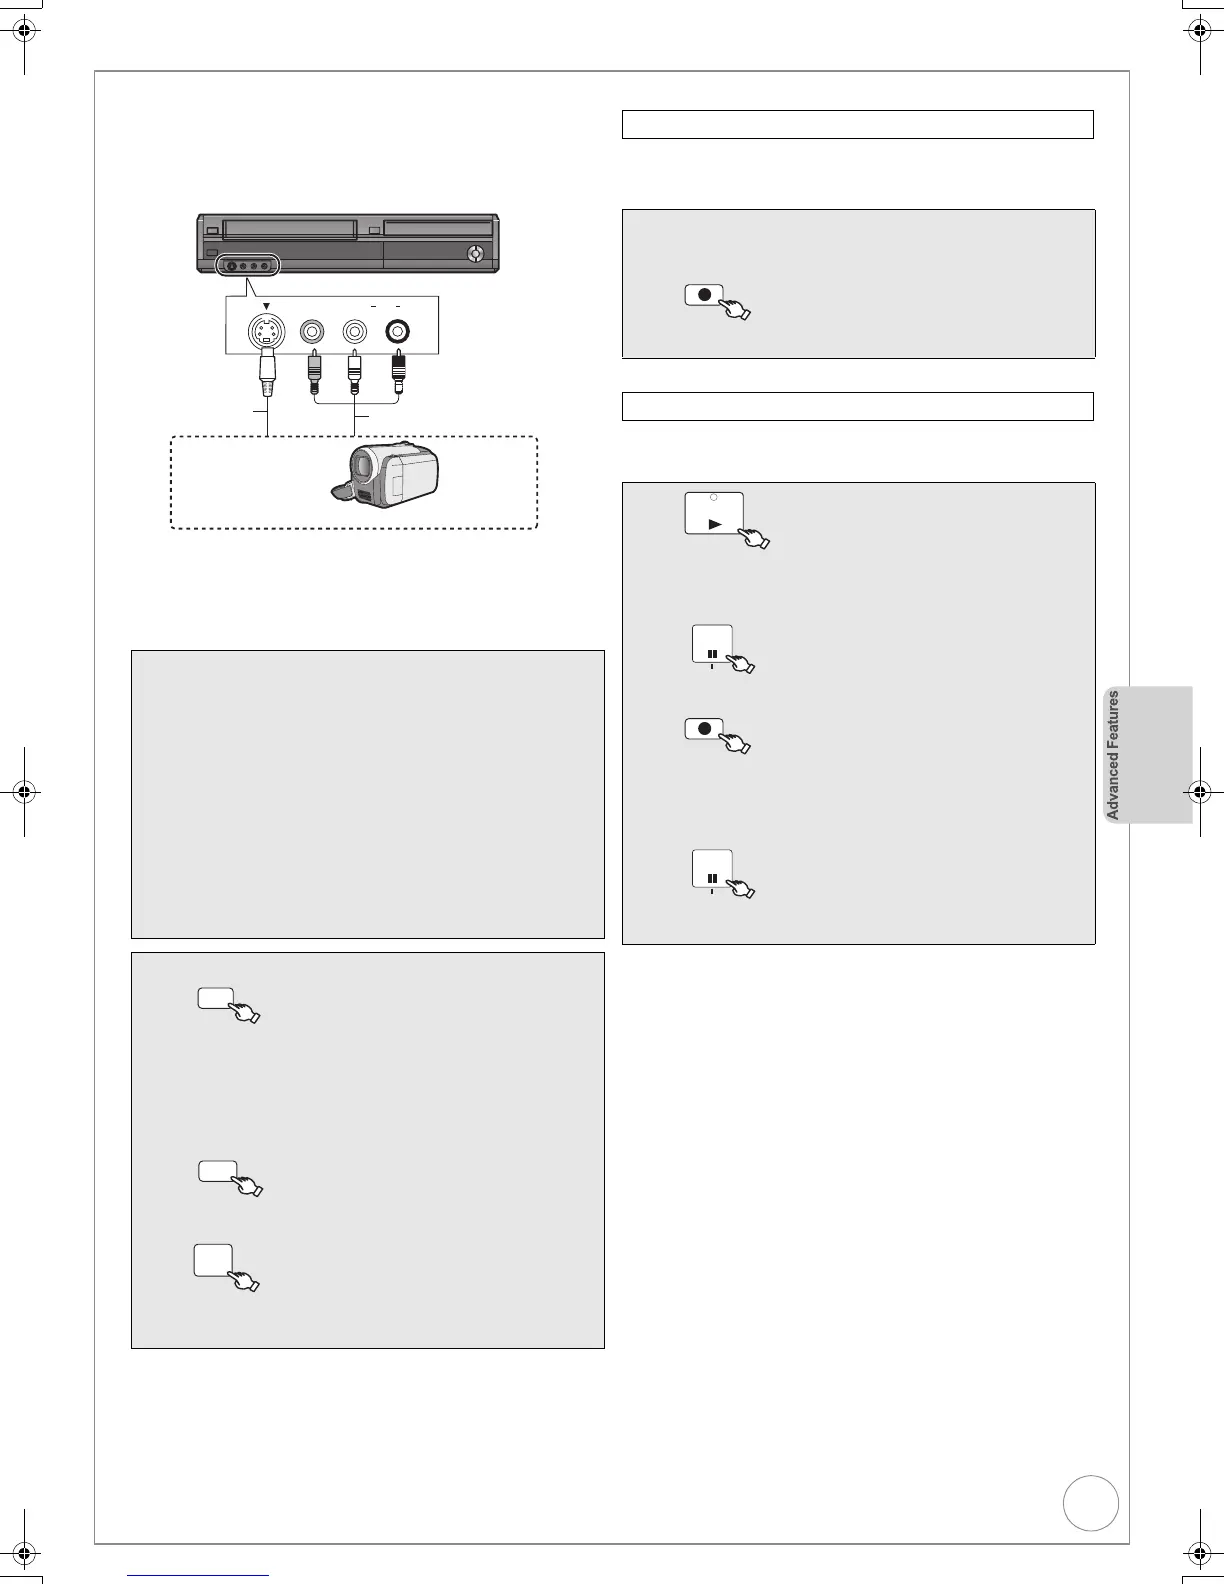
Recording from an External Device
[HDD] [RAM] [- R] [-RW‹V›] [+R] [+RW] [VHS]
≥Turn off the unit and other video equipment before connecting.
≥Refer to “Adding a VCR: Connecting to a Television and a Video
Cassette Recorder” when connecting to the AV2 input terminals on
the rear panel. (> 86)
§1
You can get a sharper, clearer picture by connecting with an S Video
cable instead of the yellow video cable.
§2
Connect to terminals of the same colour.
≥If the audio output of the external device is monaural, connect to L/
MONO on the AV3 input terminals at the front.
[HDD] [RA M] [- R] [-RW‹V›] [+R] [+RW]
Perform steps 1 - 3 (> left).
[VHS]
Perform steps 1 - 3 (> left).
Tips
To skip unwanted parts
Press [;] to pause recording. (Press again to restart recording.)
To stop recording
Press [∫].
≥You can also connect to the AV2 on the rear.
[HDD] [RAM] [- R] [-RW‹V›] [+R] [+RW]
≥Using Flexible Recording (> 29), you can record the content of a
video cassette (approx. 1–8 hours) to a 4.7 GB disc with the best
possible quality of recording without wasting disc space.
Notes
≥Almost all videos and DVD-Video on sale have been treated to
prevent illegal copying. Any software that has been so treated cannot
be recorded using this unit.
≥When timer recording starts while recording from an external device,
timer recording takes priority and recording from the external device
stops.
≥If video is copied from another piece of equipment to this unit, then the
video quality will be degraded.
Preparation:
≥ Turn on the unit.
≥ [RAM] If the disc is protected, release protection
(> 76).
≥ [VHS] Ensure accidental erasure tab is intact.
≥ When the output signal from the external device is
NTSC, change the “TV System” to “NTSC” in the
Setup menu (> 82).
This unit cannot record NTSC signals to discs that
already have PAL signal recordings. (However, both
types of programmes can be recorded onto the HDD
or VHS.)
≥ To reduce noise in input from an external device, set
“Copy NR” to “On” in the on-screen display (> 75).
1
to select the HDD, DVD or
VHS drive.
– If you selected the DVD or VHS drive, insert a disc
or video cassette with enough remaining blank
space (> 89).
2
to select the recording
mode (> 27).
3
to select the input where
your external device is connected.
– Front panel inputs are AV3.
S VIDEO
AV3 IN
VIDEO
/MONO
AUDIO
R
L
S VIDEO
IN 2
VIDEO
/MONO
AUDIO
RL
Audio/video cable
§2
S Video
cable
§1
Other video equipment
Connect to Audio/Video output terminals.
This unit
DRIVE
SELECT
REC MODE
SELECT
INPUT
Recording to HDD or DVD
4
Start play on the external device.
5
at the point you want to start
recording.
Recording to VHS
4
to bring the tape to the
point at which you want to start
recording from.
5
when you reach that point.
6
to put the unit in recording
standby.
7
Start play on the external device.
8
to start recording at the
point you desire.
REC
PLAY
PAUSE
PAUSE LIVE TV
REC
PAUSE
PAUSE LIVE TV
DMR-EX99VEB_VQT2J45.book 31 ページ 2010年1月7日 木曜日 午後1時41分
 Loading...