86
VQT2J45
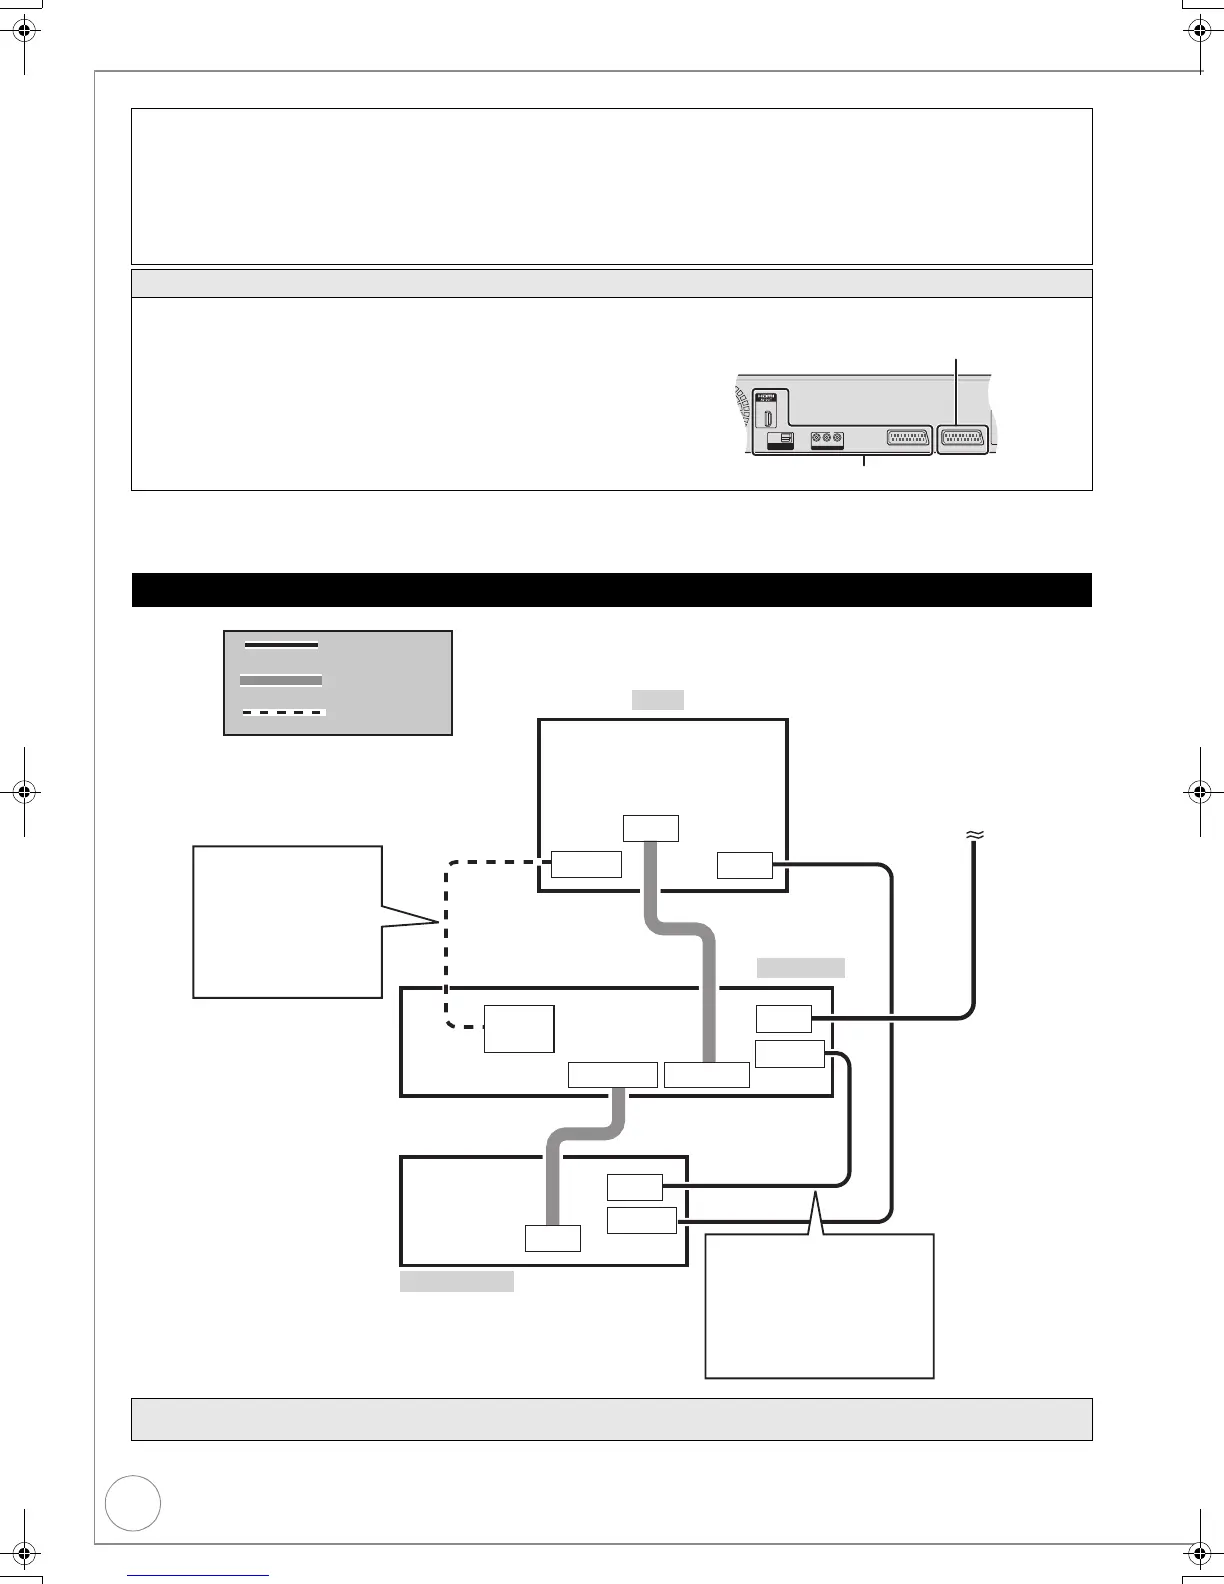
Additional Connections
≥
Before connection, turn off the mains for all connected equipment and read the appropriate operating instructions.
Connect AC mains lead only after all other connections are complete.
BE SURE TO READ THE CAUTION FOR AC MAINS LEAD ON PAGE 3.
Using a fully wired 21-pin Scart cable
– You can use a variety of Q Link functions by connecting the unit to a Q Link compatible television (> 48).
– You can enjoy high-quality viewing by connecting the unit to an RGB compatible television.
“AV1 Output” in the Setup menu is set to “RGB 1” or “RGB 2” (> 82).
Make “AV2 Input” settings in the Setup menu (> 82).
Use of the RF coaxial cable
≥ Keep the RF coaxial cables as far away as possible from other cables.
≥ Do not roll up the RF coaxial cables.
HDD/DVD output and HDD/DVD/VHS output
The unit has HDD/DVD/VHS common out terminals and HDD/DVD priority out terminals.
≥ The HDD/DVD priority out terminals can also output the VHS signal.
However this is not possible during HDD/DVD recording or HDD/DVD timer
recording.
Adding a VCR: Connecting to a Television and a Video Cassette Recorder
To record from a VCR
Refer to “Recording from an External Device” (> 31).
RFRF
ININ
RFRF
OUTOUT
OPTICAL
DIGITAL AUDIO OUT
(PCM/BITSTREAM)
OUT
VIDEO
AV2 (EXT) AV1 (TV)
R-AUDIO-L
HDD/DVD/VHS common out
HDD/DVD priority out
RF IN
AV
RF IN
RF IN
HDMI AV
OUT
HDMI IN
RF OUT
RF OUT
AV
This unit
TV
VCR
HDMI cable
21-pin Scart cable
RF coaxial cable
AV1(TV)
AV2 (EXT)
The RF coaxial cable (included)
cannot be used for showing
pictures from the unit. The unit
must be connected using another
method, e.g. 21-pin Scart cable to
show pictures from the unit
on the television set.
To the aerial
You can enjoy
high-quality
picture by adding
the HDMI cable
connection (> 12)
DMR-EX99VEB_VQT2J45.book 86 ページ 2010年1月7日 木曜日 午後1時41分

 Loading...