22
RQT8033
Getting started
STEP 3
Set up to match your television and remote control
Choose the setting to suit your television and preference.
1 While stopped
Press [FUNCTIONS].
2 Press [3, 4] to select “To Others”
and press [ENTER].
3 Press [3, 4] to select “SETUP” and
press [ENTER].
4 Press [3, 4] to select “Connection”
and press [1].
5 Press [3, 4] to select “TV Aspect”
and press [ENTER].
6 Press [3, 4] to select the TV aspect
and press [ENTER].
≥16:9: 16:9 widescreen television
≥4:3: 4:3 aspect television
[HDD] [RAM] Titles are recorded as they appear on screen.
[DVD-V] Video recorded for a widescreen is played as Pan
& Scan (unless prohibited by the producer of the
disc) (➡ 69).
≥Letterbox: 4:3 aspect television
Widescreen picture is shown in the letterbox style (➡ 69).
You can enjoy progressive video by connecting this unit’s
COMPONENT VIDEO OUT terminals to an LCD/plasma television
or LCD projector compatible with progressive scan (➡ 69).
1 While stopped
Press [FUNCTIONS].
2 Press [3, 4] to select “To Others”
and press [ENTER].
3 Press [3, 4] to select “SETUP” and
press [ENTER].
4 Press [3, 4] to select “Connection”
and press [1].
5 Press [3, 4] to select “AV1 Output”
and press [ENTER].
6 Press [3, 4] to select “Video (with
component)” or “S Video (with
component)” and press [ENTER].
7 Press [3, 4] to select “Progressive”
and press [ENTER].
8 Press [3, 4] to select “On” and
press [ENTER].
Output becomes progressive.
[Note]
≥When connected to a regular television (CRT: Cathode ray tube)
or a multi system television using PAL mode, even if it is
progressive compatible, progressive output can cause some
flickering. Turn off “Progressive” if this occurs (➡ 39).
≥Picture will not be displayed correctly if connected to an
incompatible television.
≥If the unit is connected to the television through VIDEO OUT, S
VIDEO OUT or AV1 terminal, output will be interlace irrespective
of the settings.
To return to the previous screen
Press [RETURN].
To exit the screen
Press [RETURN] several times.
Selecting television type and aspect
DVD
HDD
DVD
SD
1
2 3
4 5 6
7
8
9
P
R
O
G
/
C
H
E
C
K
D
I
S
P
L
A
Y
㧿
Í
Í
DIRECT TV REC
AV
CH
VOLUME
TV
CH
VIDEO Plus+
MANUAL SKIP
0
INPUT SELECT
SKIP
SLOW/SEARCH
STOP
PAU SE
PLAY/x1.3
T
I
M
E
S
L
I
P
D
I
R
E
C
T
N
A
V
I
G
A
T
O
R
SUB MENU
RETURN
STATUS
CREATE
CHAPTER
ERASE
REC
REC MODE
EXT LINK
TIMER
AUDIO
DVD/TV
ENTER
CANCEL
T
O
P
M
E
N
U
F
U
N
C
T
I
O
N
S
A
B C
3,4,2,1
ENTER
FUNCTIONS
RETURN
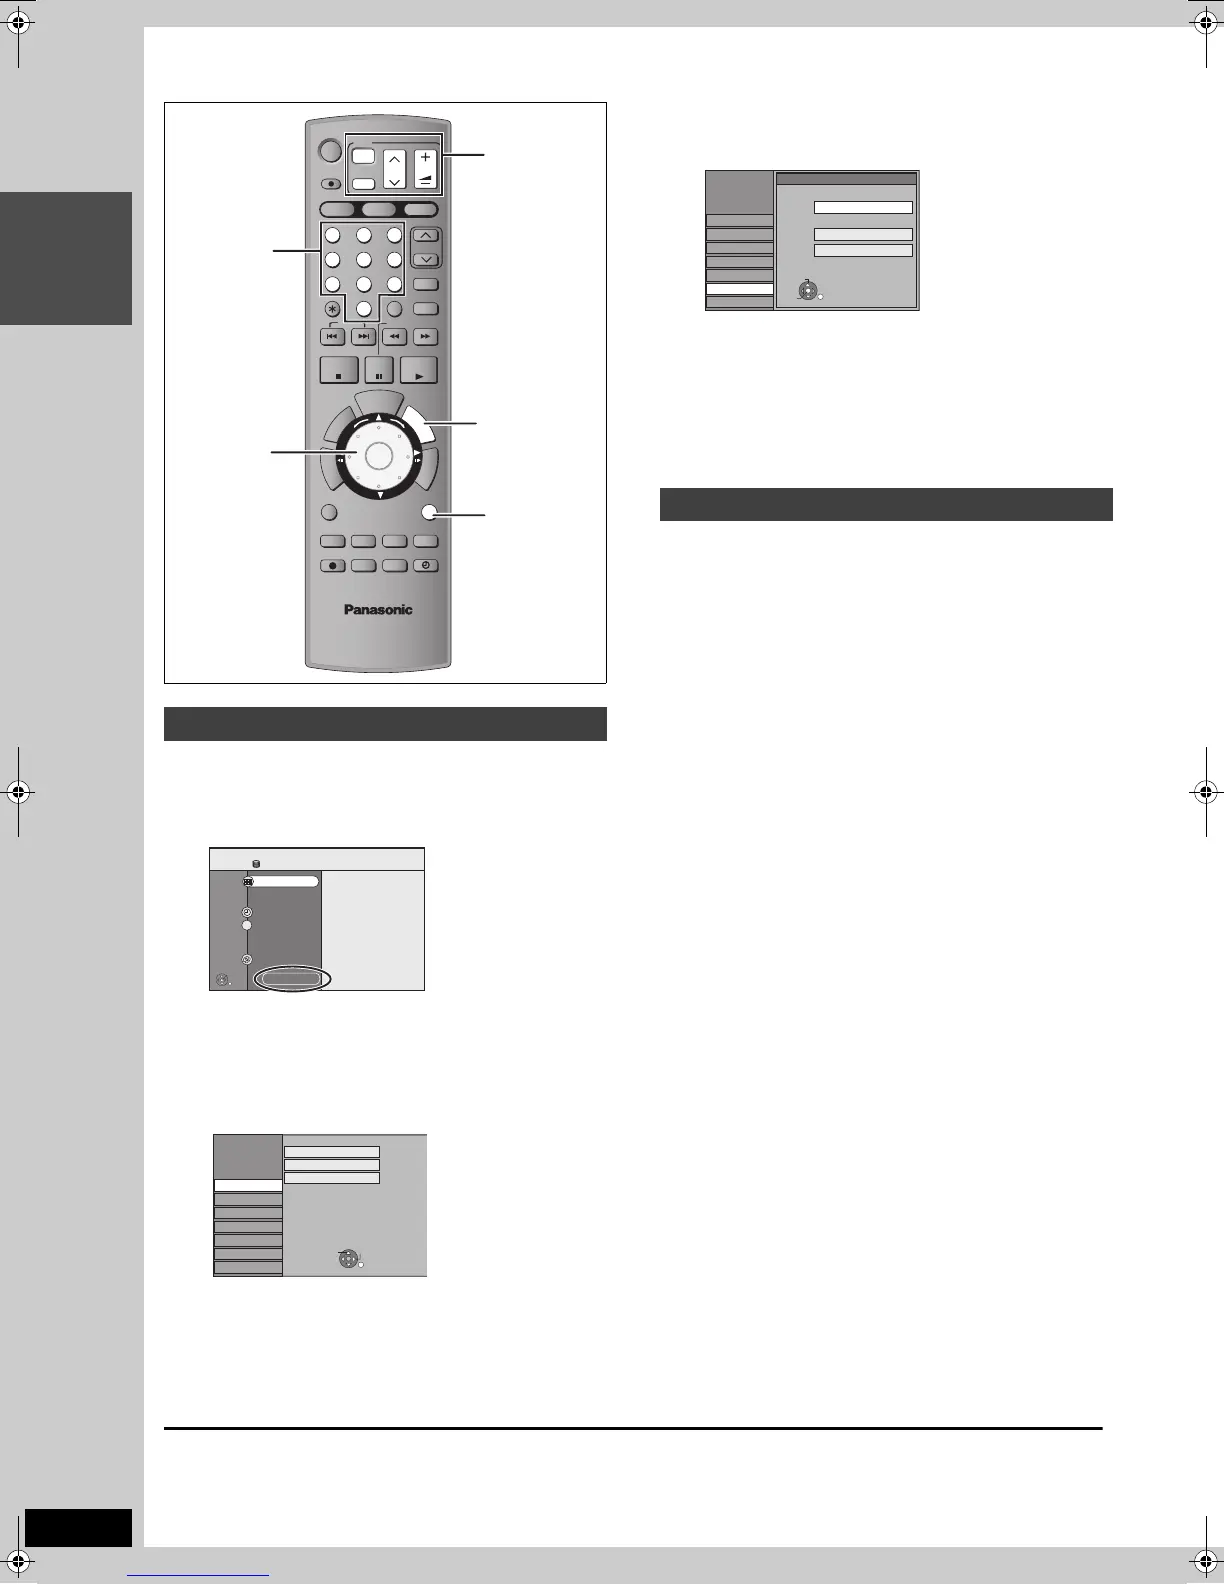
TV operation
buttons
Numbered
buttons
Disc Remaining
FUNCTIONS
30:00 SP
HDD
HDD
Dubbing
Recording
Playback
To Others
DIRECT NAVIGATOR
DUBBING
ENTER
RETURN
1
2
3
TIMER RECORDING
VIDEO Plus+
SETUP
Disc
Picture
Sound
Display
Connection
Tuning
Manual
Auto-Setup Restart
Download from TV
RETURN
TAB
SELECT
Others
To enjoy progressive video
SETUP
Disc
Picture
Sound
Display
TV Aspect
16:9
4:3
Letterbox
Connection
16:9 WIDE TV
4:3 TV
ENTER
RETURN
SELECT
Tuning
Others
EH50.book Page 22 Tuesday, July 5, 2005 11:03 AM
 Loading...