30
31
RQT5897RQT5897
For Your Reference
For Your Reference
Connecting other equipment
∫ You can connect this unit to the following types of equipment to enhance your experience.
Refer to the relevant pages for connection. Initial settings that need to be changed are indi-
cated in inverted commas (“ ”).
What you want to do
Connect to a
television to enjoy a
larger screen
Enjoy surround
sound with 3 or more
speakers
Connect 2 speakers
to enjoy stereo
Record to a cassette
or MD deck
Use headphones
View the images from
a video camera on
this unit’s LCD
How to accomplish it
Use the unit’s built-in decoder
and connect to an amplifier.
Connect digitally and use the
decoder in another piece of
equipment.
Connect to a mini-system or
amplifier (including Dolby Pro
Logic amplifiers).
Connect digitally to a mini-
system or amplifier.
Analogue recording
Digital recording
Digital connection
Analogue connection
Digital connection
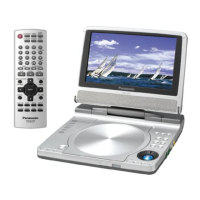
DVD-LV75
Analogue connection
Initial settings
“5 TV Aspect”
“7 Speaker Setting”
“7 Speaker Setting”
“6 Digital Audio
Output”
“7 Speaker Setting”
“6 Digital Audio
Output”
“7 Speaker Setting”
“6 Digital Audio
Output”
DVD-LV75
DVD-LV75
DVD-LV75
DVD-LV75
Reference
page
32
34
35
36
37
36
37
31
31
Note
Close the LCD to conserve power when you have connected this unit to another monitor and speakers.
The LCD and speakers are off while the LCD is closed.
Preparations
≥
Ensure that this unit and other equipment to be connected are set to the standby mode or are off, and
disconnect the AC power supply cords, before commencing connection.
≥Read through the instructions before connecting other equipment.
Using headphones
Preparations
≥Turn down the volume before connection, and then adjust the level.
≥Headphones with a 3.5 mm (
1
/8q) stereo plug can be connected.
Note
When headphones are connected, no sound will be output from the unit’s stereo speakers.
Watching video from a video camera
(DVD-LV70 and DVD-LV55 have only one AUDIO terminal.)
1 Connect the camera to this unit.
2 Press [IN/OUT] to switch to input mode.
“LINE-IN” lights on the unit’s display.
Note
≥“LINE-IN” mode is cancelled when this unit is turned off. Press [IN/OUT] again so “LINE-
IN” lights on the display again.
≥Auto power-off function (➡ page 13) does not work while the “LINE-IN” is on. Turn the unit
off when you have finished using it.
This figure shows DVD-LV75.
 Loading...