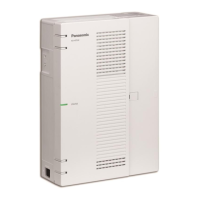
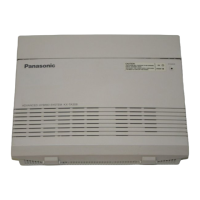
3.8 Starting the PBX
System Initialisation Procedure
The system can be reset to its original default state by pressing the Initialize switch while turning the system pow
The system initialisation startup operation is as follows.
・Turn on the system power and press and hold the Initialize switch (for 3 seconds).
1. Initialize switch press and hold (3 seconds) recognised: Green (high-speed flashing at 120 flashes/minute)
2. Initialize switch press and hold (3 seconds) confirmed: Amber (flashes 3 times)
3. Initialise process and system startup process: Green (low-speed flashing at 60 flashes/minute)
・When system initialisation is complete, operation begins (green LED illuminated).
Performing a system initialisation returns the system data to its default settings.
The memory state is also cleared.
Initialize switch
STATUS Indicator
Power switch
Note
• After the PBX is initialised, you can restore system data to the PBX that has been backed up earlier.
For details about backin
u
and restorin
s
stem data, refer to "Maintenance-
2-3
S
stem Control-
S
stem Data Backu
& Restore" in the Pro
rammin
Item List." in the Pro
rammin
Item List.
• After the PBX is initialised, you must set up the mandatory settings required for the PBX with Easy
Setu
Wizard. For details refer to "Connectin
to Web Maintenance Console" and "3.9.4.1 Eas
Setu
Wizard".
• When a Backup Batteries is connected, make sure it is started as instructed in the documentation
for the Backup Batteries.
Confirming the Trunk Connection
After the PBX starts up, programme the PBX and connect trunks to the PBX.
To confirm that the trunks are successfully connected, dial [*] [3] [7] + trunk number (3 digits) on an IP
telephone, or press the IP/DPT/APT telephone’s S-CO button. You will hear a dial tone if the trunk is available
and connected.
 Loading...