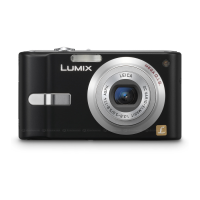
Do you have a question about the Panasonic Lumix DMC-FX550 and is the answer not in the manual?
| Brand | Panasonic |
|---|---|
| Model | Lumix DMC-FX550 |
| Category | Digital Camera |
| Language | English |
Overview of how to record and play back pictures with the camera.
Identifies and explains the various parts and buttons of the camera.
Instructions on operating the camera using the touch-sensitive LCD monitor.
Examples of operations possible by touching the LCD monitor for recording and playback.
Instructions on how to properly charge the camera's battery before first use.
Procedure for correctly inserting and removing memory cards and the battery.
Guide to setting the camera's internal clock and date for accurate recording.
Instructions on how to switch between different recording modes like Intelligent Auto.
How to use the camera's automatic mode for easy picture taking.
Guide to using Programme AE mode for manual control over settings.
How to use optical, extra optical, and digital zoom for framing shots.
Procedure for deleting single or multiple pictures from the camera.
Explanation of the LCD monitor's display modes and indicators during recording.
How to select and use the camera's built-in flash for various shooting conditions.
Techniques for capturing detailed close-up shots of small subjects.
Using touch panel to set focus and exposure on a specific subject.
Controlling aperture priority for depth of field effects in photography.
Setting shutter speed priority to control motion blur and capture action.
Manual control over both aperture and shutter speed for complete exposure control.
Adjusting exposure compensation to correct under or overexposed images.
Using auto bracket for exposure variations or colour bracket for colour effects.
Selecting scene modes to optimize camera settings for specific shooting environments.
Mode for taking portraits of people outdoors, improving skin tones.
Mode for softening skin texture in portraits, effective for chest-up shots.
Scene mode for recording subjects as slim or stretched with smooth skin.
Mode for taking pictures of oneself, utilizing the self-timer and focus assist.
Mode for capturing wide landscape views with optimal settings.
Mode to assist in creating panorama images by guiding shot alignment.
Mode for capturing fast-moving subjects like sports events.
Mode for taking portraits in low light, ensuring real-life brightness.
Mode for capturing vivid nightscapes with optimized settings.
Mode for photographing food with natural hues under ambient lighting.
Mode for photographing pets, allowing birthday and name settings.
Mode for minimizing subject jitter and capturing images in dimly lit rooms.
Mode for shooting rapid movement or decisive moments with continuous shooting.
Mode for continuous shooting with flash, useful in dark places.
Mode for capturing vivid pictures of starry skies or dark subjects with long exposures.
Mode for capturing beautiful pictures of fireworks exploding in the night sky.
Mode for capturing vivid pictures of sunset views, emphasizing red colors.
Mode for vivid blue pictures of sea/sky and preventing under exposure in sunlight.
Mode for capturing snow scenes as white as possible.
Mode for taking pictures through an airplane window.
Picture taken darker with soft focus around the subjects.
Picture taken with a grainy texture as though blasted with sand.
Mode for recording motion pictures with audio, including setting recording quality.
Using the camera's face recognition to automatically focus and adjust exposure.
Recording vacation dates to track which day pictures were taken.
Setting world time to display and record local times at travel destinations.
Setting the number of pixels for the pictures to adjust detail and print size.
Setting the compression rate for pictures, balancing quality and file size.
Selecting the aspect ratio of pictures to suit printing or playback.
Automatically setting ISO sensitivity and shutter speed to minimize jitter.
Setting the light sensitivity (ISO sensitivity) for taking pictures in different lighting.
Setting the upper limit for ISO sensitivity within the available range.
Adjusting white balance to match the light source for accurate color reproduction.
Manually setting color temperature for natural pictures in different lighting conditions.
Selecting the focusing method to suit subject position and number.
Changing the optical measurement method to measure brightness for exposure.
Automatically adjusting contrast and exposure for scenes with brightness differences.
Taking pictures continuously by holding the shutter button pressed.
Enlarging subjects further than optical zoom using digital magnification.
Setting color effects for recorded pictures like B/W, Sepia, Cool, Warm.
Adjusting picture quality by modifying contrast, sharpness, saturation, and noise reduction.
Automatically compensating jitter during picture taking for stable images.
Setting minimum shutter speed to brighten dark places or reduce subject blur.
Recording audio simultaneously with the image for memos or commentary.
Using the AF assist lamp to help focus in low light conditions.
Playing back pictures sequentially with music and adjustable intervals.
Displaying multiple pictures on the screen simultaneously for comparison.
Viewing pictures organized and displayed by their recording date.
Searching and playing back pictures grouped by category or marked as favorites.
Using touch panel for favorite settings, editing, and deleting pictures easily.
Reducing picture size for email or website use, optimizing for smaller dimensions.
Enlarging and clipping the important part of a recorded picture.
Adjusting the minute tilting of an image for a level horizon.
Adding text comments or titles to pictures.
Stamping recording date/time, age, travel date, or title onto pictures.
Setting protection for pictures to prevent accidental deletion.
Procedure for deleting selected pictures from the camera.
Accessing editing functions like resize, trimming, leveling, and title edit.
Automatically displaying pictures vertically if recorded holding the camera vertically.
Selecting pictures and settings for printing via PictBridge or photo printing stores.
Adding audio commentary to pictures after they have been taken.
Clearing face recognition information for selected images.
Copying picture data between the camera's built-in memory and a memory card.
Connecting the camera to a PC via USB for transferring pictures and using software.
Connecting to a PictBridge printer to select and print pictures directly from the camera.
Procedure for selecting one picture and initiating printing via PictBridge.
Configuring print settings like date printing and number of copies.
Selecting the desired paper size for printing.
Connecting the camera to a TV using AV cables for playback on a larger screen.
Connecting the camera to a TV via component cables for high-quality video output.
Explanation of icons and information displayed on the LCD screen during recording.
Details on various indicators and settings displayed on the LCD during recording.
Explanation of icons and information displayed on the LCD screen during playback.
Important warnings and precautions for safe and optimal camera operation.
Instructions for cleaning the camera body, lens, and LCD monitor.
Information on battery care, disposal, and precautions for handling.
Guidelines for handling memory cards and protecting them from damage.
Explanation of common confirmation and error messages displayed on the camera screen.
Troubleshooting common issues related to the camera's battery and power.
Steps to resolve issues when the camera does not turn on or operate.
Solutions for problems preventing pictures from being recorded on the camera.
Steps to correct pictures that are recorded too bright or too dark.
Resolving focus issues to ensure sharp and clear pictures.
Addressing issues with rough textures or noise appearing in recorded pictures.
Resolving problems where motion picture recording stops unexpectedly.
Adjusting the LCD monitor brightness for optimal viewing.
Troubleshooting issues related to the camera's flash not activating or activating multiple times.
Resolving playback issues like rotated images, unplayable files, or missing pictures.
Steps to take when pictures fail to play back on the camera or card.
Troubleshooting issues when connecting the camera to a TV, PC, or printer.
Steps to fix issues preventing picture transfer from camera to PC.
Instructions for changing the camera's language setting back to a readable one.
Resolving issues where the camera's clock setting is lost or reset.
Addressing limitations when the zoom function does not reach maximum magnification.
Tables showing the approximate number of pictures and recording times based on settings.
