5.5 Connect the power plug and grounding wire.
● Ask a service person to do the grounding work.
● In case of a 2-pin power cord, establish a ground.
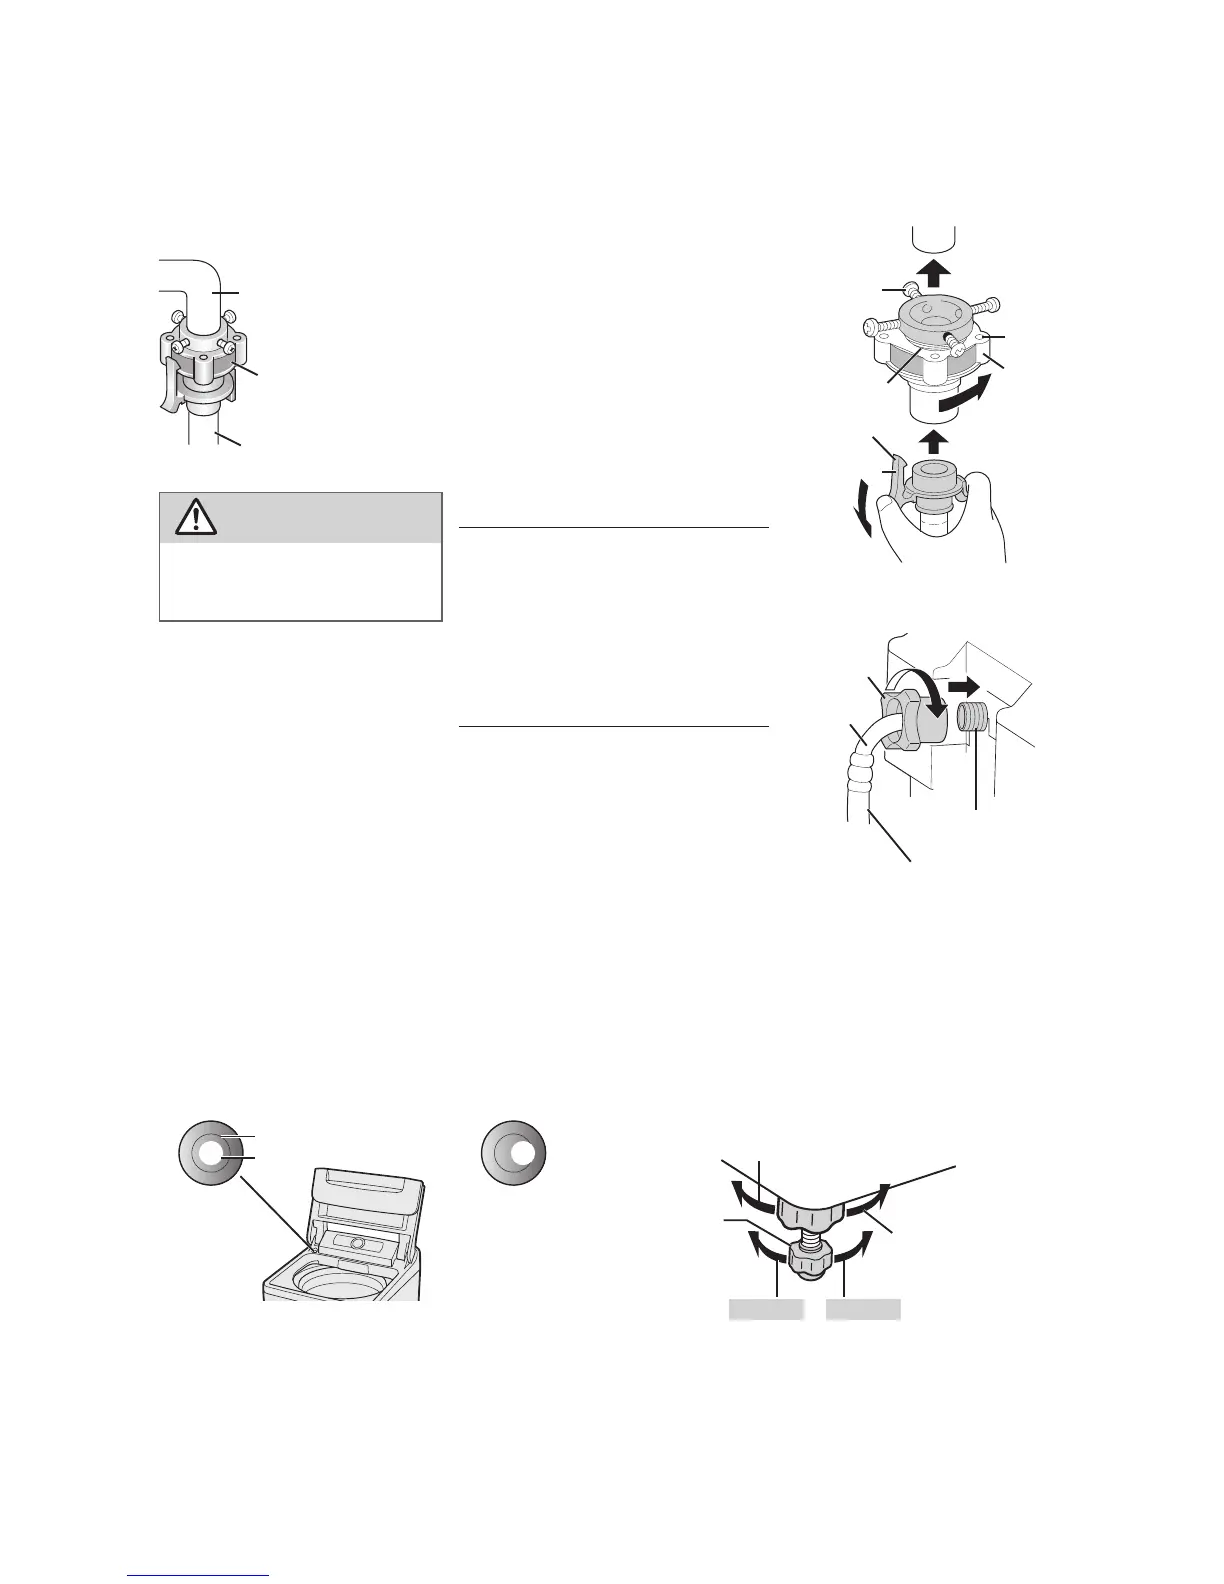
5.6 Check the washing machine is level.
The bubble should be at the
centre of the mark.
Leveller
Mark
Bubble
■
If the bubble is out of the mark
3
Turn to the right to
tighten.
1
Turn the adjustable leg knob to
the left to loosen.
2
Turn the adjustable
leg to eliminate
wobble.
To lower
To raise
5.7 Perform a trial operation.
● Check that there is no water leakage, abnormal sounds or error display.
Connect the water tap adaptor to
the water faucet.
1
Turn part A to the left until approx.
4 mm of the thread becomes
visible.
2
Loosen the 4 screws.
3
Connect to the faucet and tighten
the screws.
4
Turn part A to the right and tighten
securely. (To prevent water
leakage)
Connect the water supply hose to
the water tap adaptor.
Insert the hose into the adaptor while
pushing down the lever, and hook
theclawoftheleverontheangeof
the adaptor.
Connect the water supply hose to
the water supply valve screw.
1
Hold the elbow and tighten the nut.
2
Check that the elbow is not loose.
Water faucet
Water supply hose
Water tap adaptor
CAUTION
● Tightenthenutrmly.
● Do not twist, squash, modify
or cut the hose.
Part A
Flange
Thread
Lever
Claw
Screw
Elbow
Water supply
valve screw
Nut
Water supply hose
■
Make sure to ask a service person for installation. Do not install by yourself.
■
If the installation, test run and inspection of the washing machine are not carried out following this
installation method, Panasonic will not be liable for any accident or damage caused.
5.4 Connect the water tap adaptor and water supply hose.
- 8 -
 Loading...