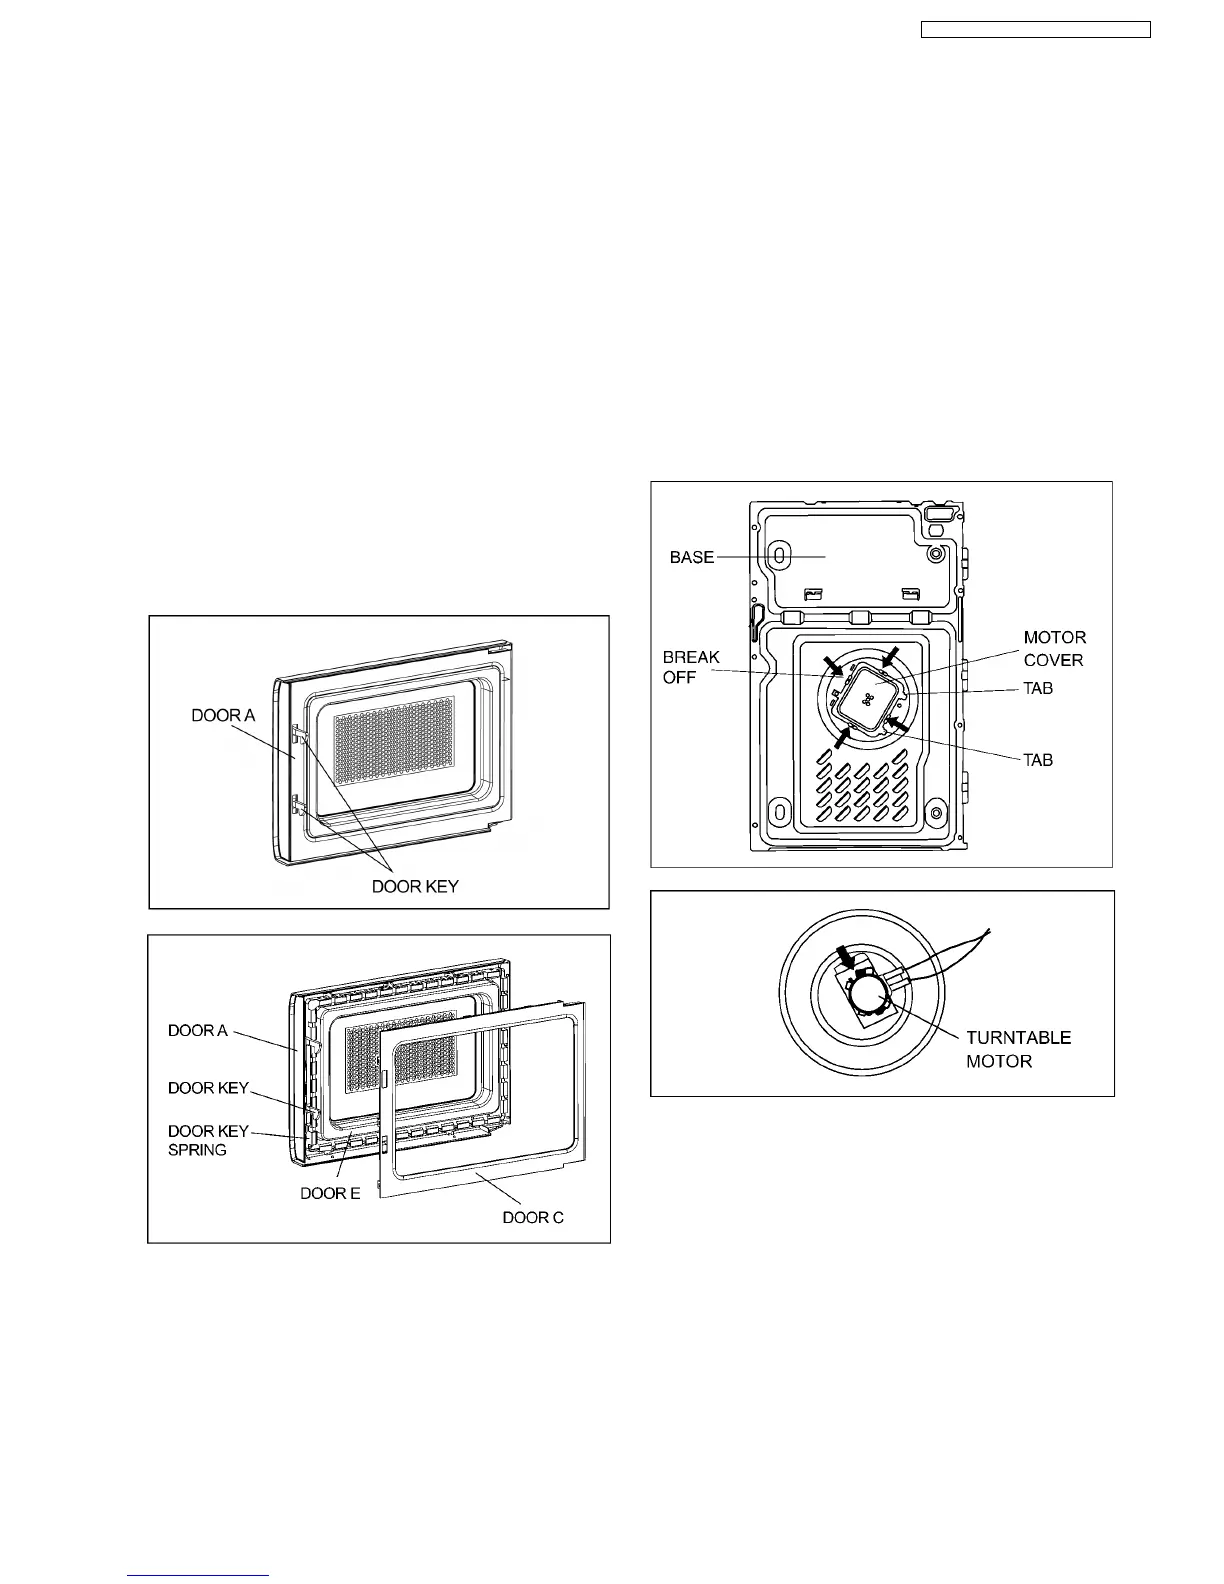
4.5. Door assembly
1. Remove door C from door E by carefully pulling outward,
starting from upper right hand corner using a flat blade
screwdriver.
2. Separate door E from tabs on door A and remove door A.
3. Remove door screen B from door A.
4. Open Door E at the opening angle of approximately
10°(Note: The door cannot be removed if the opening
angle is greater than 10°).
5. Remove the door E from its hinges by pushing the door E’s
bottom upward and out.
6. Remove door key and door key spring from door E.
7. Replace other components.
NOTE:
Door alignment is crucial. If door is misaligned,
apply pressure until alignment is achieved.
NOTE:
After replacement of the defective component parts
of the door, reassemble, and perform microwave
leakage test.
4.6. Turntable motor
1. Remove the motor cover by breaking off at the 4 spots
indicated by arrows with a cutter or the like.
NOTE:
After removing the motor cover, be sure that cut
portions are properly trimmed or bent to the inside
so that no sharp edges will be exposed to outside.
2. Disconnect 2 lead wires connected to the turntable motor.
3. Remove the turntable motor by removing 1 screw.
NOTE:
After reInstalling the new turntable motor and
reconnecting the 2 lead wires, reinstall the motor
cover by rotating it around 180, tucking the 2 tabs
under the base in the 2 provided slots, then screw
the single tab to the base using a screw.
11
NN-GD376S / NN-GD366M / NN-GD356W