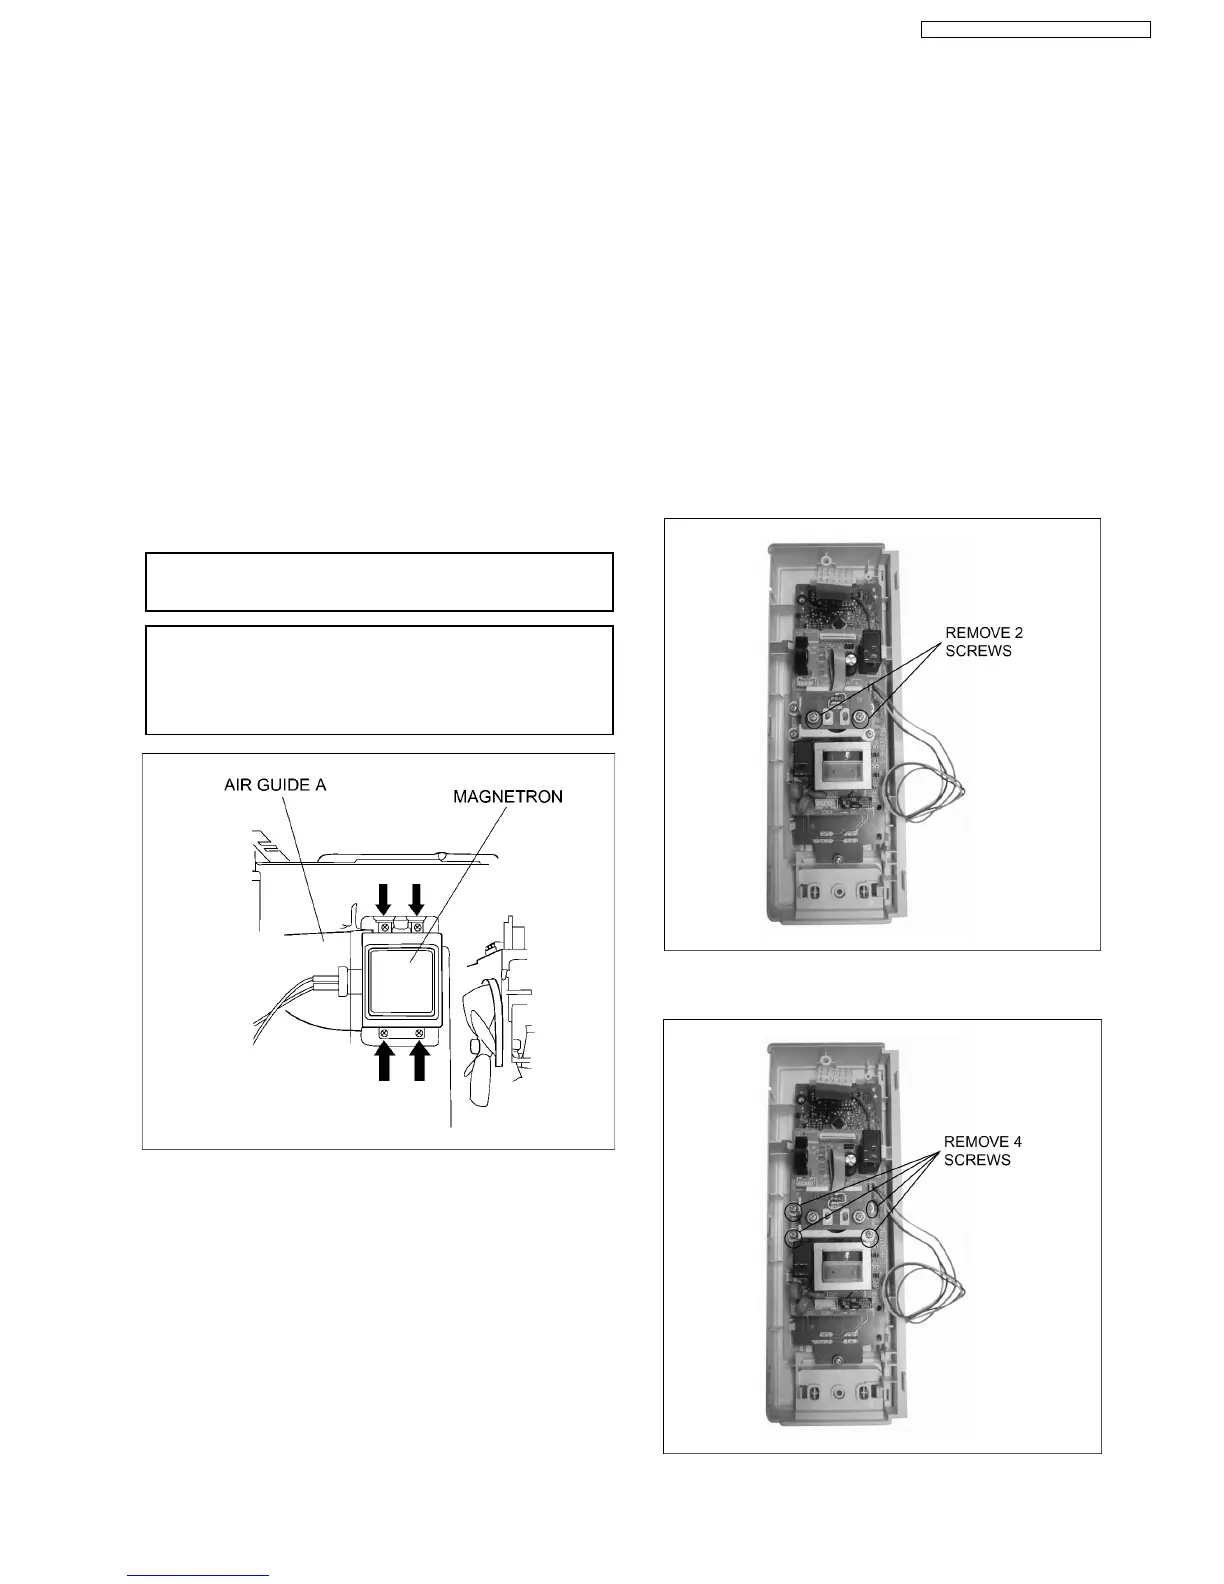
4.1. Magnetron
1. Discharge the high voltage capacitor.
2. Remove 1 screw holding air guide A on the magnetron.
3. Remove 1 screw holding reinforce bracket on the
magnetron.
4. Remove 1 screw holding thermistor on the magnetron.
5. Disconnect 2 high voltage lead wires from magnetron
filament terminals.
6. Remove 4 screws holding magnetron.
NOTE:
After replacement of the magnetron, tighten mounting
screws properly in an x pattern, making sure there is no
gap between the waveguide and the magnetron to
prevent microwave leakage.
CAUTION
When replacing the magnetron, be sure the antenna gasket is in
place.
CAUTION
When connecting 2 filament lead wires to the magnetron terminals,
be sure to connect the lead wires in the correct position. The lead wire
of high volatge transformer should be connected to “F terminal” and
the lead wire from high voltage capacitor should be connected to “FA
terminal”.
4.2. Digital programmer circuit
(D.P.C) and membrane key
board.
NOTE:
Be sure to ground any static electric charge built up on
your body before handling the DPC.
1. Disconnect all connectors from D.P.C. board.
2. Disconnect connector CN701 from H.V. inverter.
3. Unplug flat cabel from CN6 on D.P.C. board (DU) by
carefully pulling outward.
4. Remove 2 screws holding small D.P.C. board (DU) on
backstop.
5. Remove 4 screws holding backstop on big D.P.C. board
(DU).
4 DISASSEMBLY AND PARTS REPLACEMENT
PROCEDURE
9
NN-GD376S / NN-GD366M / NN-GD356W