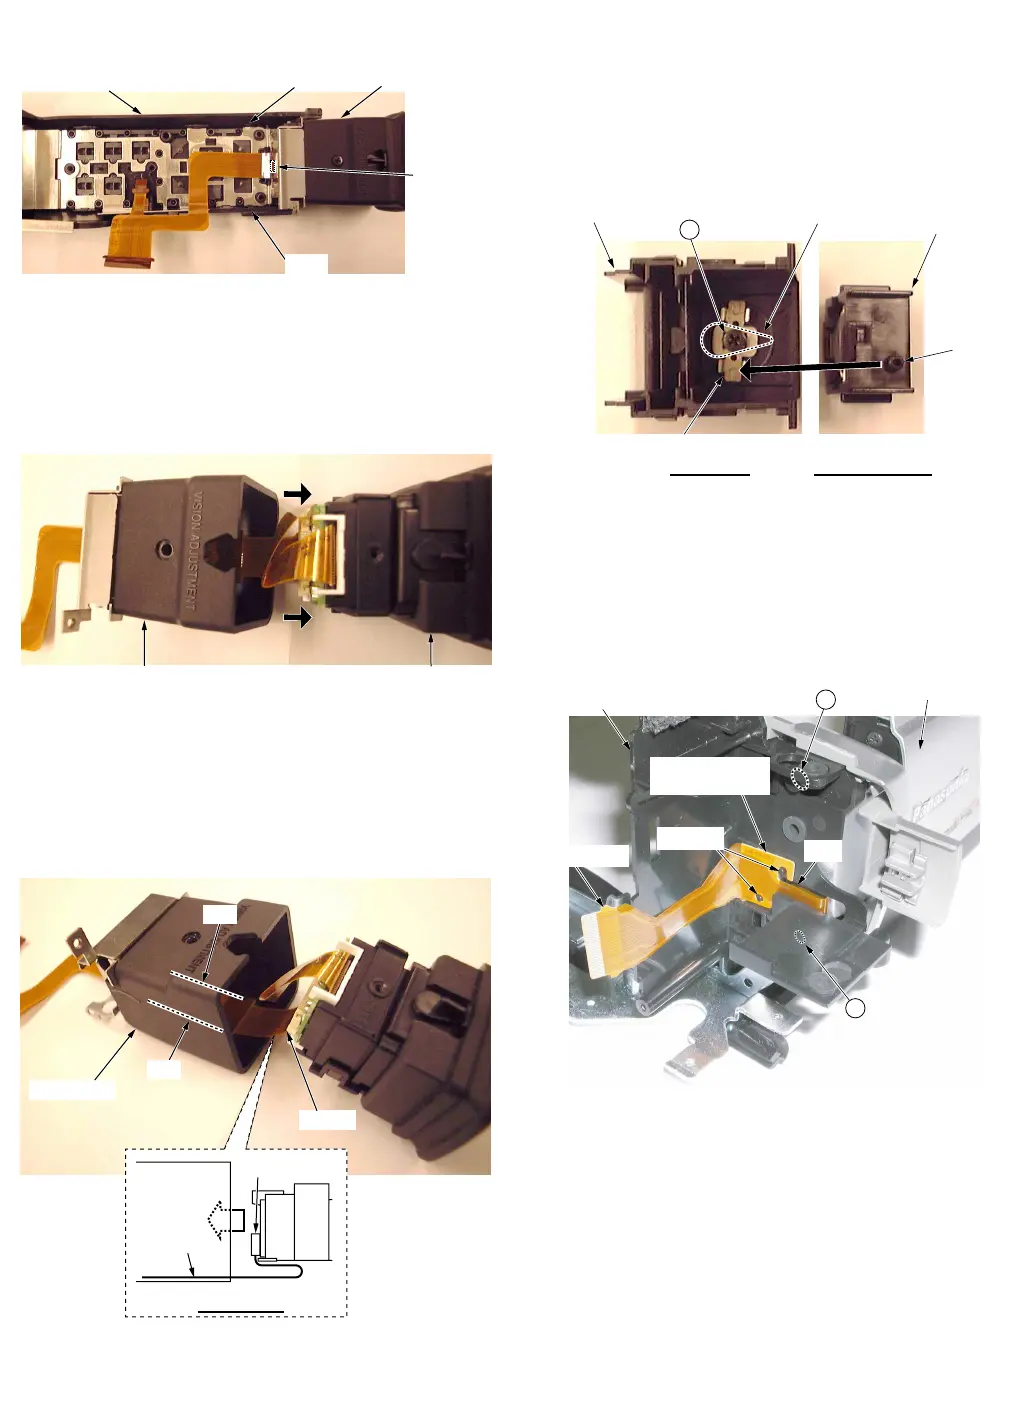
12. Installation of EVF Unit
1) Secure the 3 Locking Tabs (L-1) on the Top Case Unit.
(L-1) EVF UnitTop Case Unit
(L-1)
(L-1)
Fig. D9
13. Removal of EVF Case Ass'y
Work carefully so as not to damage the Top F.P.C. in the
EVF Case Ass'y.
1) Remove the Screw (402).
2) Pull off the EVF Case Ass'y with grasping the Eye Cap
carefully.
EVF Case Ass’y Eye Cap
Fig. D10
Installation of EVF Case Ass'y
1) Confirm that the Top F.P.C. is set to ribs in the EVF
Case.
2) Connect the Top F.P.C. to the Connector FP951 on the
EVF Back Light C.B.A.
3) Install into the EVF Case Ass'y with bending the Top
F.P.C. as shown.
FP951
EVF Case
Rib
Rib
Top F.P.C.
FP951
Side View
Fig. D11
14. Installation of Lens Holder, Eye Sight Lever A, Eye
Sight Lever B
1) Install the Eye Sight Levers A and B into the EVF Protect
B taking care that Portion "a" of the Eye Sight Lever A
is installed in the correct direction as shown. Then,
tighten the Screw (402).
2) Install the Lens Holder so that the boss of the Lens
Holder is set to Portion "a" of the Eye Sight Lever A.
EVF Protect B
Lens Holder
(with Lens)
Boss
Portion "a" of Eye Sight Lever A
Eye Sight Lever B
Bottom View
Top View
402
Fig. D12
15. Installation of LCD Case Ass'y
Work carefully so as not to damage the F.P.C.
1) Put the LCD F.P.C. through the slot of the Side Case R.
2) To tighten 2 Screws (404, 509), close the LCD Case
Ass'y, or turn it to the right or left.
3) Confirm that the LCD F.P.C. is set with 2 Bosses on the
Side Case R as shown.
Bosses
double-sided
adhesive tape
Slot
LCD F.P.C.
Side Case R
LCD Case Ass’y
404
509
Fig. D13