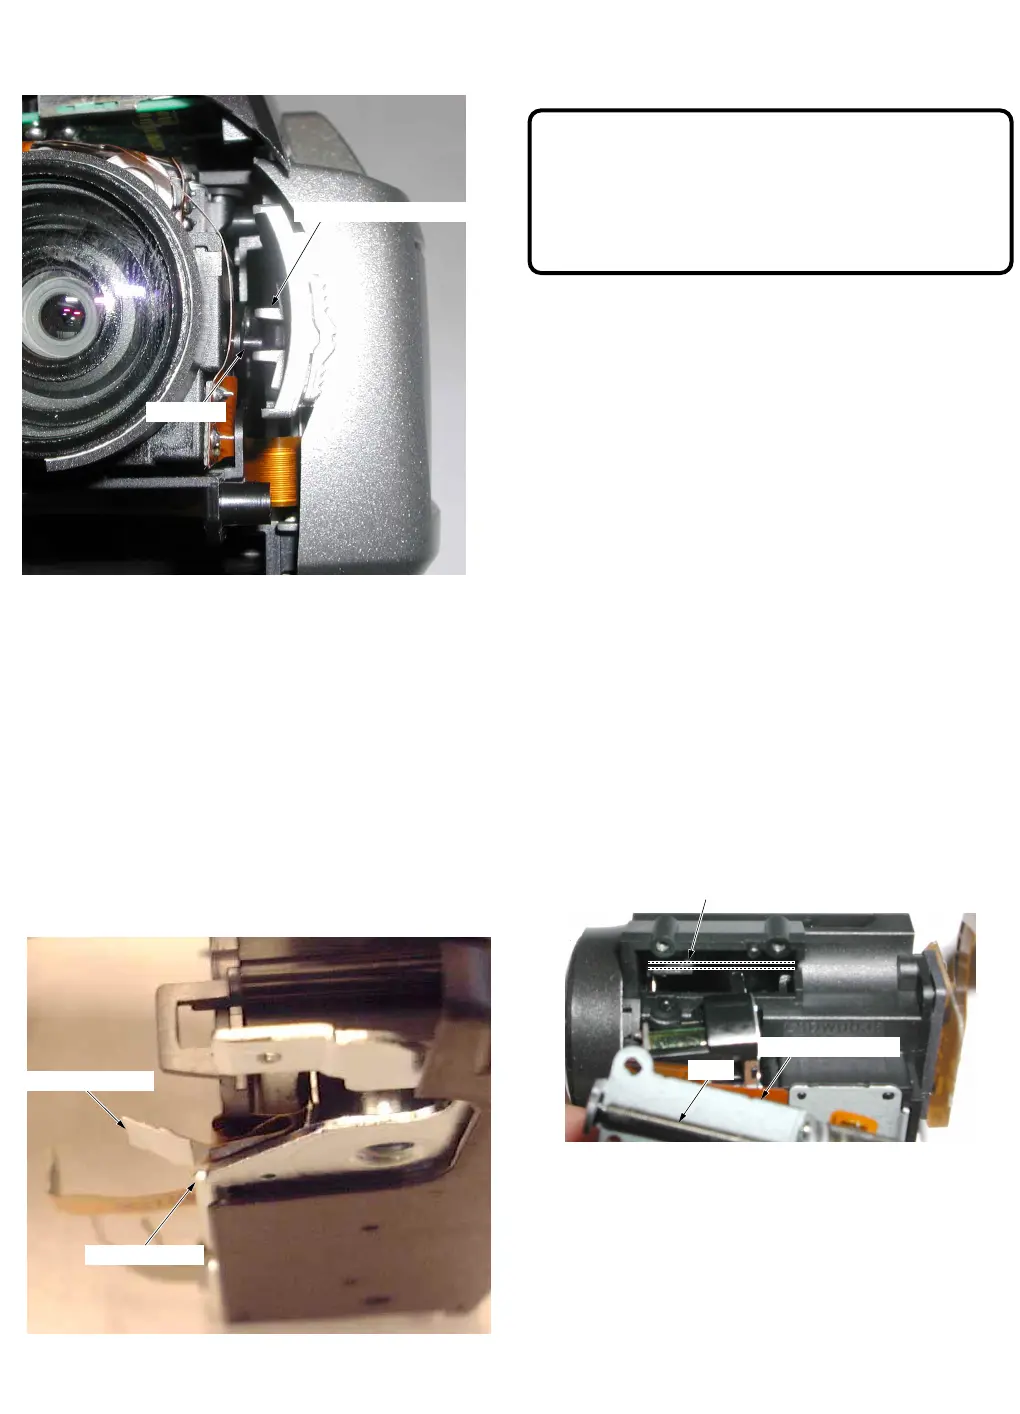
6. Installation of Lens Ass'y
Install the Lens Ass'y so that the IR Lever is set to the Magic
VU Knob Holder.
IR Lever
Magic VU Knob Holder
Fig. D6
7. Removal of Top Case & EVF Ass'y
To remove the Screw (404-6), raise the EVF Ass'y.
Installation of Top Case & EVF Ass'y
Secure the Rib of the Top Case & EVF Ass'y to the Side
Case R Ass'y.
8. Replacement of Mechanism Chassis Ass'y
When replacing the Mechanism Chassis Ass'y, be sure to
perform the Envelope Output Adjustment. Refer to
"ENVELOPE OUTPUT ADJUSTMENT" in MECHANICAL
ADJUSTMENT.
Installation of Mechanism Chassis Ass'y
When installing the Mechanism Chassis Ass'y, be sure to
make the Capstan F.P.C. between the Mechanism Chasis
Ass'y and the Tripod Frame as shown.
Tripod Frame
Capstan F.P.C.
Fig. D7
9. Replacement of Lamp
When replacing the Lamp, refer to "HOW TO REPLACE
THE LAMP (LSLL0028) OF BUILT-IN LIGHT" in SERVICE
NOTES.
DANGER:
Use only replacement Lamp (PART NO. LSLL0028)
supplied by Panasonic to reduce risk of fire.
Handle new Lamp with cloth or tissue as skin oils
decrease Lamp life.
Remove Light Protector and allow Lamp to cool before
replacing to avoid possible burn hazard.
10. Removal of CCD C.B.A., Filter Rubber, Optical Filter
CAUTION:
1) When removing the CCD C.B.A., take care that the
Optical Filter does not fall out.
2) Take extreme caution when removing the CCD C.B.A.
because it is easily damaged by static electricity. Use
a Wrist Strap while removing and installing.
3) Do not touch the CCD window surface when handling.
Installation of CCD C.B.A., Filter Rubber, Optical Filter
Install in order shown below.
1) Install the Optical Filter correctly.
Note: Make sure that no dust gets on the Optical Filter
and in the Lens Unit. Clean it with lens cleaning paper
dampened with lens cleaner if necessary.
2) Install the Filter Rubber on the Optical Filter correctly as
shown below.
Note: Make sure that no dust gets on the Filter
Rubber.
3) Install the CCD C.B.A. to the Lens Unit. Then, secure
the 2 Screws (422) while keeping the CCD C.B.A.
pressed toward the upper right corner.
Note: Do not touch the Lens Surface. Clean their
surface with lens cleaning paper dampened with lens
cleaner if necessary.
11. Installation of Zoom Motor Unit
Install the Zoom Motor Unit so that the Shaft of the Zoom
Motor Unit is set in the Holder. Then, tighten the 3 Screws
(507).
Zoom Motor Unit
shaft
Holder
Fig. D8