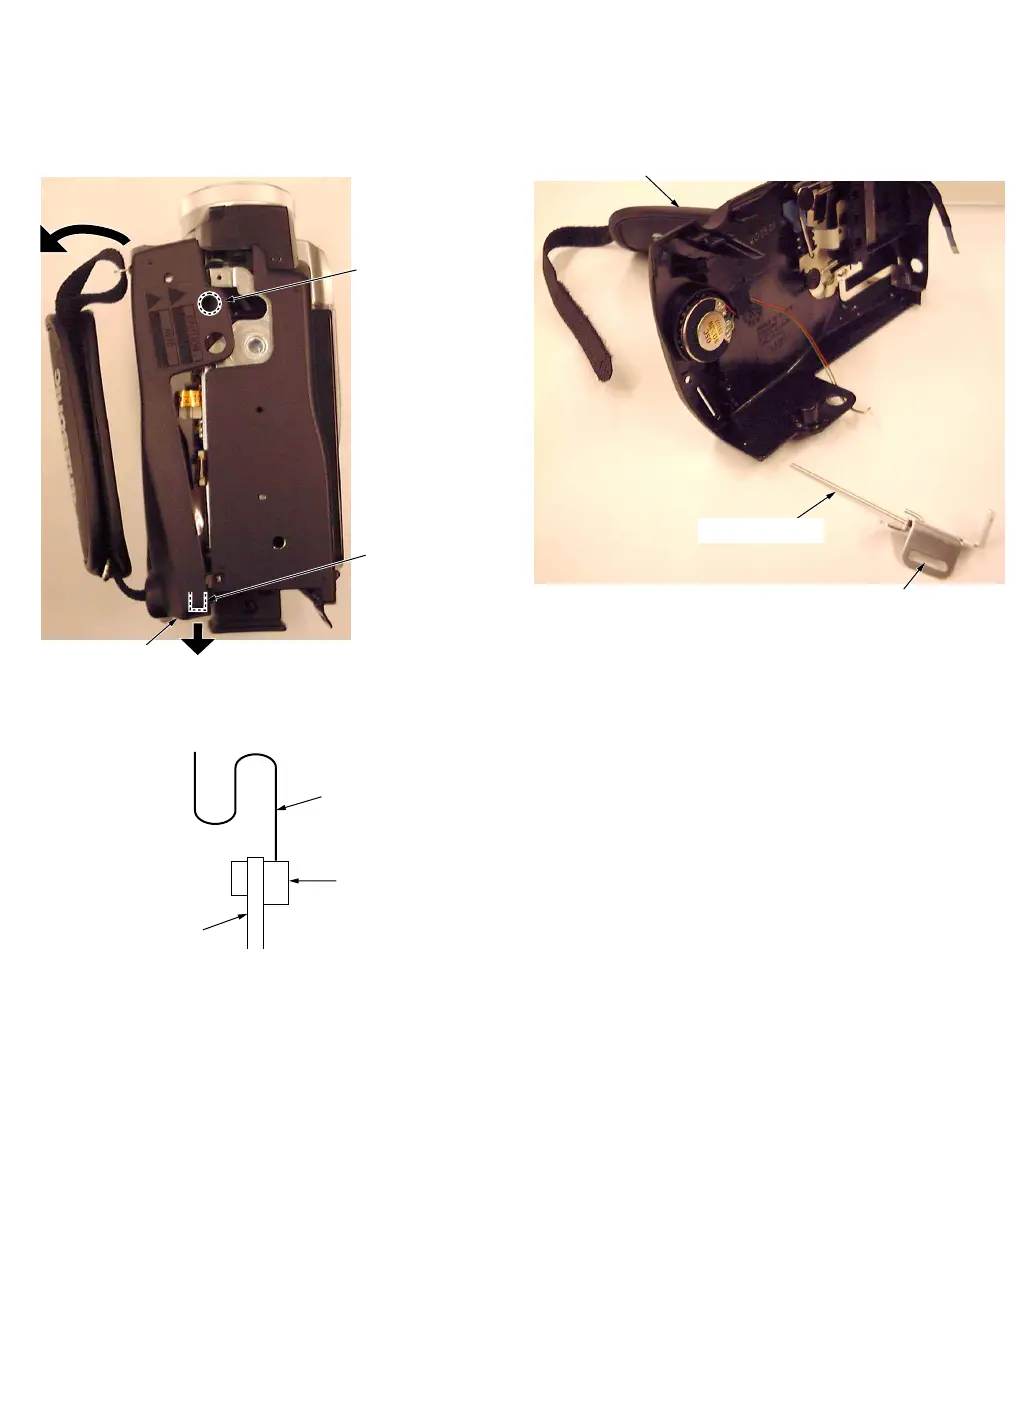
2. Removal of Side Case L Unit
Take care not to damage the F.P.C.s or the Speaker Cable.
1) After removing the 6 Screws (404-1), release the Portion
A of the Side Case L Unit at first. Then, release the
Phone Jack of the Rear C.B.A.
2) Disconnect the Speaker Cable and the F.P.C.s from the
Connectors P1, FP6 and FP9.
Phone Jack of
Rear C.B.A.
(L-2)
Portion A of Side
Case L Unit
Fig. D3
Installation of Zoom Switch F.P.C. of Side Case L Unit
When connecting the Zoom Switch F.P.C. to the Connector
FP9 on the Main C.B.A., make it as shown.
Zoom Switch F.P.C.
FP9
Main C.B.A.
Fig. D4
3. Removal of Speaker
1) Open the Hand Strap and release it from the hole of the
Strap Angle front.
2) Remove the Screw (404-2).
3) Remove the Strap Angle front and the Speaker Angle.
Then, remove the Speaker.
Hand Strap
Speaker Angle
hole of Strap Angle front
Fig. D5
4. Installation of Main C.B.A.
Take care not to damage the Flexible Cables.
1) Connect the Flexible Cables to the connectors on the
Main C.B.A, verifying that the direction of the Flexible
Cables is correct. Refer to "REMOVAL/INSTALLATION
OF F.P.C. FROM NON ZIF (Zero Insertion Force)
CONNECTOR."
5. Removal/Installation of Rear C.B.A.
When removing/installing the Rear C.B.A., raise the EVF
Ass'y.