3. Unscrew the 1 screw and remove the P.C.Board
attachment fittings with R-P.C.Board.
Note:
·
R-P.C.Board is secured. Be careful not to apply
excessive force.
4. Unscrew the 1 screw and remove the R-P.C.Board.
6.6. Removal of S-P.C.Board
1. Remove the upper case according to the section 6.2.
"Removal of Upper Case".
2. Unscrew the 2 screws and release the grounding terminal.
3. Unscrew the 1 screw and remove the operation button
block.
4. Unscrew the 2 screws and remove the S-P.C.Board.
6.7. Removal of V-P.C.Board
1. Remove the upper case according to the section 6.2.
"Removal of Upper Case".
2. Unscrew the 2 screws and remove the V-P.C.Board.
6.8. Removal of B/Q-Module
1. Remove the upper case according to the section 6.2.
"Removal of Upper Case".
2. Unscrew the 2 screws and remove the A-P.C.Board block.
3. Unscrew the 2 screws and remove the V-P.C.Board.
18
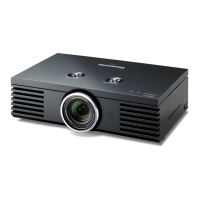
PT-AE2000U / PT-AE2000E
 Loading...
