Chapter 2
Getting Started — Setting up
ENGLISH - 31
Setting up
Installation mode
There are four ways to set up the projector. Set the [PROJECTOR SETUP] menu
→
[PROJECTION METHOD]
(
x
page 88) depending on the installation method.
Mounting on the ceiling and projecting forward Mounting on the ceiling and projecting from rear
(Using the translucent screen)
Menu item Method Menu item Method
[PROJECTION METHOD] [AUTO] or [FRONT/CEILING] [PROJECTION METHOD] [REAR/CEILING]
Setting on a desk/oor and projecting forward Setting on a desk/oor and projecting from rear
(Using the translucent screen)
Menu item Method Menu item Method
[PROJECTION METHOD] [AUTO] or [FRONT/DESK] [PROJECTION METHOD] [REAR/DESK]
Note
f
The projector has a built-in angle sensor. When projecting in front of the screen, if set the [PROJECTOR SETUP] menu
→ [PROJECTION METHOD] → [AUTO], the projector’s posture will be detected automatically. When projecting from
rear, please set the [PROJECTION METHOD] to [REAR/DESK] or [REAR/CEILING].
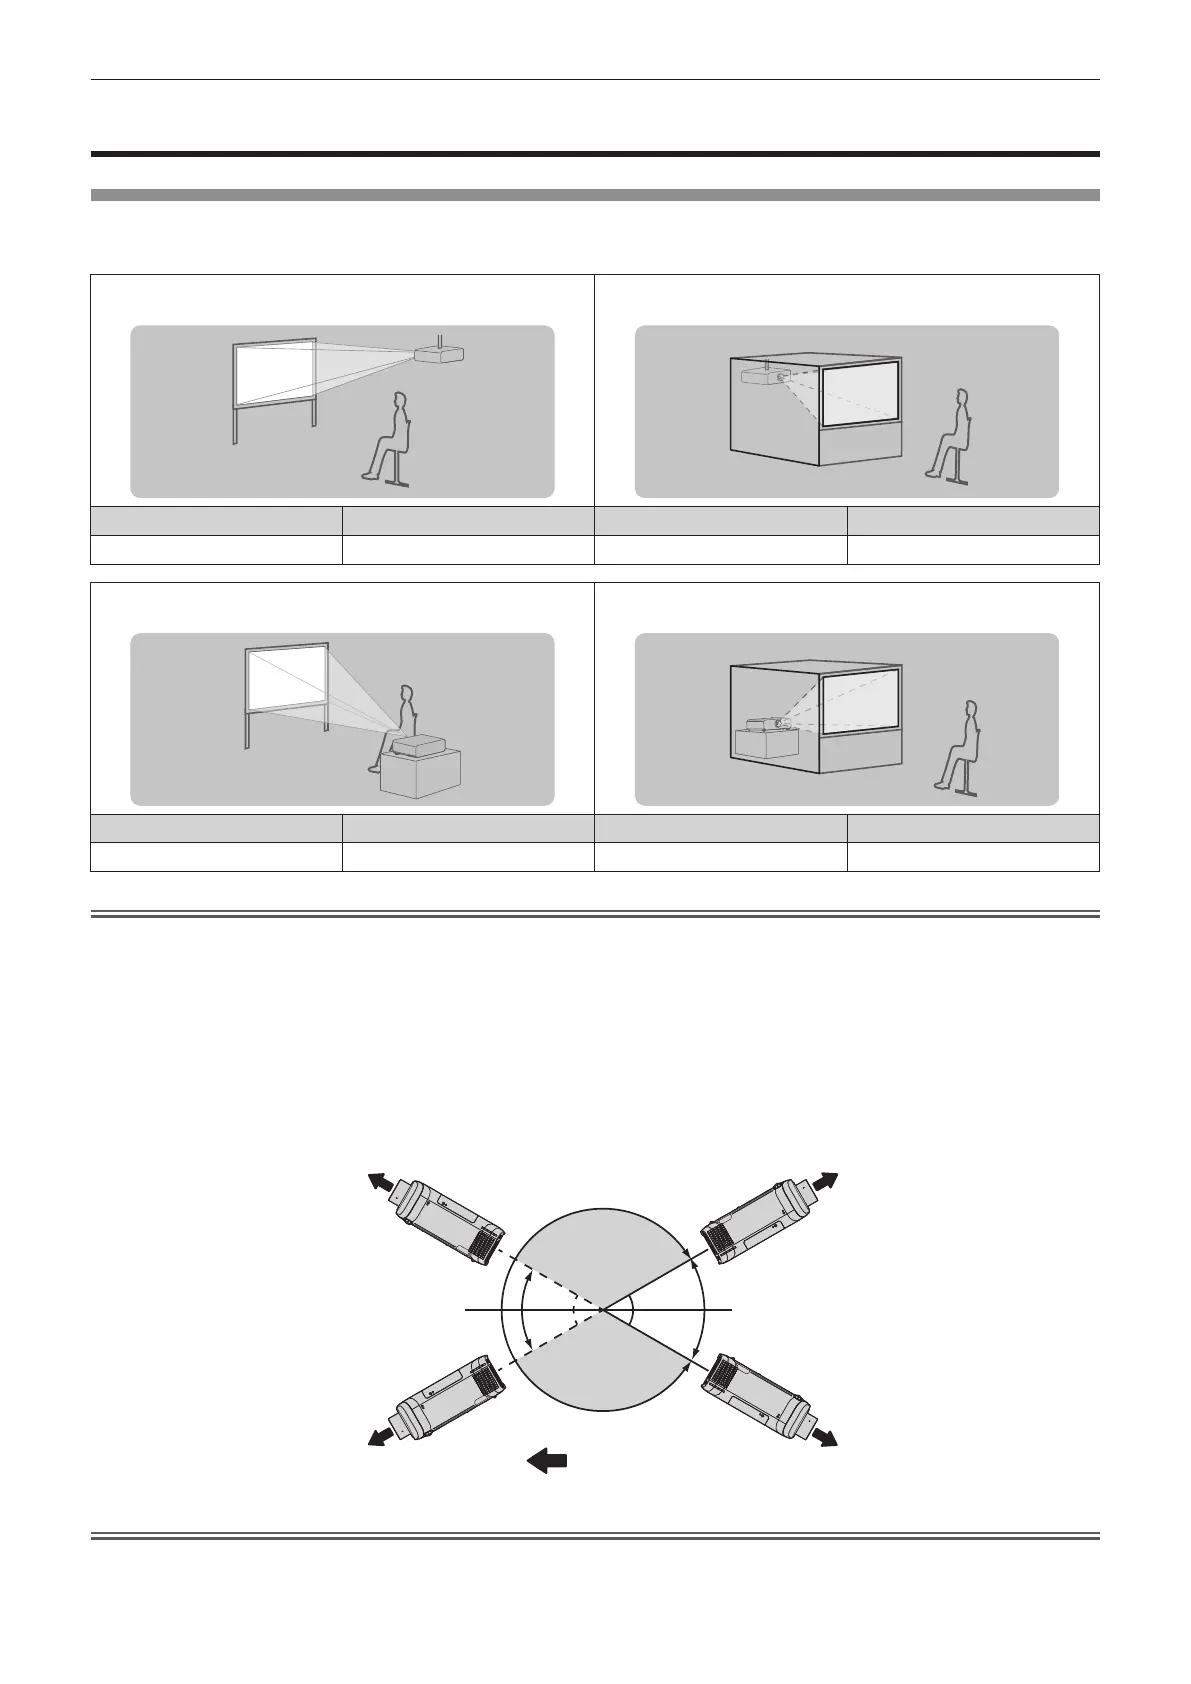
rAngle sensor
The range of installation posture detected by the projector’s built-in angle sensor is as follows.
In case of [AUTO], when the projector is placed with the top side upward within ±30° from the horizontal plane, it
will switch to [FRONT/DESK] automatically; when the projector is placed with the top side downward within ±30°
from the horizontal plane, it will switch to [FRONT/CEILING] automatically. Although it is detected as [FRONT/
DESK] even when it exceeds ±30° with respect to the horizontal plane, do not use such installation posture in this
range.
Attention
f
The angle sensor cannot detect whether it is the “Installation prohibited posture” in the above picture. Please do not use the projector tilted
at an angle that exceeds ±30° from the vertical plane. It may reduce the life of the components. (
x
page 18)
Projection direction
:
30°
30°
30°
30°
[FRONT/CEILING]
Installation
prohibited posture
Installation
prohibited posture
[FRONT/DESK]
 Loading...