Chapter 3 Basic Operations — Turning on/off the projector
ENGLISH - 45
Making adjustments and selections
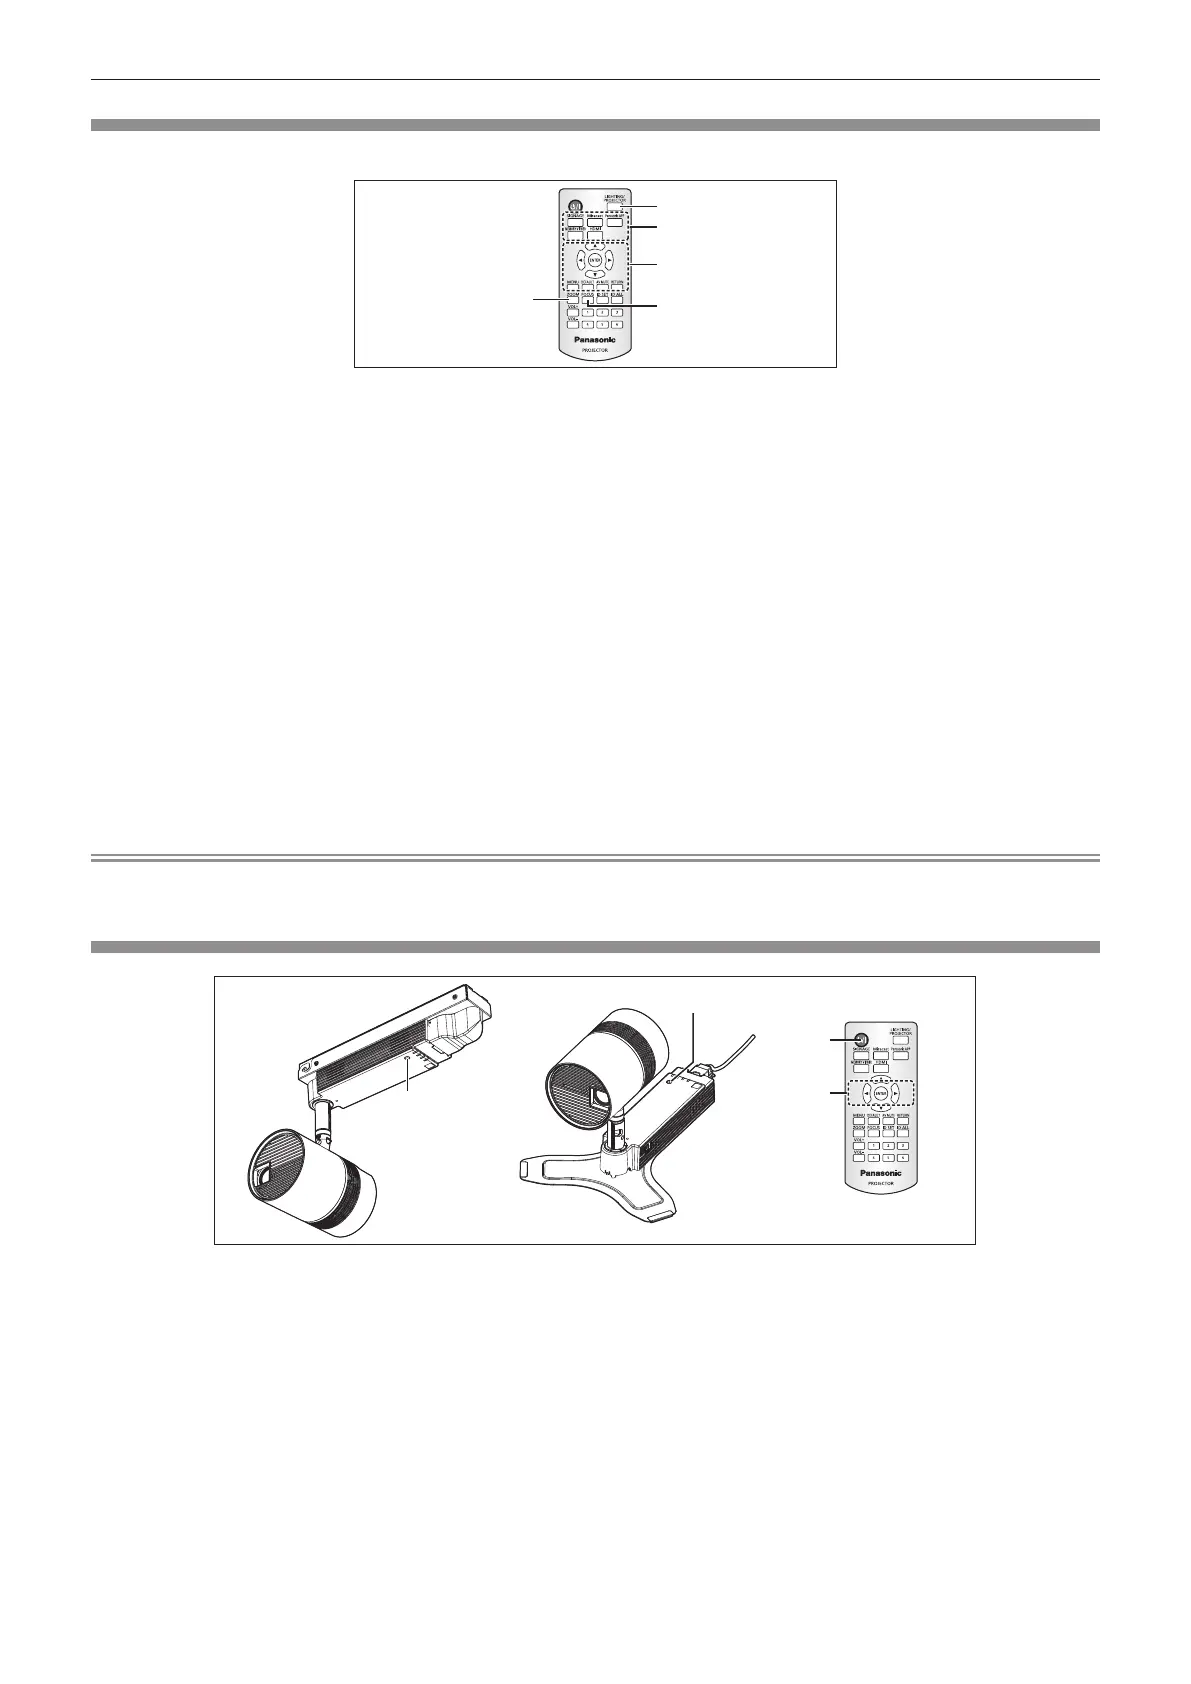
It is recommended to adjust the focus after 30 minutes have elapsed projecting.
3)
1) 7)
6)
4)
2)
1) Press the <FOCUS> button on the remote control to roughly adjust the focus of the projection light.
(x page 48)
2) Set the [SETUP] menu → [PROJECTION METHOD] (x page 68) and [VERTICAL FLIP] (x page 68)
according to the installation condition.
f Refer to “Navigating through the menu” (x page 55) for the operation of the menu screen.
3) Press the <LIGHTING/PROJECTOR> button on the remote control to switch the projection mode of
the projector to lighting mode or projector mode. (x page 47)
4) When using the projector in the projector mode, press the <HDMI>, <MEMORY VIEWER>, <Miracast>,
<Panasonic APP>, or <SIGNAGE> button on the remote control to select the input to project.
(x page 47)
5) Adjust the orientation of the main unit to adjust the projection position. (x page 36)
6) Press the <ZOOM> button on the remote control to adjust the projection size. (x page 48)
7) Press the <FOCUS> button on the remote control again to adjust the focus.
Note
f The initial setting screen is displayed when the projector is turned on for the rst time after purchase or when [ALL USER DATA] in the
[SETUP] menu → [INITIALIZE] is executed. Refer to “When the initial setting screen is displayed” (x page 42).
Turning off the projector
1)
2)
1)
1)
r When using the optional Ceiling Kit
1) Press the power <v/b> button.
f The [POWER OFF(STANDBY)] conrmation screen is displayed.
2) Press qw on the remote control to select [OK], and press the <ENTER> button.
(Or press the power <v/b> button again.)
f The projection is nished.
3) Wait for a few seconds until the power indicator <ON (G)/STANDBY (R)> lights in red.
4) Turn off the power supply of the interior wiring if necessary.

 Loading...