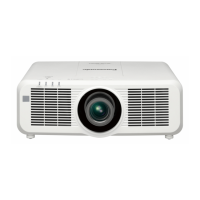
Chapter 1 Preparation — About your projector
32 - ENGLISH
18 NFC touch point
This is the touch point when using the near eld communication
(NFC, Near Field Communication) function. A device such as a
smartphone equipped with the NFC function can be connected
to the projector by holding it near the touch point.
19 Burglar hook port
Attaches a burglar prevention cable, etc.
Attention
Do not block the intake/exhaust vents of the projector.
The components may deteriorate faster if cooling inside the projector is inhibited.
Note
f The optional NFC Upgrade Kit (Model No.: ET-NUK10) can be used to enable the NFC function of the projector. Note that there are some
models that have the NFC function enabled from the time of factory shipment, and there are some countries or regions where the NFC
Upgrade Kit cannot be applied.
For the availability of the NFC function in the country or region where you purchased the product, visit the following website or consult your
dealer.
https://panasonic.net/cns/projector/
f For the connection using the NFC function, use the application software “Smart Projector Control” which performs the setting and
adjustment of the projector.
For details of the “Smart Projector Control”, visit the following website.
https://panasonic.net/cns/projector/
r Control panel
7
9
6
5
8
2
10
1
3
4
1 <POWER ON> button
Sets the projector to projection mode when the <MAIN
POWER> switch on the projector is set to <ON> and the power
is turned o (standby mode).
2 <STANDBY> button
Sets the projector to the state where the projector is turned
o (standby mode) when the <MAIN POWER> switch on the
projector is set to <ON> and in projection mode.
3 <MENU> button
Displays or hides the main menu. (x page 79)
Returns to the previous menu when a sub-menu is displayed.
If you press the <MENU> button on the control panel for at least
three seconds while the on-screen display is o (hidden), the
on-screen display is turned on.
4 <SHUTTER> button
Used to temporarily turn o the image. (x page 74)
5 Information monitor
Displays various statuses and error information. (x page 213)
6 <INFO> button
Used to operate the information monitor. (x page 213)
7 <INPUT SELECT> button
Switches the input signal to project. (x page 67)
8 <ENTER> button
Determines and executes an item in the menu screen.
9 asqw selection buttons
Used to select an item in the menu screen, change the setting,
and adjust the level.
Also used to enter a password in [SECURITY] or enter
characters.
10 <LENS> button
Adjusts the focus, zoom, and lens shift.

 Loading...
