36
Fig. 7-1
7-1-2. Removing the side panels
(1) Slide the side panels in the direction of the arrow
to
remove them (2 locations, left and right). (Fig. 7-2)
Fig. 7-2
7-1-3. Installing the ceiling panel
(1) Fasten the hooks on both sides of the ceiling panel to
the indoor unit. The hooks on one side (2 locations) are
stationary, while the hook on the other side is movable.
(Fig. 7-3)
(2) Place the panel at a slight angle, and fasten the panel
stationary hooks onto the hook receivers on the side of the
indoor unit.
(3) After verifying that the hooks are fastened, press the other
side of the panel up so that it is level. Press up until the
movable hook has fastened to the hook receiver on the
indoor unit.
(4) Verify that the hooks on both sides of the ceiling panel
have been securely fastened before removing your hands.
At this point the panel is provisionally attached to the
indoor unit.
● When removing the panel, press the movable hook toward
the inside while being careful to support the panel.
(Fig. 7-4)
(5) Align the panel installation holes with the screw holes in
the indoor unit.
(6) Fit the supplied washer-head screws into the 4 panel
installation holes, and tighten them until the panel is tightly
attached to the indoor unit. (Fig. 7-5)
5-5. Finishing the Installation
After finishing insulating and taping over the tubing, use sealing
putty to seal off the hole in the wall to prevent rain and draft
from entering. (Fig. 5-9)
Fig. 5-9
6. HOW TO INSTALL THE REMOTE
CONTROLLER (OPTIONAL PART)
NOTE
Refer to the Operating Instructions attached to the optional
Remote Control Unit.
7. HOW TO INSTALL THE CEILING PANEL
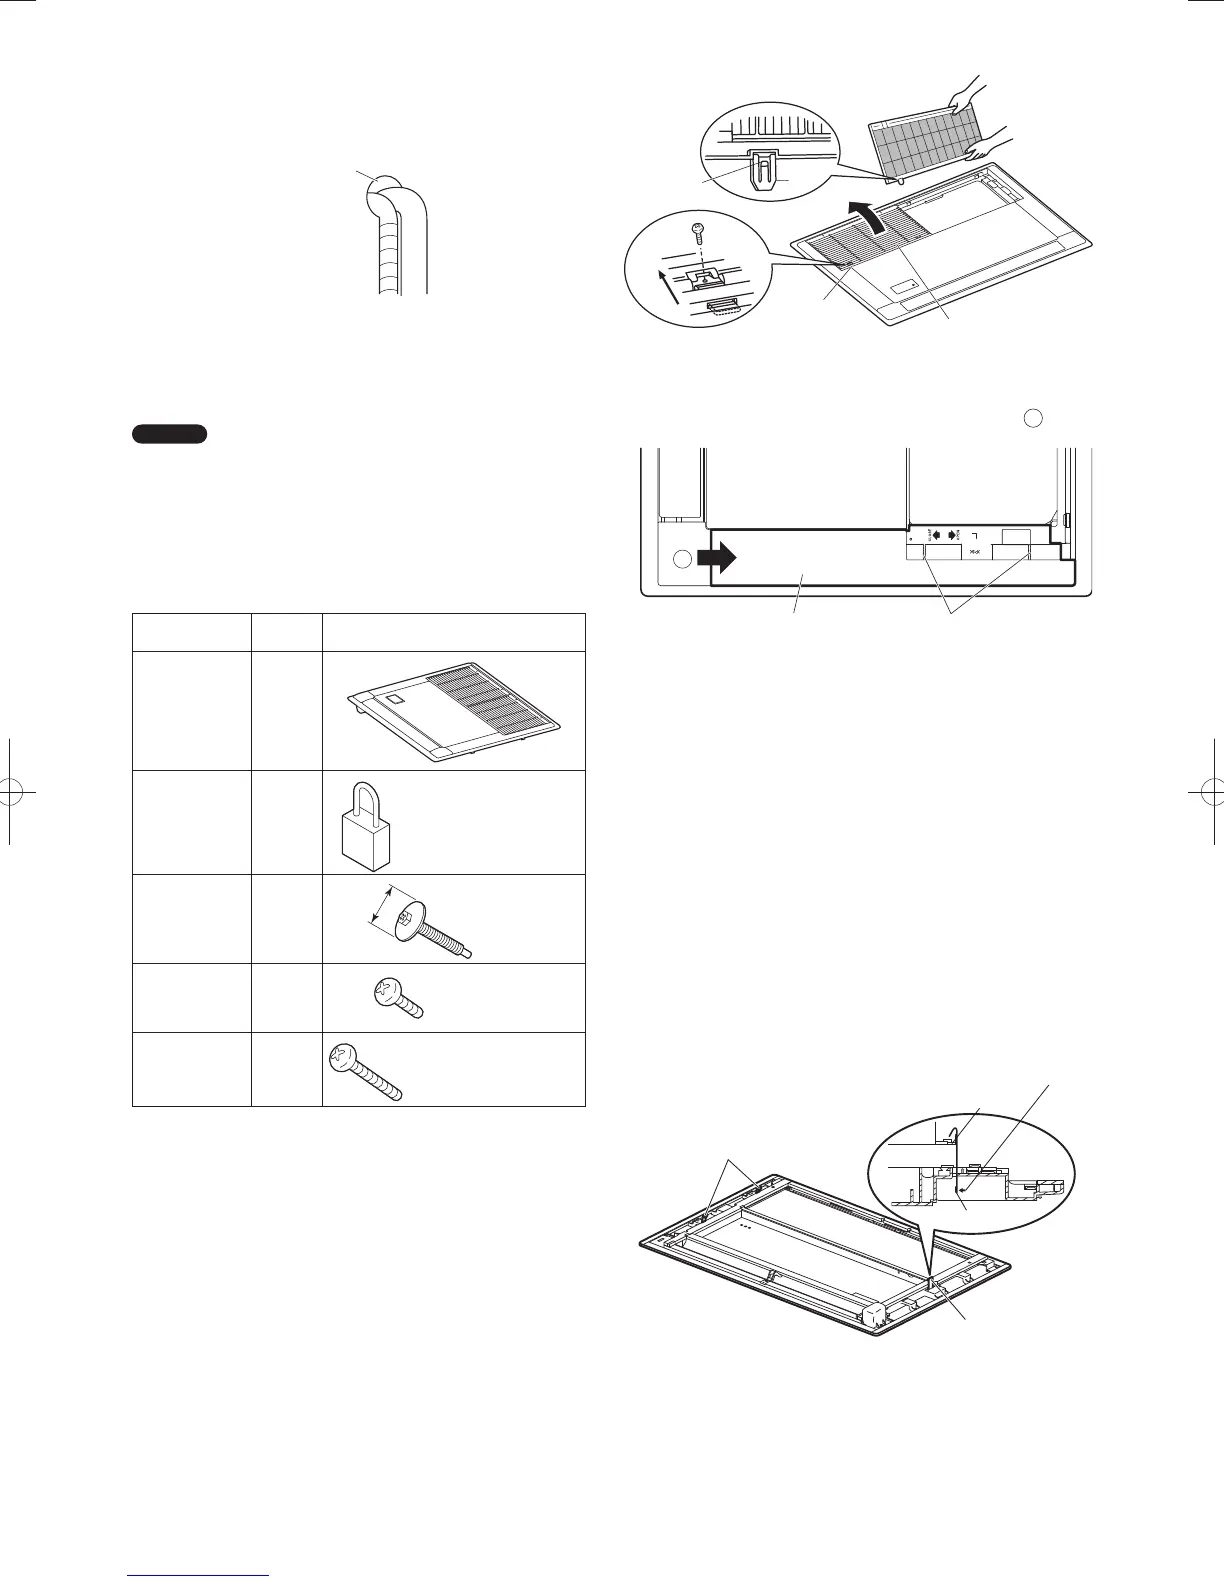
■ 1-Way Cassette Type (D1 Type)
Component Parts Unit: mm
Part name Quantity Appearance
Ceiling panel 1
Short-circuit
connector
1
(2P, yellow)
Used for
high ceiling installation
Washer-head
screw
4
M
5 × 40
Screw 2
4 × 12
For fastening
side panel
Screw 2
4 × 35
For fastening front/rear
center of panel
7-1. Installing the Panel on the Indoor Unit
7-1-1. Removing the intake grille
(1) Remove the 2 screws that fasten each of the 2 grilles in
place. (Fig. 7-1)
(2) Slide the intake grille hooks (2 locations) in the direction of
the arrow to open the intake grille. (Fig. 7-1)
(3) When the intake grille is open, use a flathead (minus)
screwdriver to press on the rear hinge tabs (2 locations),
then remove the intake grille. (Fig. 7-1)
Apply putty here
ø18
Press on the
tabs with a
flathead (minus)
screwdriver
while pulling out
the intake grille.
Hinge
Hook
Intake grille
Slide
Slide
Side panel
Slide tabs
Stationary hooks
Press to remove.
Hook receiver
Movable hook
Movable hook
Fig. 7-3
Fig. 7-4
Tubing
PanaIndoor-337012Eng.indb36PanaIndoor-337012Eng.indb36 2012/03/2116:20:532012/03/2116:20:53
 Loading...