5
CONTENTS
Page
Page
IMPORTANT! . . . . . . . . . . . . . . . . . . . . . . . . . . . . . . . . . . 2
Please Read Before Starting
Check of Density Limit
1. GENERAL . . . . . . . . . . . . . . . . . . . . . . . . . . . . . . . . . . 6
1-1. Tools Required for Installation (not supplied)
1-2. Accessories Supplied with Unit
1-3. Type of Copper Tube and Insulation Material
1-4. Additional Materials Required for Installation
2. SELECTING THE INSTALLATION SITE . . . . . . . . . . . 7
2-1. Indoor Unit
3. HOW TO INSTALL THE INDOOR UNIT . . . . . . . . . . . 8
■ 1-Way Cassette Type (D1 Type)
3-1. Preparation for Suspending
3-2. Suspending the Indoor Unit
3-3. Placing the Unit Inside the Ceiling
3-4. Installing the Drain Piping
3-5. Checking the Drainage
■ 2-Way Cassette Type (L1 Type)
3-6. Preparation for Suspending
3-7. Suspending the Indoor Unit
3-8. Placing the Unit Inside the Ceiling
3-9. Installing the Drain Piping
3-10. Checking the Drainage
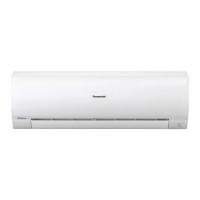
■ Wall Mounted Type (K1 Type)
22, 28, 36 types
3-11. Remove the Rear Panel from the Unit
3-12. Make a Hole
3-13. Install the Rear Panel on the Wall
3-14. Remove the Grille to Install the Indoor Unit
3-15. Shape the Indoor Side Tubing
3-16. Wiring Instructions
3-17. Wiring Instructions for Inter-unit Connections
3-18. Mounting
3-19. Drain Hose
■ Wall Mounted Type (K1 Type)
45, 56, 73, 106 types
3-20. Remove the Rear Panel from the Unit
3-21. Make a Hole
3-22. Install the Rear Panel on the Wall
3-23. Removing and Installing the Grille
3-24. Shape the Indoor Side Tubing
3-25. Wiring Instructions
3-26. Mounting
3-27. Drain Hose
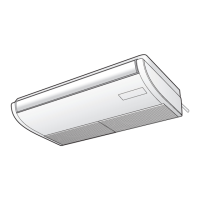
■ Floor Standing Type (P1 Type)
Concealed Floor Standing Type (R1 Type)
3-28. Required Minimum Space for Installation and
Service
3-29. Dimensions and Part Names
Floor Standing Type
(P1 Type)
3-30. Removing and Attaching the Front Panel
(Floor Standing Type)
3-31. Installing the Refrigerant Tubing
3-32. Installing the Drain Piping
3-33. Installing the Remote Controller
4. ELECTRICAL WIRING . . . . . . . . . . . . . . . . . . . . . . . 29
4-1. General Precautions on Wiring
4-2. Recommended Wire Length and Wire Diameter
for Power Supply System
4-3. Wiring System Diagram
5. HOW TO PROCESS TUBING . . . . . . . . . . . . . . . . . . 34
5-1. Connecting the Refrigerant Tubing
5-2. Connecting Tubing Between Indoor and Outdoor
Units
5-3. Insulating the Refrigerant Tubing
5-4. Taping the Tubes
5-5. Finishing the Installation
6. HOW TO INSTALL THE REMOTE CONTROLLER
(OPTIONAL PART) . . . . . . . . . . . . . . . . . . . . . . . . . . 36
NOTE
Refer to the Operating Instructions attached to the optional
Remote Control Unit.
7. HOW TO INSTALL THE CEILING PANEL . . . . . . . . . 36
■ 1-Way Cassette Type (D1 Type)
7-1. Installing the Panel on the Indoor Unit
7-2. Other
■ 2-Way Cassette Type (L1 Type)
(For 22, 28, 36, 45, 56 Types)
7-3. Before Installing the Ceiling Panel
7-4. Installing the Ceiling Panel
7-5. Removing the Ceiling Panel for Servicing
■ 2-Way Cassette Type (L1 Type) (For 73 Type)
7-6. Before Installing the Ceiling Panel
7-7. Installing the Ceiling Panel
7-8. Removing the Ceiling Panel for Servicing
8. APPENDIX . . . . . . . . . . . . . . . . . . . . . . . . . . . . . . . . 40
■ Name of Parts
■ Care and Cleaning
■ When Using Wireless Remote Controller Instead of
Wired Remote Controller
■ Troubleshooting
■ Tips for Energy Saving
PanaIndoor-337012Eng.indb5PanaIndoor-337012Eng.indb5 2012/03/2116:20:432012/03/2116:20:43
 Loading...