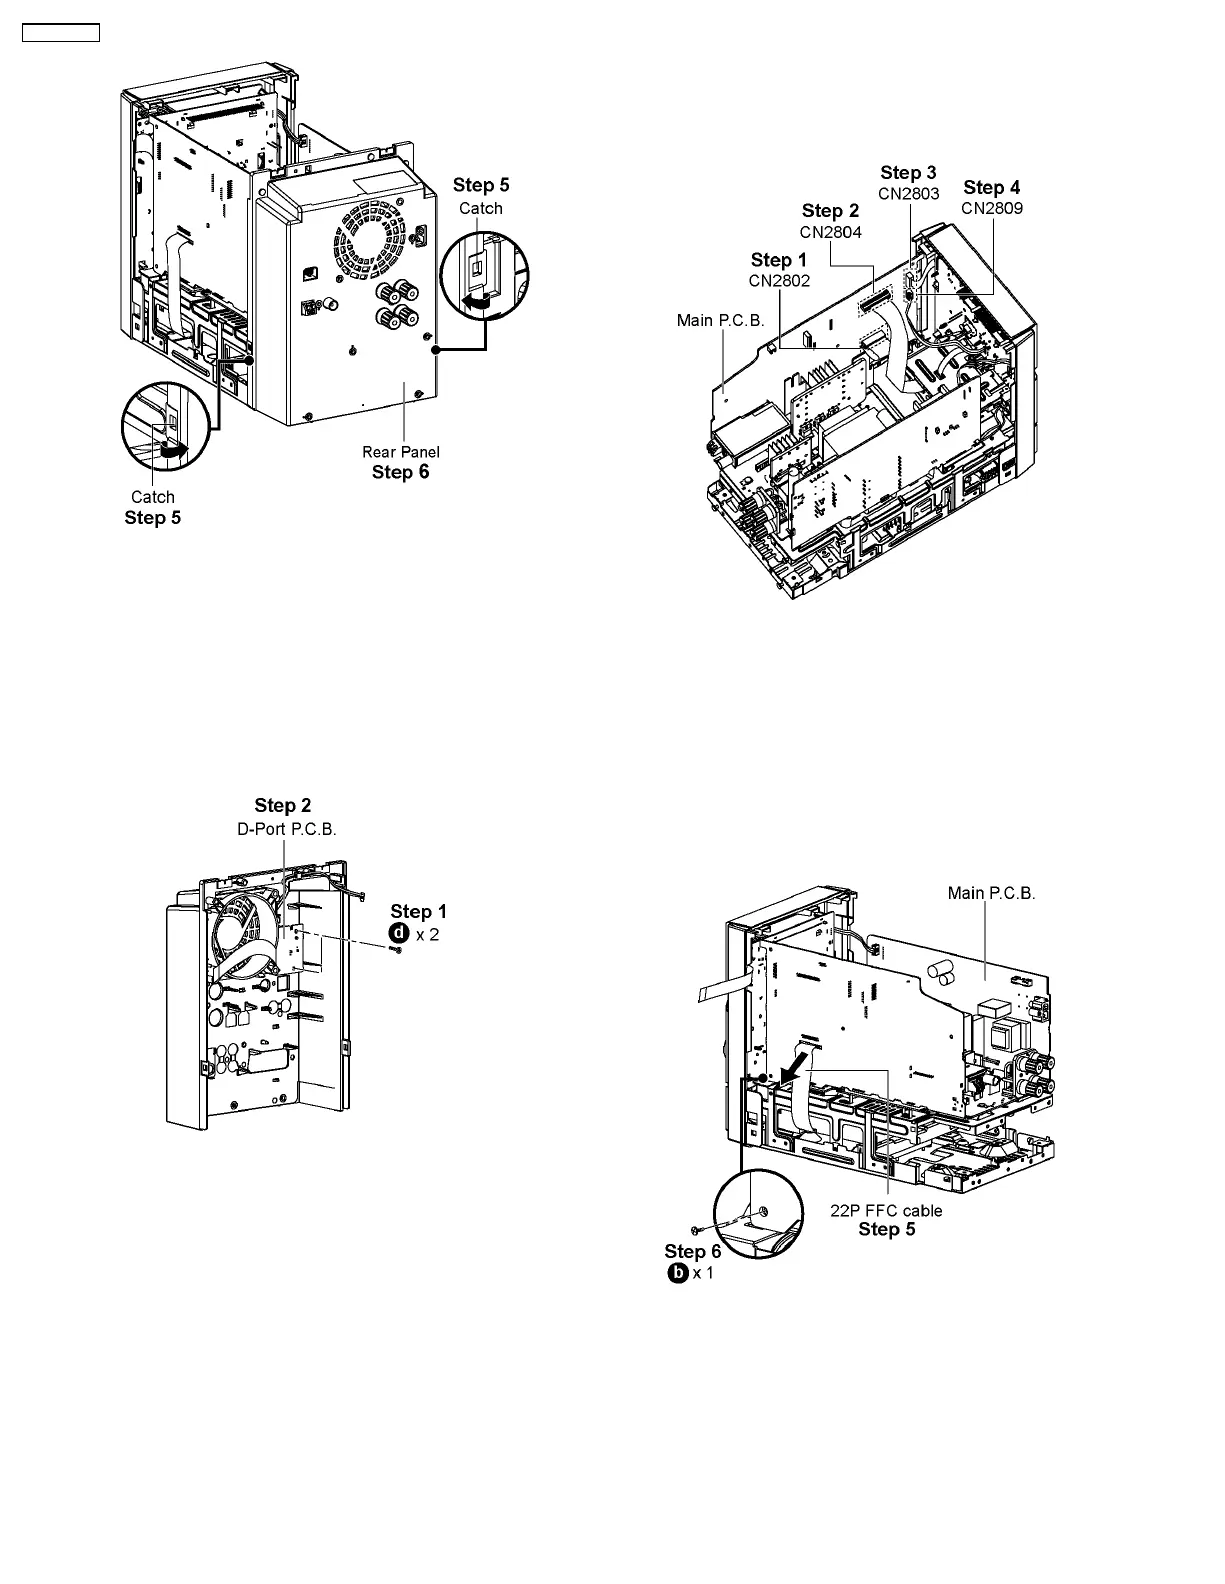
Step 5 : Release the catch at each side of the Rear Panel in
the direction of arrow.
Step 6 : Remove Rear Panel.
8.10. Disassembly of D-Port P.C.B.
• Follow the (Step 1) - (Step 5) of Item 8.3
• Follow the (Step 1) - (Step 6) of Item 8.9
Step 1 : Remove 2 screws from D-Port P.C.B..
Step 2 : Remove D-Port P.C.B..
8.11. Disassembly of Main P.C.B.
• Follow the (Step 1) - (Step 5) of Item 8.3
• Follow the (Step 1) - (Step 6) of Item 8.9
Step 1 : Detach 22P FFC cable at the connector (CN2802) on
Main P.C.B..
Step 2 : Detach 20P FFC cable at the connector (CN2804) on
Main P.C.B..
Step 3 : Detach 17P FFC cable at the connector (CN2803) on
Main P.C.B..
Step 4 : Detach 4P cable at the connector (CN2809) on Main
P.C.B..
Step 5 : Remove 22P FFC cable from Main P.C.B. in the
direction of arrow.
Step 6 : Remove 1 screw from Main P.C.B..
26
SA-PMX3GN