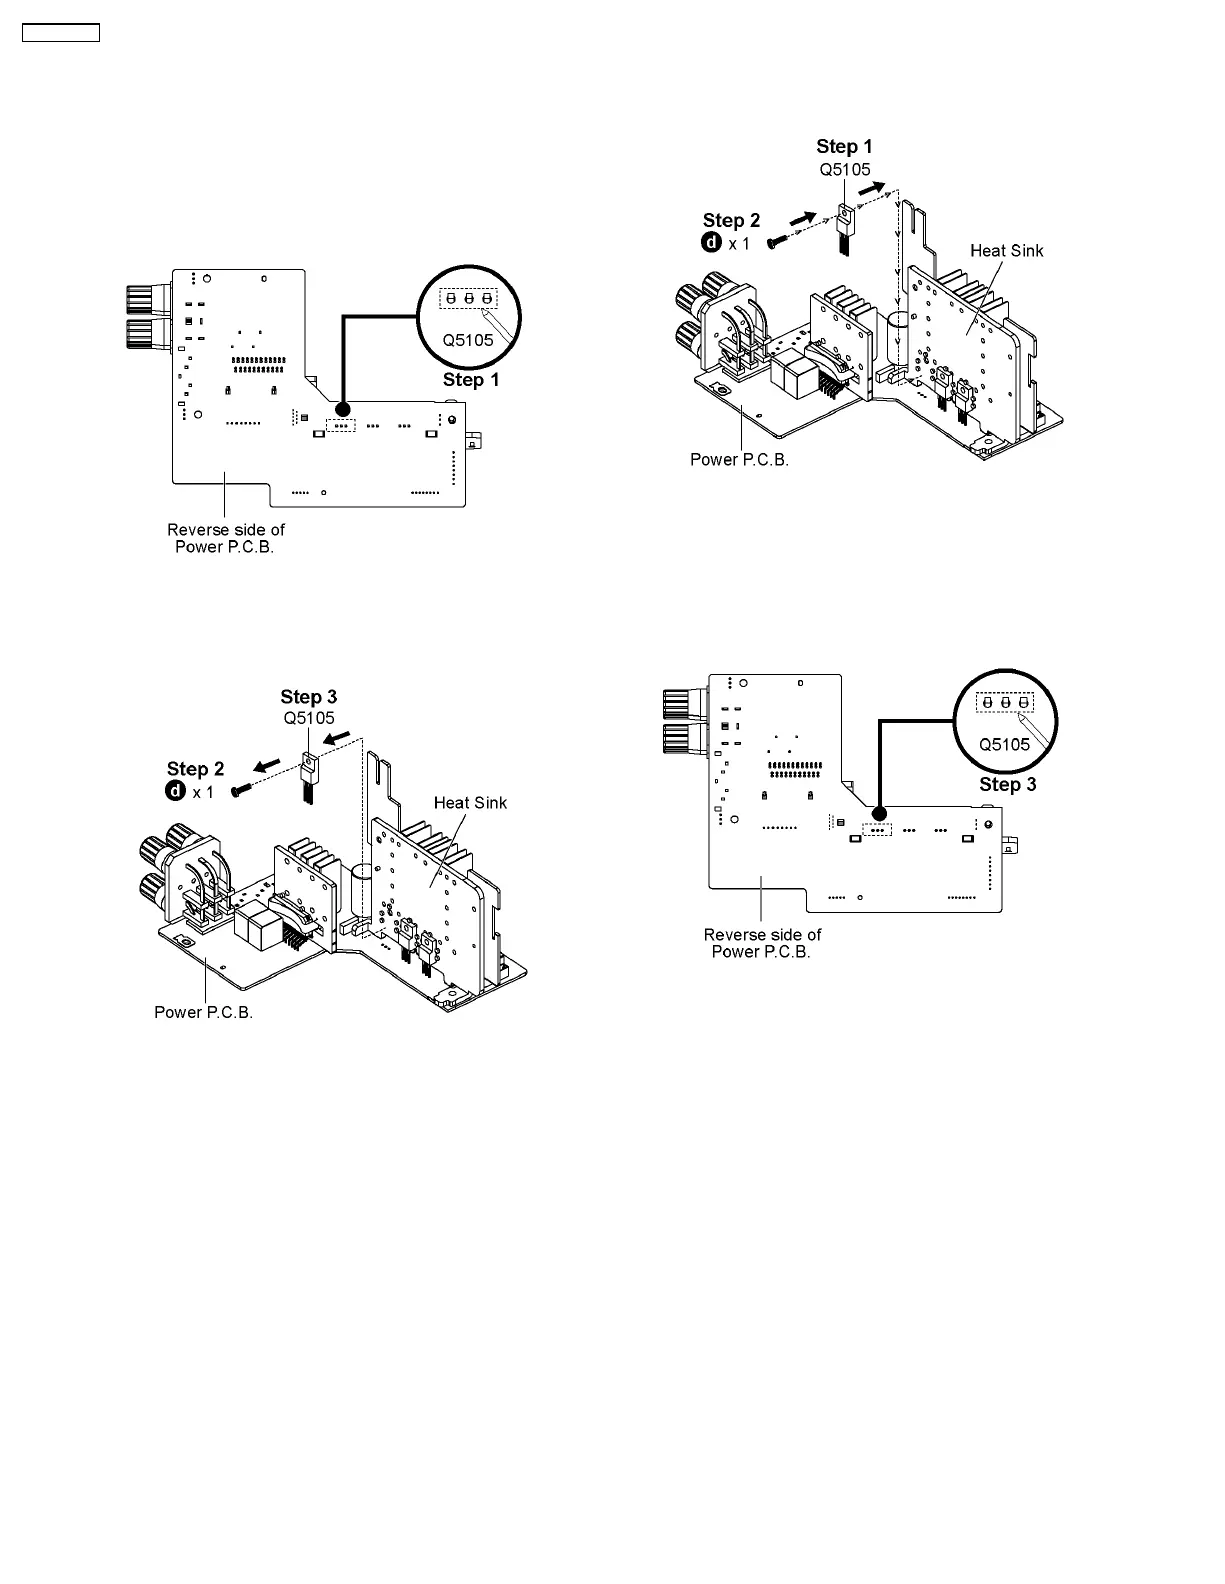
8.17. Replacement of Transistor
(Q5105)
• Follow the (Step 1) - (Step 5) of Item 8.3
• Follow the (Step 1) - (Step 6) of Item 8.9
• Follow the (Step 1) - (Step 7) of Item 8.11
• Follow the (Step 1) - (Step 2) of Item 8.15
Step 1 : Desolder pins of Transistor (Q5105) on reverse side of
Power P.C.B..
Step 2 : Remove 1 screw.
Step 3 : Remove the Transistor (Q5105).
Caution : Avoid touching the Heat Sink during replacement
due to its hight temperature as it may lead to injuries/shock.
8.17.1. Assembly of the Transistor
(Q5105)
Step 1 : Mount the transistor (Q5105) onto the Power P.C.B..
Caution : Ensure all pins are seated properly.
Step 2 : Fix 1 screw to attach the transistor (Q5105) to the Heat
Sink.
Step 3 : Solder the pins of the Transistor (Q5105) on the
reverse side of the Power P.C.B..
Caution : Before soldering, ensure all pins are properly seated
and no ‘floating’ of pins.
32
SA-PMX3GN