Edit-Recording
from
Compact Discs
(continued)
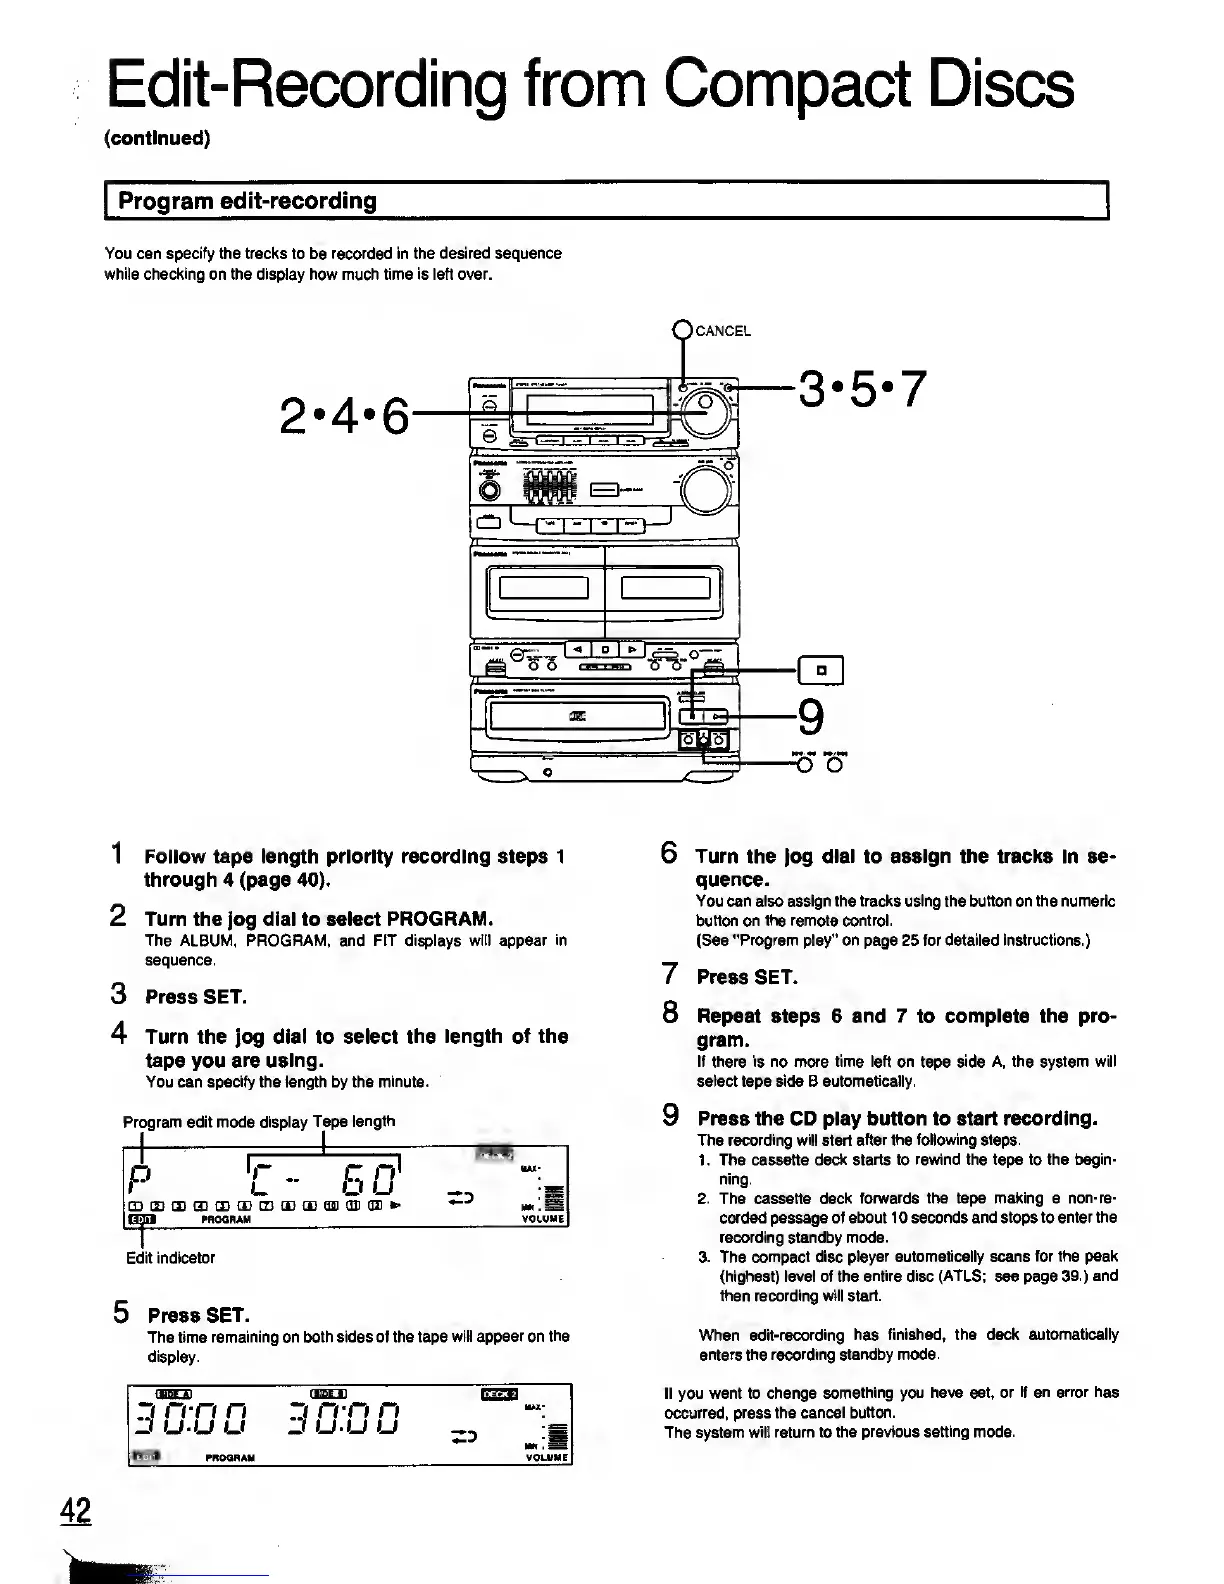
Program
edit-recording
You can
specify the tracks
to be recorded
in the desired sequence
while
checking
on the
display
how much
time is
left over.
42
1 Follow tape length priority recording steps 1
through 4 (page
40).
2 Turn the jog dial to select PROGRAM.
The ALBUM, PROGRAM, and FIT displays will appear in
sequence.
3
Press SET.
4 Turn the jog dial to select the
length of the
tape you
are using.
You can
specify
the length by the
minute.
Pr
ogram edit mode display
Tape
length
r
L.
50
CDCDCDCDODCEtECEtEflEICIllQII*'
PROGRAM
Edit indicator
5 Press SET.
The time
remaining on both sides of the tape
will appear on the
display.
6
Turn
the jog
dial
to
assign
the
tracks
in se-
quence.
You can also assign the tracks using the button on the numeric
button on the remote control.
(See "Program play" on page 25 for detailed instructions.)
7 Press SET.
8 Repeat steps 6
and 7
to
complete the pro-
gram.
If there is no more time left on
tape
side A, the system will
select tape side B
automatically.
9
Press the CD play button to start
recording.
The
recording will start after the following steps.
1 . The cassette
deck starts to rewind the tape to the begin-
ning.
2.
The cassette
deck forwards the tape making a
non-re-
corded passage of about 1 0 seconds
and stops to enter the
recording standby mode.
3.
The
compact disc player automatically scans
for the peak
(highest) level of the
entire disc (ATLS;
see page 39.)
and
then
recording will start.
When
edit-recording has finished, the deck automatically
enters the recording standby mode.
If you want to change
something you have set, or
if an error
has
occurred, press the
cancel button.
The system
will return
to
the previous
setting
mode.
 Loading...