Do you have a question about the Panasonic SC-CH55 and is the answer not in the manual?
Specific safety information for UK models, including mains lead colour coding.
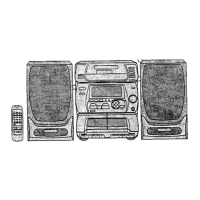
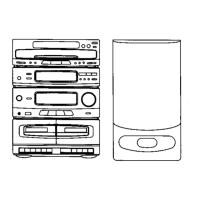
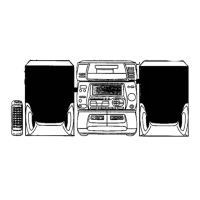
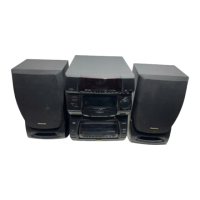
Lists and illustrates all included accessories with the unit.
Instructions for opening the cover and inserting batteries correctly.
Information on the expected duration of battery use.
Important precautions regarding battery installation and handling.
Guidelines for optimal use of the remote control, including range and positioning.
Instructions for installing the FM indoor antenna for best reception.
Guidance on using an outdoor FM antenna if indoor reception is poor.
Instructions for connecting the LW/MW loop antenna for broadcast reception.
Steps to connect external audio sources like a turntable.
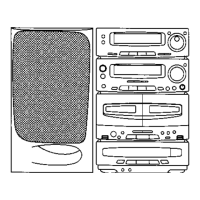
Detailed instructions for connecting speaker cables to the unit.
Final step to connect the power cord after all other connections are made.
Explains the buttons and controls related to the tuner function.
Describes the various information shown on the main display.
Indicator for when the timer is set to turn on.
Indicator that illuminates when the timer recording function is activated.
Indicator for when the timer is set to turn off.
Indicator for when the sleep timer function is active.
Indicator for precise tuning to a broadcast station.
Shows which cassette deck is currently in operation.
Indicates the direction of tape movement.
Indicator for the automatic tape level setting function.
Indicator for the CD edit-recording function.
Indicator for when the unit is in a link condition.
Shows the tape side being recorded during CD edit-recording.
Indicator for program play mode.
Indicator for random play mode.
Indicator for repeat play mode.
Indicates when an FM stereo broadcast is being received.
Shows the track number being played or recorded.
Indicates when the total number of tracks exceeds 13.
Shows the selected reverse mode for tape playback.
Indicator for the Dolby noise reduction system.
Indicator for recording or recording standby mode.
Details the controls and functions of the amplifier section.
Indicator for when the equalizer function is turned off.
Indicator for when a pre-programmed equalization curve is selected.
Indicator for when the user-defined equalization curve is selected.
Indicators showing the currently used equalization curve.
Indicator for when the equalizer function is turned on.
Indicator for when the super bass mode is activated.
Indicator for when the surround effect is activated.
Indicator for when the karaoke mode is activated.
Displays the equalization or spectrum analysis level.
Shows the current volume level.
Indicator for when the muting mode is activated.
Details the controls and functions of the cassette deck section.
Buttons used to skip tracks or search for specific points on a CD.
Button to temporarily stop CD playback.
The part of the unit that opens to accept a CD.
Button to open or close the CD tray.
Jack for connecting headphones.
Jack for connecting a microphone.
Button to stop CD playback.
Button to start CD playback.
Describes common controls also found on the main unit.
Specific controls on the remote for the tuner.
Specific controls on the remote for the CD player.
Specific controls on the remote for the cassette deck.
How to use the muting function to lower volume.
Instructions for connecting and using a microphone.
Instructions for connecting and using headphones.
Step-by-step guide to setting the clock time on the unit.
Steps for playing CDs in their normal track order.
How to pause CD playback.
How to stop CD playback completely.
Instructions for programming a custom track order for CD playback.
Information on how programmed track orders are stored.
Explains the program indicator on the display.
Important notes regarding track programming errors or limitations.
How to stop programmed CD playback.
Steps to cancel the entire programmed sequence.
How to remove individual tracks from a programmed sequence.
Steps to play a specific track directly from the unit.
Steps to play a specific track directly using the remote.
Important notes about direct access play limitations.
How to disable the repeat play function.
How to stop random play.
How to disable the random play function.
Instructions for searching for specific points within a track.
Steps for playing cassette tapes using either deck.
How to set Dolby NR for tape playback.
How to select different tape reverse modes.
Explanation of the automatic tape stopping feature.
Information about the Dolby Noise Reduction system.
Instructions for loading tapes into both decks.
How to select the reverse mode for consecutive playback.
How to set Dolby NR for consecutive tape playback.
How to select the active deck for playback.
How to use the TPS button to fast forward or rewind tape.
Steps to tune into radio stations manually using the jog dial.
Information on changing MW frequency step settings.
How to tune to a station for memory presetting.
How to select a preset channel for storing a station.
How to reduce FM noise by switching to monaural mode.
How to select preset channels using the remote control.
Information on how the unit remembers the last tuned station.
Steps to record audio from a source onto a tape.
How to start recording automatically from a CD.
How to pause recording temporarily.
How to stop the recording process.
Using the beat proof button to reduce unwanted signals during recording.
How to record with equalizer and surround sound effects.
How to record entire albums from CD to tape in original sequence.
Instructions for loading the tape for album edit-recording.
How to set the tape length for album edit-recording.
How to cancel the album edit-recording process.
How to check remaining tape time during edit-recording.
How to arrange tracks for recording when tape length is limited.
How to check track assignments across both sides of the tape.
How to cancel the fit edit-recording process.
How to check the recorded track sequence.
How to specify the order of tracks for program edit-recording.
Steps to finalize the programmed track sequence.
How to cancel the entire program edit-recording.
How to verify the programmed playback order.
How to cancel the link edit-recording process.
Explanation of the automatic tape level adjustment system.
Instructions for copying tapes from deck 1 to deck 2.
How to stop tape-to-tape recording.
How to record onto the remaining tape.
Step-by-step guide to setting the timer for automatic playback.
How to adjust the volume for timer playback.
How to select the CD source for timer play.
Steps to select the tuner source for timer play.
Steps to select the tape source for timer play.
Instructions for setting the timer play function.
Steps to set the timer for automatic recording.
How to cancel the timer recording function.
How to check the set timer recording times.
Instructions for setting the sleep timer.
How to check the remaining time on the sleep timer.
How to operate the sleep timer.
How to cancel the sleep timer.
Combining sleep timer with timer play or recording.
How to select built-in equalization presets.
How to set the equalizer to a flat response.
How to cycle through equalization curves.
Details on the available pre-programmed equalization curves.
How to recall user-saved equalization settings.
Instructions for activating surround sound effects.
How to disable the super bass effect.
How to disable the surround sound effect.
How to turn off the karaoke function.
How to record karaoke accompaniment.
How to cycle through different display modes.
Information on the spectrum analyzer display modes.
How to connect and use external audio sources.
Guidelines on suitable and unsuitable cassette tape types.
How to protect tapes from accidental erasure.
How to handle tape slack to prevent damage.
Recommendations for proper tape storage conditions.
Important precautions for handling compact discs.
Recommendations for storing compact discs.
Instructions for cleaning the tape heads, pinch rollers, and capstan.
Information on demagnetizing tape heads to maintain sound quality.
How to clean the exterior of the unit.
Common issues and their solutions applicable to the entire system.
Troubleshooting specific to FM radio reception.
Troubleshooting specific to MW/LW radio reception.
Troubleshooting issues related to TV interference.
Troubleshooting specific to cassette tape playback.
Troubleshooting specific to CD playback.
Troubleshooting issues with the remote control.
Technical specifications for the amplifier.
Technical specifications for the FM tuner.
Technical specifications for the MW/LW tuner.
Technical specifications for the cassette deck.
Technical specifications for the CD section.
Technical specifications for the speaker system.
General technical specifications like power and dimensions.
| Brand | Panasonic |
|---|---|
| Model | SC-CH55 |
| Category | Stereo System |
| Language | English |