23
TH-42PH11GK / TH-42PH11MK / TH-42PH11MS
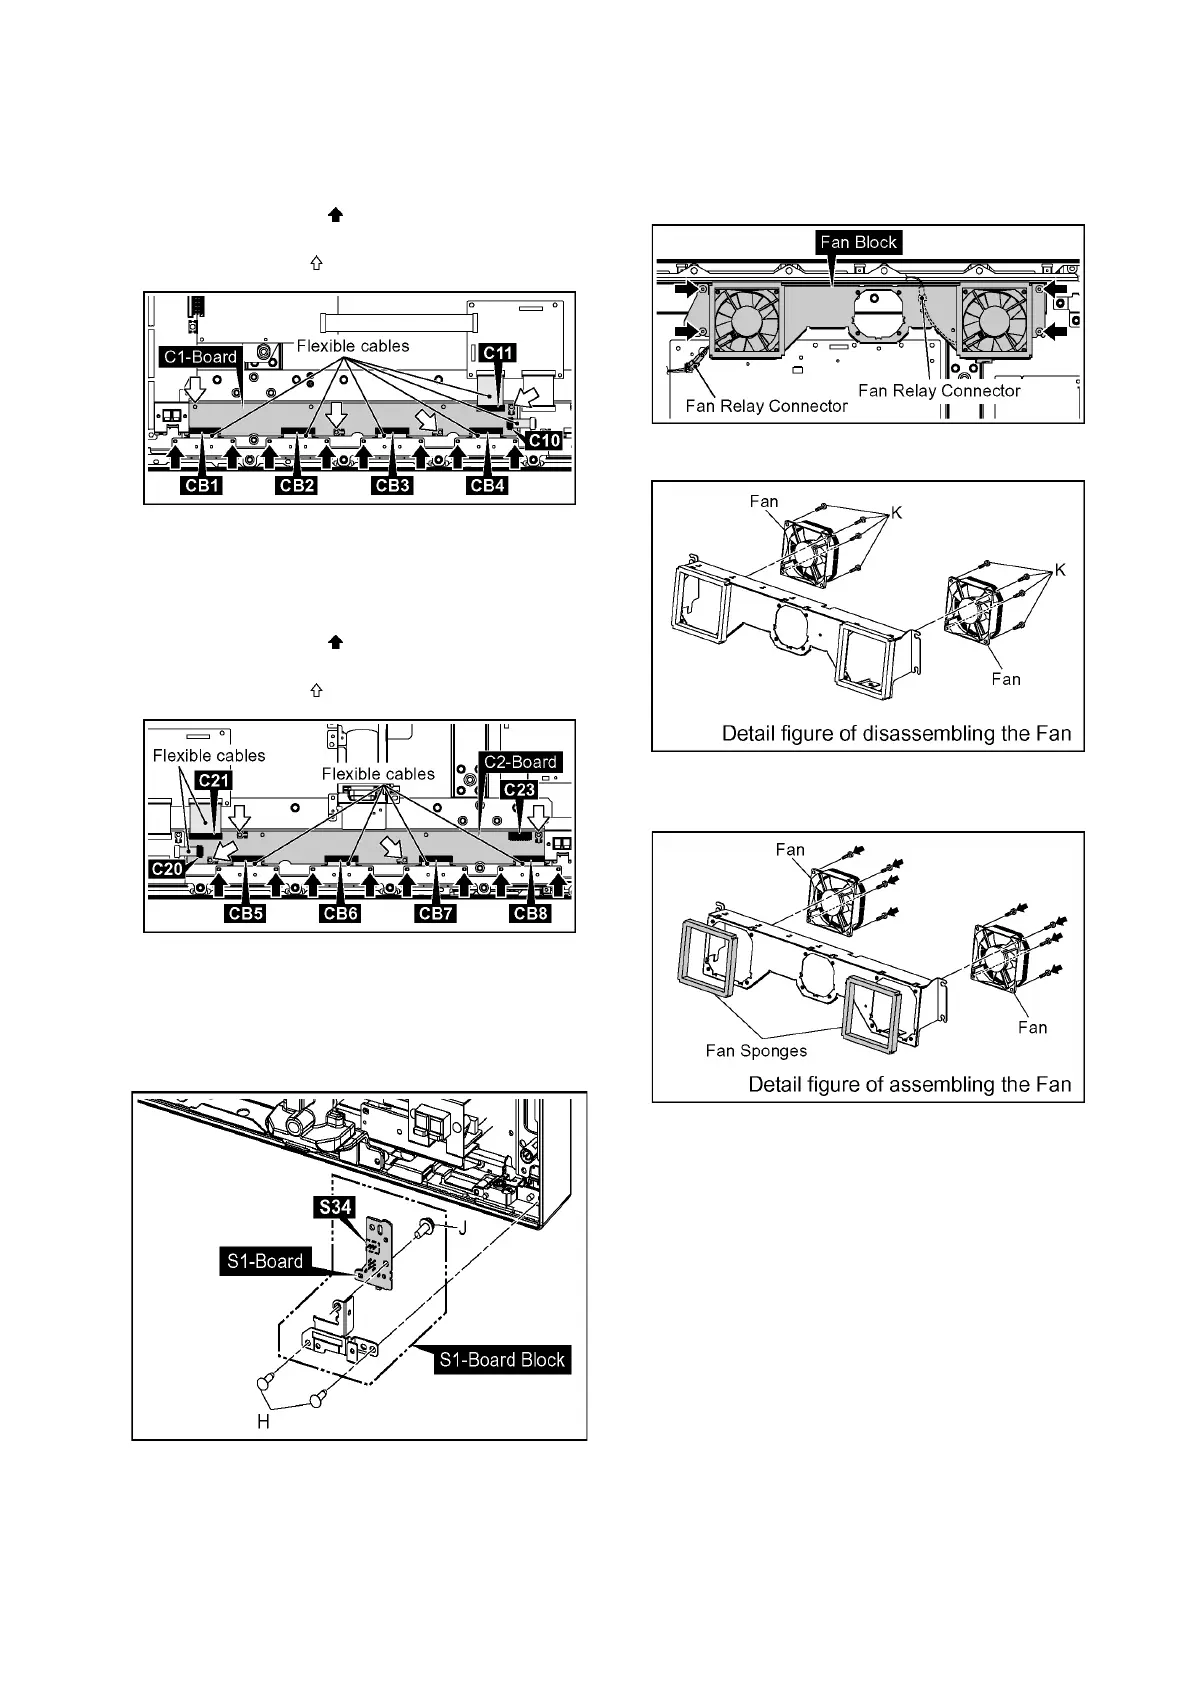
8.13.1. Removal of C1-Board
1. Remove the flexible cables from the connectors (C10,
C11).
2. Remove 8 screws ( ) and then remove the flexible
cables from the connectors (CB1, CB2, CB3, CB4).
3. Remove 4 screws ( ) and then remove C1-Board.
8.13.2. Removal of C2-Board
1. Remove the flexible cables from the connectors (C20,
C21).
2. Disconnect the connector (C23).
3. Remove 8 screws ( ) and then remove the flexible
cables from the connectors (CB5, CB6, CB7, CB8).
4. Remove 4 screws ( ) and then remove C2-Board.
8.14. Removal of S1-Board
1. Remove 2 screws (H) and then remove the S1-Board
Block.
2. Disconnect the connector (S34).
3. Remove 1 screw (J) and then remove S1-Board.
8.15. Removal of Fan
1. Remove 4 screws and then remove the Fan Block.
2. Disconnect the Fan Relay Connectors.
3. Remove 8 screws (K) and then remove the Fans.
4. Reassemble the Fans in reverse order.
5. Stick the Fan Sponges around the Fan.
Note:
The Fan Sponge is not re-usable.
Please use a new one when Fan exchange.
 Loading...