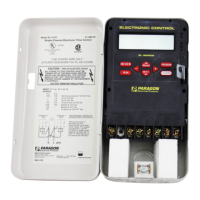
Replacing Switch Box Components
Important When Re
-
placing Components: If
a push-on terminal is
loose, gently squeeze
with pliers. Connections
must be tight!
Replacing Circuit
Board Fuse
The fuse holder is near the bottom of the switch box. Re
-
move fuse by pressing on the fuse holder and turning coun
-
ter-clockwise half a turn.
Replacement fuse: AGC ½ A 250V AC
WARNING:Replacingthefusewithoneofahigheramper
-
age will void your warranty.
Thermocouple Replacement
If your thermocouple needs replacing often, it may be due
to sulphur in the clay you are firing. Sulphur makes the ther
-
mocouple sheath brittle so that if nudged during loading, it
breaks.
TnF II: see next column.
1 UNPLUG kiln.
2 Remove screws on the sides
ofthe switchboxthat holdit
to the kiln, and let switch
box hang by element-to-re-
lay lead wires.
3 To prevent the thermocou-
ple from touching anything
metallic, it is held in place
with a porcelain insulator.
Remove the screw from the
thermocouple fastener,
which holds the porcelain
insulator inplace. Pullther
-
mocouple from its firebrick
hole.
4 Insert the new thermocoupleinto the firebrick holeso
thatitprotrudesintothefiringchamber
1
2
"-
5
8
".Placea
markonthethermocouple1"pasttheoutsidefirebrick
wall surface.
5 Remove the thermocouple. Slide the porcelain insula
-
tor, wide end first, onto the thermocouple as far as it
willgo.Gentlybendthethermocoupleatthemarkwith
your hands. Do not use pliers, or the thermocouple
may kink.
6 Slidethethermocouplebackintothehole.Positionthe
thermocouplefastenersothatitholdstheporcelainin
-
sulator against the heat shield. Install the screw.
7 Position the thermocouple lead wires so they are away
fromthehotsidesofthekilncaseandelectricalwiring.
(Thermocouple wires next to or looped around other
wiresmaycauseerraticcontrollerreadings.)Donotal
-
low the thermocouple, including its spring, to touch
anything metallic, such as a heat shield.
8 Checktoseethatnowiresare touchingthekilncaseor
the element connectors. Wirestouching elementcon
-
nectors or kiln case will burn out. Install switch box.
TnF 2 Thermocouple Replacement
1 UNPLUG. Remove TnF 2 controller faceplate.
2 Removethethermocoupleleads fromconnectors 10&
11(diagrampage22).Pullthethermocouplewirefrom
the box.
3 Threadtheendofthenewthermocoupleleadwireinto
its hole in the TnF 2 box.
4 Connect the new wire to connectors 10 & 11. Fasten
faceplate to the front panel. See “Thermocouple Re
-
placement,” left column, to install the thermocouple
onto the kiln. The thermocouple must not touch any
-
thing metallic.
Controller Board Replacement
1 UNPLUG kiln.
2 Remove the 4 corner screws
holding the controller face-
plate to the switch box.
Carefully lift out faceplate.
3 Disconnect all wires from
the back of the board.
4 Connectthewirestothenew
boardfollowing thediagram
on page 22. Reinstall faceplate.
WARNING! Be careful to attach the wires to the correct
terminals. Reversing wires on the board can burn out
switch box components and the transformer. Damage
from miswiring is not covered by warranty!
Transformer Replacement
1 UNPLUGkiln.Removethescrewsthatholdtheswitch
box to the kiln, and let switch box hang by ele
-
ment-to-relay lead wires. (TnF II: Remove the front
panel from the TnF II.)
2 Remove and transfer one wire at a time from the old
transformer to the new one. Make sure each connec
-
tion is tight.
3 Unbolt transformer from switch box. Examine new
transformertomakesuretheprimaryisproperlywired
foryourkiln’s voltage.(Refer toyourkiln’swiringdia
-
gram.) Make sure push-on connectors do not touch
each other.
4 Boltnewtransformerintoswitchbox.Checktoseethat
wires are not touching kiln case or the element con
-
nectors. Wires touching element connectors or the
kilncase willburn out.Move switchbox intoplace and
reinstall switch box screws.
21

 Loading...


